Building A Development Board For The STM32 G0 Series

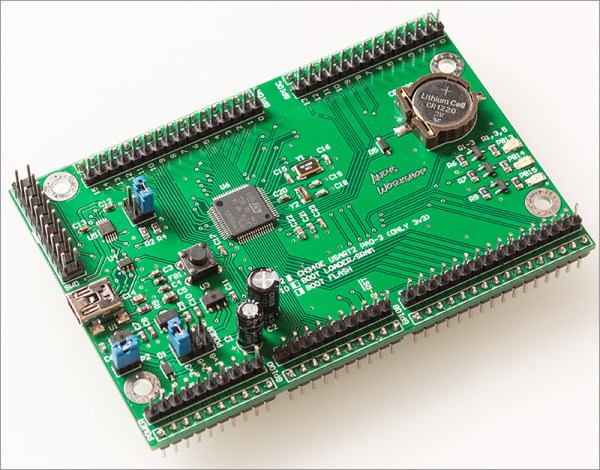
When [Andy Brown] recently tripped over ST’s new G0 series of MCUs, he figured after some research that the best way to learn everything there’s to know about the STM32G0xx by making his own development board based around the STM32G081. The result is a Nucleo-style board, breaking out all pins to convenient 2.54 mm headers, and with a number of niceties, such as an on-board coin cell and 32.768 kHz LSE oscillator for RTC use and three different power supplies (3.3 V, 2.5 V, and 1.8 V) for the MCU.

The board is programmed with an external ST-Link programmer that connects to the SWD interface on the MCU, with a 20-pin programming header provided. While by no means small or compact, it makes for very easy breadboarding and prototyping, with all 2.54 mm headers accessible from the bottom and top.

As for the STM32G0 series itself, the jury is still out on its performance compared to the F0. The former swaps the Cortex-M0 core for an M0+, with a reduced pipeline length (3 stages in the G0) but increased frequency (64 MHz versus 48 MHz). The G0 has a little bit more SRAM, but so far less Flash storage. According to ARM, this MCU range is designed to remove any need to still use an 8-bit MCU. Big claims, indeed.

The biggest issue which [Andy] had while developing this board was probably with the CH340 USB-UART chip. Ordering them from AliExpress as is common, the CH340G ICs he got just wouldn’t work on the first board revision, forcing him to switch to the CH340E and requiring a board respin. This version has an internal oscillator and as a bonus even came in the original tape packaging when it arrived, instead of in a plastic baggy like with the CH340G parts.

See a video of [Andy] going through the design after the break.

Continue reading “Building A Development Board For The STM32 G0 Series”

Hoverboard Circles Bastille Day

According to reports, a turbine-powered flying board buzzed around Bastille Day celebrations carrying its inventor [Franky Zapata] toting a rifle to promote the military applications of the Flyboard Air. You can see the video record, below.

We’ve heard the board costs a cool $250,000 so you may want to start saving now. There are several versions including one that qualifies in the United States as an ultralight. The board Zapata used can reach speeds of 190 km/h and can run for up to 10 minutes, although the website claims 200 km/h is possible and the company also claims to routinely reach 140 km/h. and 6 minute flight times.

Continue reading “Hoverboard Circles Bastille Day”

Getting MIDI Under Control

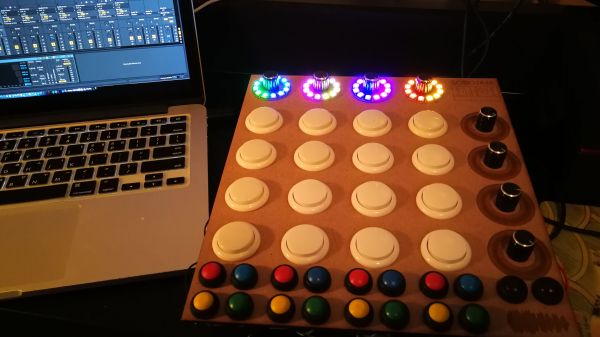
When [Mr. Sobolak] started his DIY Midi Fighter he already had experience with the MIDI protocol, and because it is only natural once you have mastered something to expand on the success and build something more impressive, more useful, and more button-y. He is far from rare in this regard. More buttons mean more than extra mounting holes, for example an Arduino’s I/O will fill up quickly as potentiometers hog precious analog inputs and button arrays take digital ones. Multiplexing came to the rescue, a logic-based way to monitor or control more devices, in contrast to the serial protocols used by an IO expander.

Multiplexing was not in [Mr. Sobolak]’s repertoire, but it was a fitting time to learn and who doesn’t love acquiring a new skill by improving upon a past project? All the buttons were easy enough to mount but keeping the wires tidy was not in the scope of this project, so if you have a weak stomach when it comes to a “bird’s nest” on the underside you may want to look away and think of something neat. Regardless of how well-groomed the wires are, the system works and you can listen to a demo after the break. Perhaps the tangle of copper beneath serves a purpose as it buoys the board up in lieu of an enclosure.

We are looking forward to the exciting new versions where more solutions are exercised, but sometimes, you just have to tackle a problem with the tools you have, like when the code won’t compile with the MIDI and NeoPixel libraries together so he adds an Uno to take care of the LEDs. Is it the most elegant? No. Did it get the job done? Yes, and if you don’t flip over the board, you would not even know.

Continue reading “Getting MIDI Under Control”

Universal music translation network

Hiding Data In Music Might Be The Key To Ditching Coffee Shop WiFi Passwords

In a move guaranteed to send audiophiles recoiling back into their sonically pristine caves, two doctoral students at ETH Zurich have come up with an interesting way to embed information into music. What sounds crazy about this is that they’re hiding data firmly in the audible spectrum from 9.8 kHz to 10 kHz. The question is, does it actually sound crazy? Not to our ears, playback remains surprisingly ok.

You can listen to a clip with and without the data on ETH’s site and see for yourself. As a brief example, here’s twelve seconds of the audio presenting two versions of the same clip. The first riff has no data, and the second riff has the encoded data.

You can probably convince yourself that there’s a difference, but it’s negligible. Even if we use a janky bandpass filter over the 8 kHz -10 kHz range to make the differences stand out, it’s not easy to differentiate what you’re hearing:

After many years of performing live music and dabbling in the recording studio, I’d describe the data-encoded clip as having a tinny feedback or a weird reverb effect. However, you wouldn’t notice this in a track playing on the grocery store’s speaker. Continue reading “Hiding Data In Music Might Be The Key To Ditching Coffee Shop WiFi Passwords”

The Trials And Tribulations Of Building An IOT Garage Door Opener

Garage doors can be frustrating things, being a chore to open manually and all. Many people opt to install a motorized opener, but for some, even this isn’t enough. Hooking up a garage door to the Internet of Things has long been a popular project, and [Simon Ludborzs] decided to give it a shot. Naturally, there were some obstacles to be overcome along the way.

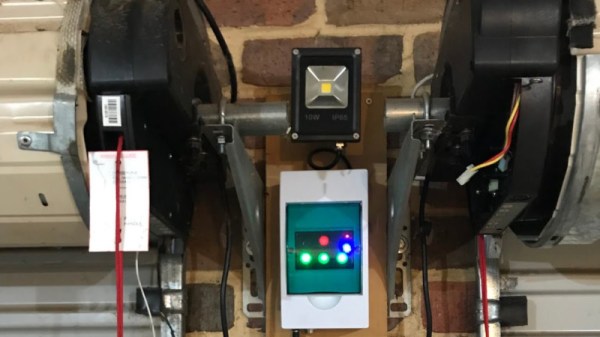
[Simon]’s build is relatively straight down the lines, using an ESP-12 as the brains of the operation, which connects to the internet over WiFi. However, robustness was a major goal of the project, and being reliant on shaky cloud-based services wouldn’t do. This opener is set up to work independently of an internet connection, too. There’s a nifty control panel with glowing buttons to operate the opener, in addition to the webpage served up on the network.

During the development, [Simon] ran into several roadblocks. A set of roller door motors were inadvertently killed, and there were issues in getting the web interface working as expected. None of these were showstoppers, though, and with a little work and some new parts, everything came together in the end. The project was then given a proper commercial-grade case, sourced from AliBaba. This is a great step to take for a project expected to hold up to daily use for years on end. He also took the time to document his tips for easier ESP8266 development, which may prove useful to those just getting started with the platform.

Garage door openers remain a common theme around here, but every project has its own story to tell. If you’ve developed a particularly unique solution to your garage access problems, you know who to call.

Arduboy In A Dreamcast VMU

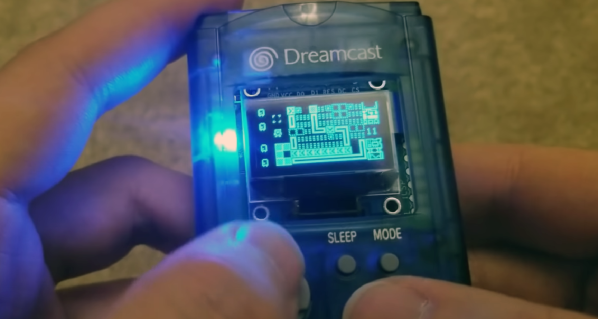
The Arduboy is a tiny, credit-card sized sized video game console that you can build yourself. The Dreamcast VMU was also a tiny, pocketable video game system, but really that’s just where we stored our saves for Crazy Taxi. What do you get when you combine the two? [sjm] did just that, giving us an Arduboy tucked into a Dreamcast VMU.

The guts of the Arduboy is simply an ATMega32u4, the same chip found in many Arduinos, an I2C OLED, and a few other various electronics for USB, power, and battery protection. In short, it’s an easy circuit, and something just about anyone with the skills can build themselves. Since just anyone can get a PCB fabbed, and the Dreamcast already has nice silicone buttons built into the enclosure, it was a simple matter for [sjm] to create a Dreamcast VMU-shaped PCB with all the guts of an Arduboy. The only real difference is the size of the OLED — this one uses a 0.96″ 128×64 OLED, where the original used one with the same resolution but with a significantly larger size.

Yes, we’ve seen this same project before, but now thanks to the magic of the Hackaday Prize, it’s now in the running for the greatest hardware competition on the planet. You can check out the entire build video and a short demo after the break. Of course, this isn’t the first repurposing of the Arduboy circuit, we’ve seen a flex circuit version, and a version with a crank like the Playdate developed by Teenage Engineering and Panic.

Continue reading “Arduboy In A Dreamcast VMU”

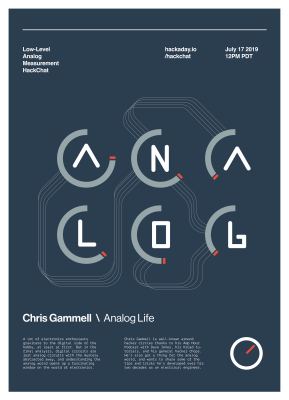
Low-Level Analog Measurement Hack Chat

Join us on Wednesday 17 July 2019 at noon Pacific for the Low-Level Analog Measurement Hack Chat with Chris Gammell!

A lot of electronics enthusiasts gravitate to the digital side of the hobby, at least at first. It’s understandable – an Arduino, a few jumpers, and a bit of code can accomplish a lot. But in the final analysis, digital circuits are just analog circuits with the mystery abstracted away, and understanding the analog side opens up a fascinating window on the world of electronics.

Chris Gammell is well-known around hacker circles thanks to his Amp Hour Podcast with Dave Jones, his KiCad tutorials, and his general hacker chops. He’s also got a thing for the analog world, and wants to share some of the tips and tricks he’s developed over his two decades as an electrical engineer. In the next Hack Chat, we’ll be joining Chris down in the weeds to learn the ins and outs of low-level analog measurements. Join us with your questions and insights, or just come along to peel back some of the mysteries of the analog world.

join-hack-chatOur Hack Chats are live community events in the Hackaday.io Hack Chat group messaging. This week we’ll be sitting down on Wednesday July 17 at 12:00 PM Pacific time. If time zones have got you down, we have a handy time zone converter.

Click that speech bubble to the right, and you’ll be taken directly to the Hack Chat group on Hackaday.io. You don’t have to wait until Wednesday; join whenever you want and you can see what the community is talking about.