It’s often said that “getting there is half the fun”, and we think that can be just as true when building hardware as it is during the roadtrip to your favorite hacker con. Many of us enjoy the process of planning, designing, and building a new gadget as much as playing with it when it’s done. We get the impression [Radomir Dopieralski] feels the same way, as he’s currently working on yet another iteration of his PewPew project.
 For the uninitiated, [Radomir] has already created a number of devices in the PewPew line, which are designed to make programming games on “bare metal” easier and more approachable for newcomers by using CircuitPython.
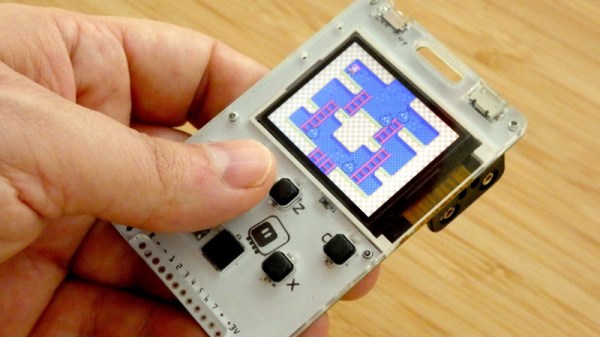
The original version was a shield for the Adafruit Feather, which eventually evolved into a standalone device. The latest version, called the M4, includes many niceties such as a large TFT screen and an acrylic enclosure. It’s also switched over to the iconic Game Boy layout, to really drive home that classic gaming feel.
As [Radomir] explains, previous versions of the PewPew were designed to be as cheap and easy to manufacture as possible, since they were to be used in game programming workshops. But outside of that environment, they left a little something to be desired. With the M4, he’s created something that’s much closer to a traditional game system. In that respect it’s a bit like the Arduboy: you can still use it to learn game development, but it’s also appealing enough that you might just play other people’s games on it instead.