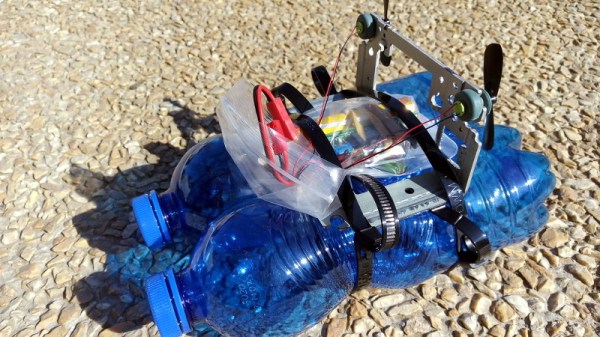
What do you get when you combine an old optical drive, some empty soda bottles, and a microcontroller? Well…nothing, really. That’s still just a pile of rubbish. But if you add in a battery, an RC receiver, and some motors, you’re getting dangerously close to a fun little toy to kick around the pond as [Antonio Rizzo] recently demonstrated.
 A couple of plastic bottles lashed together make up the hull of the boat, and [Antonio] has used the internal frame of an old optical drive bent at a 90 degree angle to hold the two small DC motors. In a particularly nice touch, the drive’s rubber anti-vibration bushings are reused as motor mounts, though he does admit it was just dumb luck that the motors were a perfect fit.
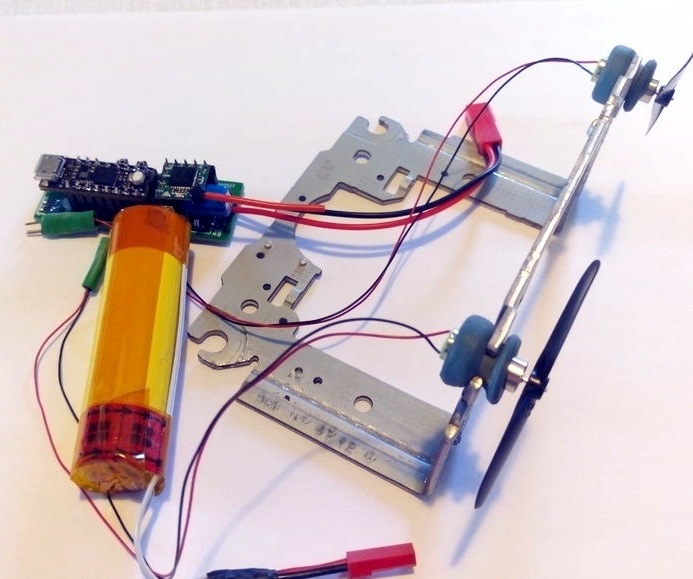
For the electronics, [Antonio] has paired a custom motor controller up with the uChip, a diminutive Arduino-compatible microcontroller in a narrow DIP-16 package. Wireless communication is provided by an off-the-shelf cPPM receiver such as you might see used in a small plane or quadcopter.
The whole build is powered by a common 18650 lithium-ion battery, which could also be easy enough to recover from the trash given how common they are in laptop batteries; though if you threw a new cell into this build we wouldn’t hold it against you. Everything is put into a high-tech plastic sandwich bag to provide minimum of waterproofing with the minimum of effort.
If using a commercial RC receiver and transmitter is a bit too mainstream for your tastes, you could always roll your own radio.