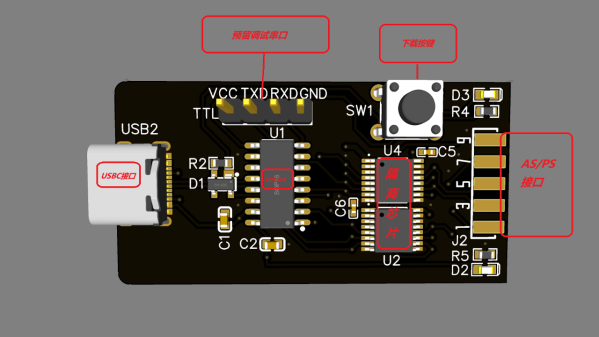
Here’s a CH552G-based USB Blaster project from [nickchen] in case you needed more CH552G in your life, which you absolutely do. It gives you the expected IDC-10 header ready for JTAG, AS, and PS modes. What’s cool, it fits into the plastic shell of a typical USB Blaster, too!
The PCB is flexible enough, and has all the features you’d expect – a fully-featured side-mounted IDC-10 header, two LEDs, a button for CH552 programming mode, and even a UART header inside the case. There’s an option to add level shifter buffers, too – but you don’t have to populate them if you don’t want to do that for whatever reason! The Hackaday.io page outlines all the features you are getting, though you might have to ask your browser to translate from Chinese.
Sadly, there’s no firmware or PCB sources – just schematics, .hex, BOM, and Gerber .zip, so you can’t fix firmware bugs, or add the missing USB-C pulldowns. Nevertheless, it’s a cool project and having the PCB for it is lovely, because you never know when you might want to poke at a FPGA on a short notice. Which is to say, it’s yet another CH552 PCB you ought to put in your PCB fab’s shopping cart! This is not the only CH552G-based programming dongle that we’ve covered – here’s a recent Arduino programmer that does debugWire, and here’s like a dozen more different CH552G boards, programmers and otherwise.
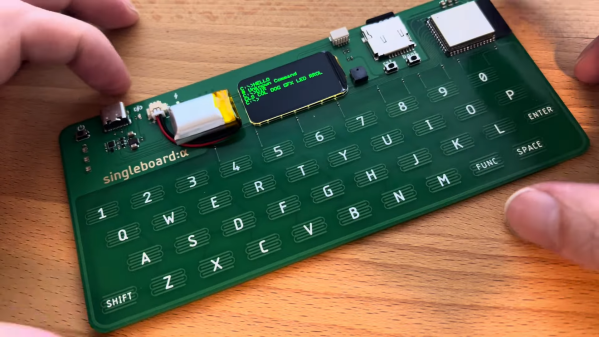
When we think single-board computers, we normally envision things like the Raspberry Pi. But Arduboy creator [Kevin Bates] has recently come up with his own take on the SBC that’s a bit like a modernized take on the early computers of the 1980s. Introducing Singleboard: Alpha.
The build has an incredibly pleasing form factor — it’s a single PCB with a capacitive keyboard etched right into the copper. The brains of the Singleboard is an ESP32, which provides plenty of grunt as well as wireless connectivity. Display is via a small LCD, currently configured with a green-on-black terminal that looks fantastic.
You’re not gonna run a fully-fledged GUI operating system on this thing, but that doesn’t mean it can’t be useful. We could imagine a device like this being a flexible wireless terminal for working with headless systems, for example, and it would be a charming one at that.
Home automation is huge right now in consumer electronics, but despite the wide availability of products on the market, hackers and makers are still spinning up their own solutions. It could be because their situations are unique enough that commercial offerings wouldn’t cut it, or perhaps they know how cheaply many automation tasks can be implemented with today’s microcontrollers. Still others go the DIY route because they’re worried about the privacy implications of pushing such a system into the cloud.
Seeing how many of you were out there brewing bespoke automation setups gave us the idea for this year’s Home Sweet Home Automation contest, which just wrapped up last week. We received more than 80 entries for this one, and the competition was fierce. Judging these contests is always exceptionally difficult, as nearly every entry is a standout accomplishment in its own way.
But the judges forged ahead valiantly, and we now have the top three projects which will be receiving $150 in store credit from the folks at DigiKey.
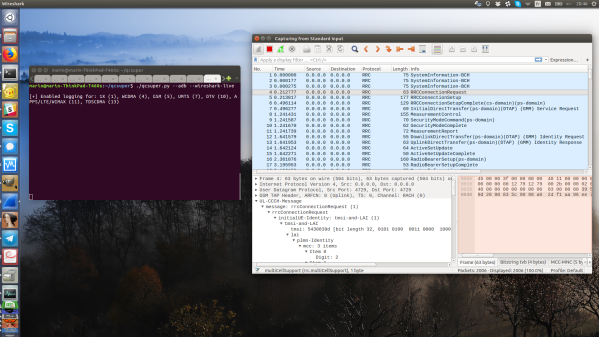
If your thought repurposing DVB-T dongles for generic software defined radio (SDR) use was cool, wait until you see QCSuper, a project that re-purposes phones and modems to capture raw 2G/3G/4G/5G. You have to have a Qualcomm-based device, it has to either run rooted Android or be a USB modem, but once you find one in your drawers, you can get a steady stream of packets straight into your Wireshark window. No more expensive SDR requirement for getting into cellular sniffing – at least, not unless you are debugging some seriously low-level issues.
It appears there’s a Qualcomm specific diagnostic port you can access over USB, that this software can make use of. The 5G capture support is currently situational, but 2G/3G/4G capabilities seem to be pretty stable. And there’s a good few devices in the “successfully tested” list – given the way this software functions, chances are, your device will work! Remember to report whether it does or doesn’t, of course. Also, the project is seriously rich on instructions – whether you’re using Linux or Windows, it appears you won’t be left alone debugging any problems you might encounter.
This is a receive-only project, so, legally, you are most likely allowed to have fun — at least, it would be pretty complicated to detect that you are, unlike with transmit-capable setups. Qualcomm devices have pretty much permeated our lives, with Qualcomm chips nowadays used even in the ever-present SimCom modules, like the modems used in the PinePhone. Wondering what a sniffer could be useful for? Well, for one, if you ever need to debug a 4G base station you’ve just set up, completely legally, of course.
A network-attached storage (NAS) device is a frequent peripheral in home and office networks alike, yet so often these devices come pre-installed with a proprietary OS which does not lend itself to customization. [Codedbearder] had just such a NAS, a Terramaster F2-221, which while it could be persuaded to run a different OS, couldn’t do so without an external USB hard drive. Their solution was elegant, to create a new backplane PCB which took the same space as the original but managed to shoehorn in a small PCI-E solid-state drive.
The backplane rests in a motherboard connector which resembles a PCI-E one but which carries a pair of SATA interfaces. Some investigation reveals it also had a pair of PCI-E lanes though, so after some detective work to identify the pinout there was the chance of using those. A new PCB was designed, cleverly fitting an M.2 SSD exactly in the space between two pieces of chassis, allowing the boot drive to be incorporated without annoying USB drives. The final version of the board looks for all the world as though it was meant to be there from the start, a truly well-done piece of work.
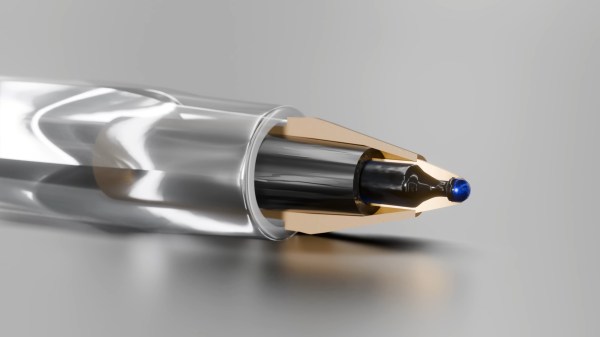
Look around you. Chances are, there’s a BiC Cristal ballpoint pen among your odds and ends. Since 1950, it has far outsold the Rubik’s Cube and even the iPhone, and yet, it’s one of the most unsung and overlooked pieces of technology ever invented. And weirdly, it hasn’t had the honor of trademark erosion like Xerox or Kleenex. When you ‘flick a Bic’, you’re using a lighter.
It’s probably hard to imagine writing with a feather and a bottle of ink, but that’s what writing was limited to for hundreds of years. When fountain pens first came along, they were revolutionary, albeit expensive and leaky. In 1900, the world literacy rate stood around 20%, and exorbitantly-priced, unreliable utensils weren’t helping.
In 1888, American inventor John Loud created the first ballpoint pen. It worked well on leather and wood and the like, but absolutely shredded paper, making it almost useless.
One problem was that while the ball worked better than a nib, it had to be an absolutely perfect fit, or ink would either get stuck or leak out everywhere. Then along came László Bíró, who turned instead to the ink to solve the problems of the ballpoint.
One of the most basic tools for tinkering with electronics is a multimeter. Today, even a cheap meter has capabilities that would have been either very expensive or unobtainable back in the 1970s. Still, even then, a meter was the most affordable way to do various tasks around the shop. Is this cable open? Are these two wires shorted? What’s the value of this resistor? Is the circuit getting power? Is the line voltage dropping? You can answer all those questions — and many more — with a basic meter. But there’s one thing that hasn’t changed much over the years: probes. That’s a shame because there are a lot of useful options.
The probes that came with your meter probably have much in common with the probes a 1970-era meter had. Yeah, the banana plugs probably have a little plastic cover, and the plastic itself might be a little different. Parts are small these days, so the tips might be a little finer than older probes. But if you sent your probes back in time, few people would notice them.
The Blinders Syndrome
One problem is that those probes are usually good enough. We’ve all clipped an alligator clip to a test probe. I’ve even fashioned super pointy probes out of syringes. Years ago, I bought an expensive kit with many attachments I rarely use, like little hooks and spade lugs. Then, I happened to go down the wrong aisle at Harbor Freight.
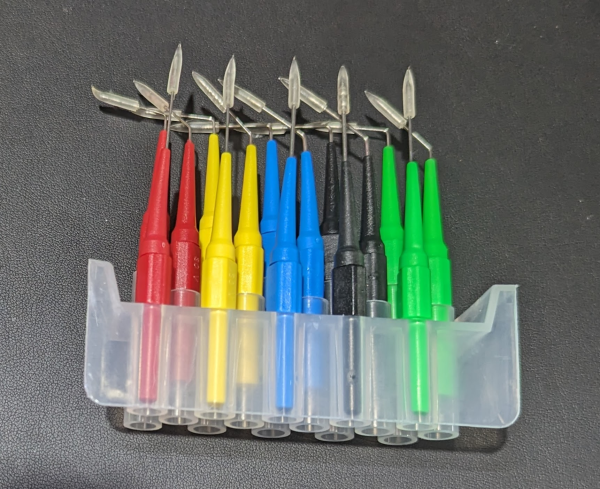
Back probes ready for action.
In the automotive section, I noticed a tidy plastic box labeled “22 pc. back probe kit.” I’d never heard the term “back probe,” but it was clearly some sort of wire. It turns out the kit has a bunch of very fine needles on banana jacks and some patch cables to connect them to your meter.
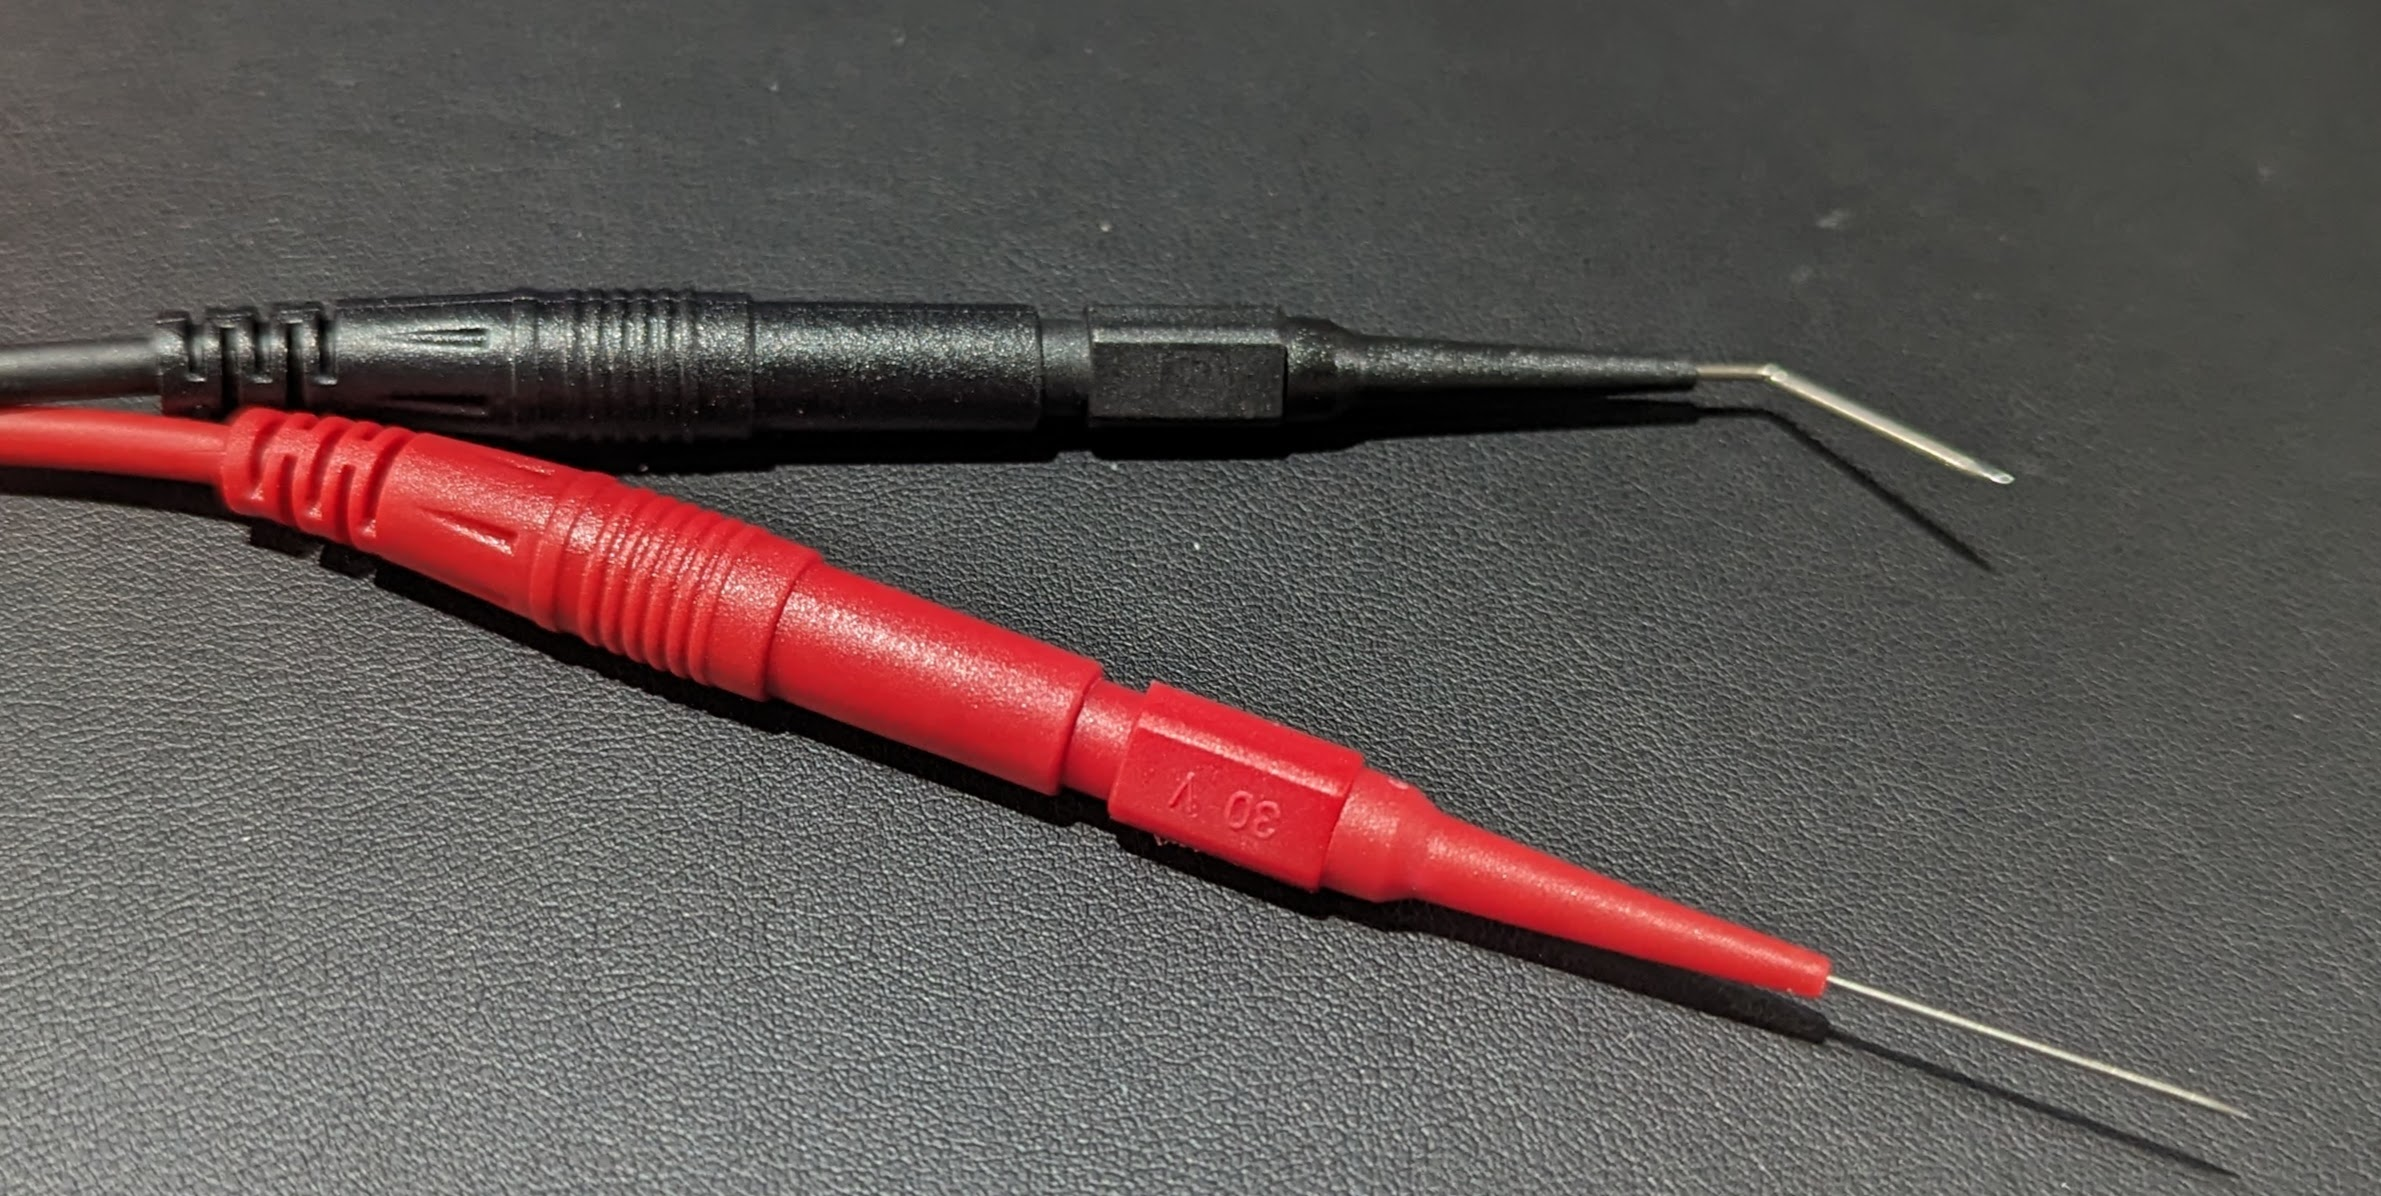
They are “back probes” because you can jam them in the back of connectors next to the wire. There are five colors of needles, and each color set has three items: a straight needle, a bent needle, and a 90-degree bend needle.
I’d never heard of this, and that started me down the rabbit hole of looking at what other exotic probes were out there. If you search the usual sources for “back probe,” you’ll see plenty of variations. There are also tons of inexpensive probe kits with many useful tips for different situations. Like everything, the price was much lower than I had paid for the rarely used kit I bought years ago. The only thing I really use out of that kit are the test hook clips and you can buy those now for a few bucks that just push over your probes.
Choices
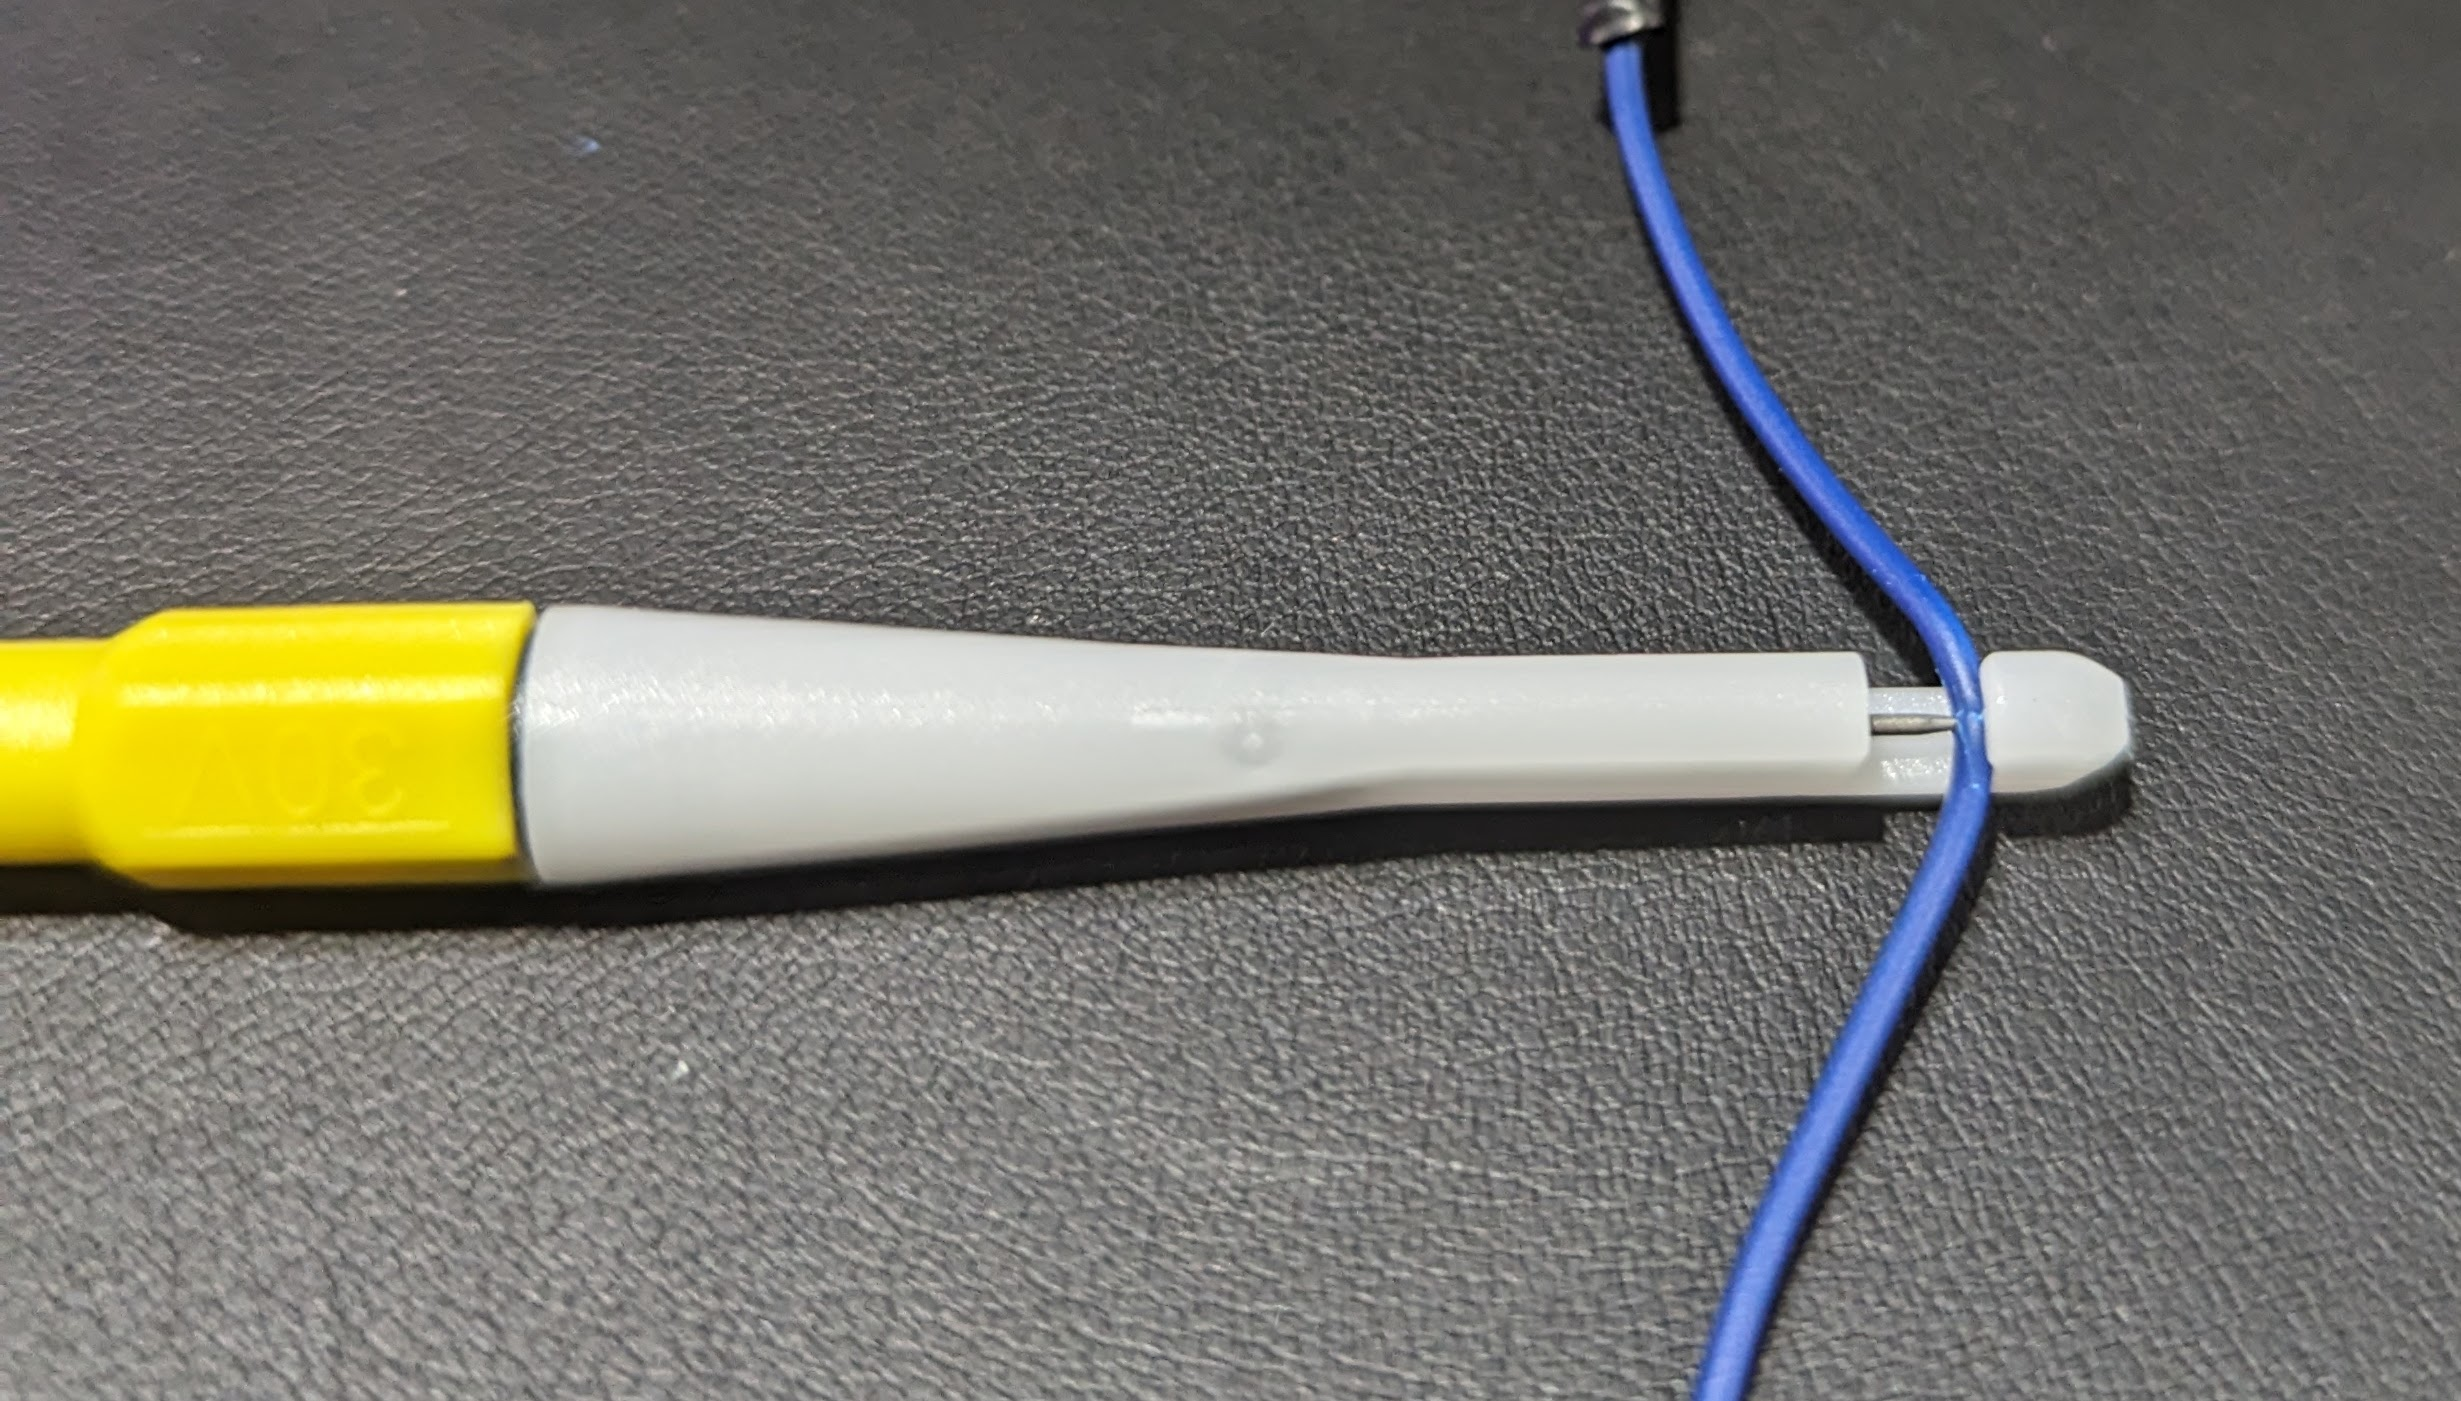
Wire-piercing probe works best for larger wires.
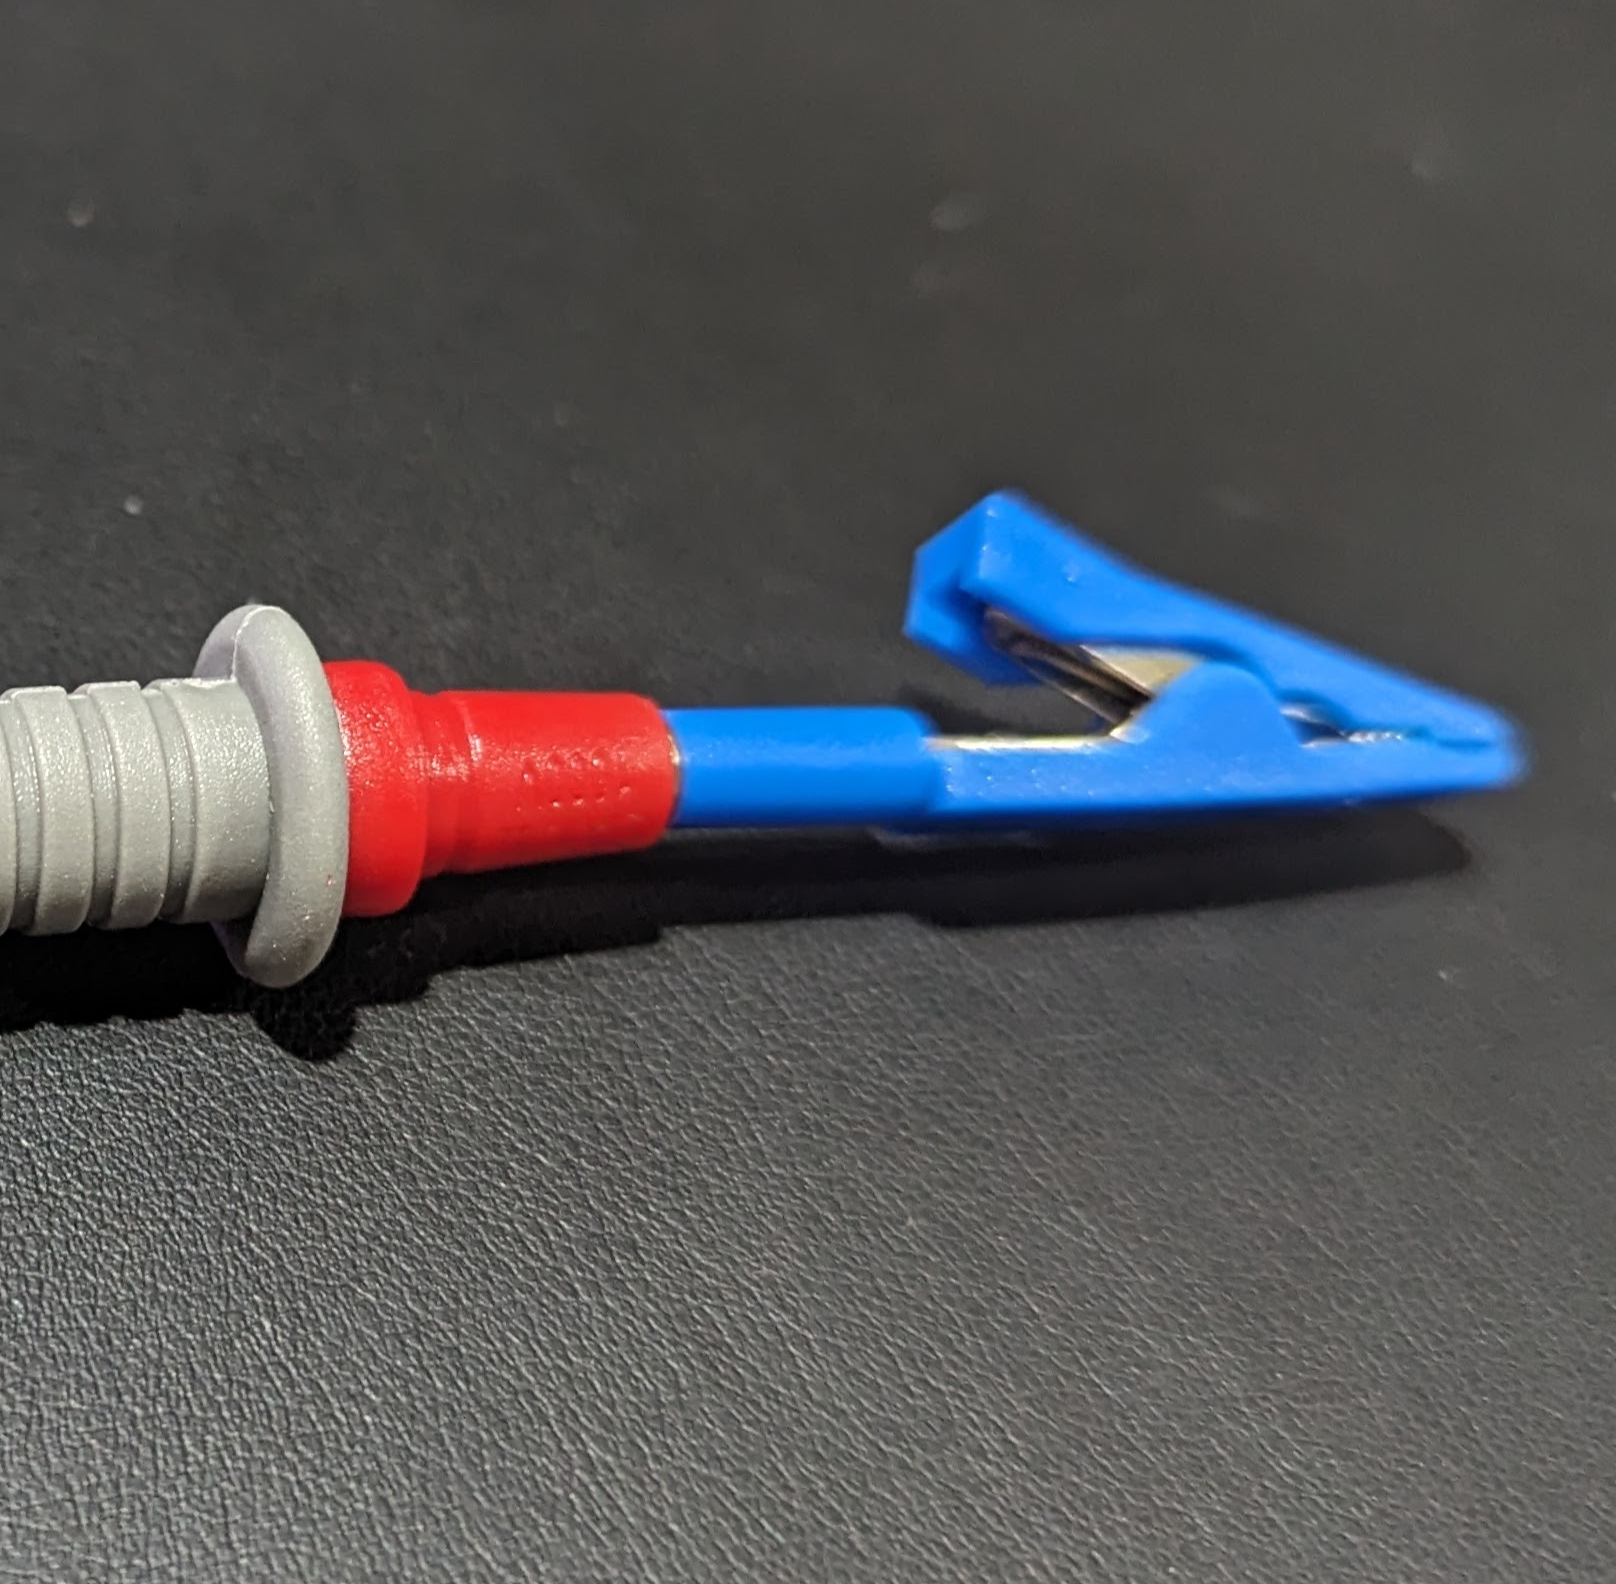
You could probably use the needles to stick through insulation, too. But if that’s your goal, they make piercing clip test probes specifically for that purpose. A little plastic holder has a hook for your wire and a needle that threads in to penetrate the wire.
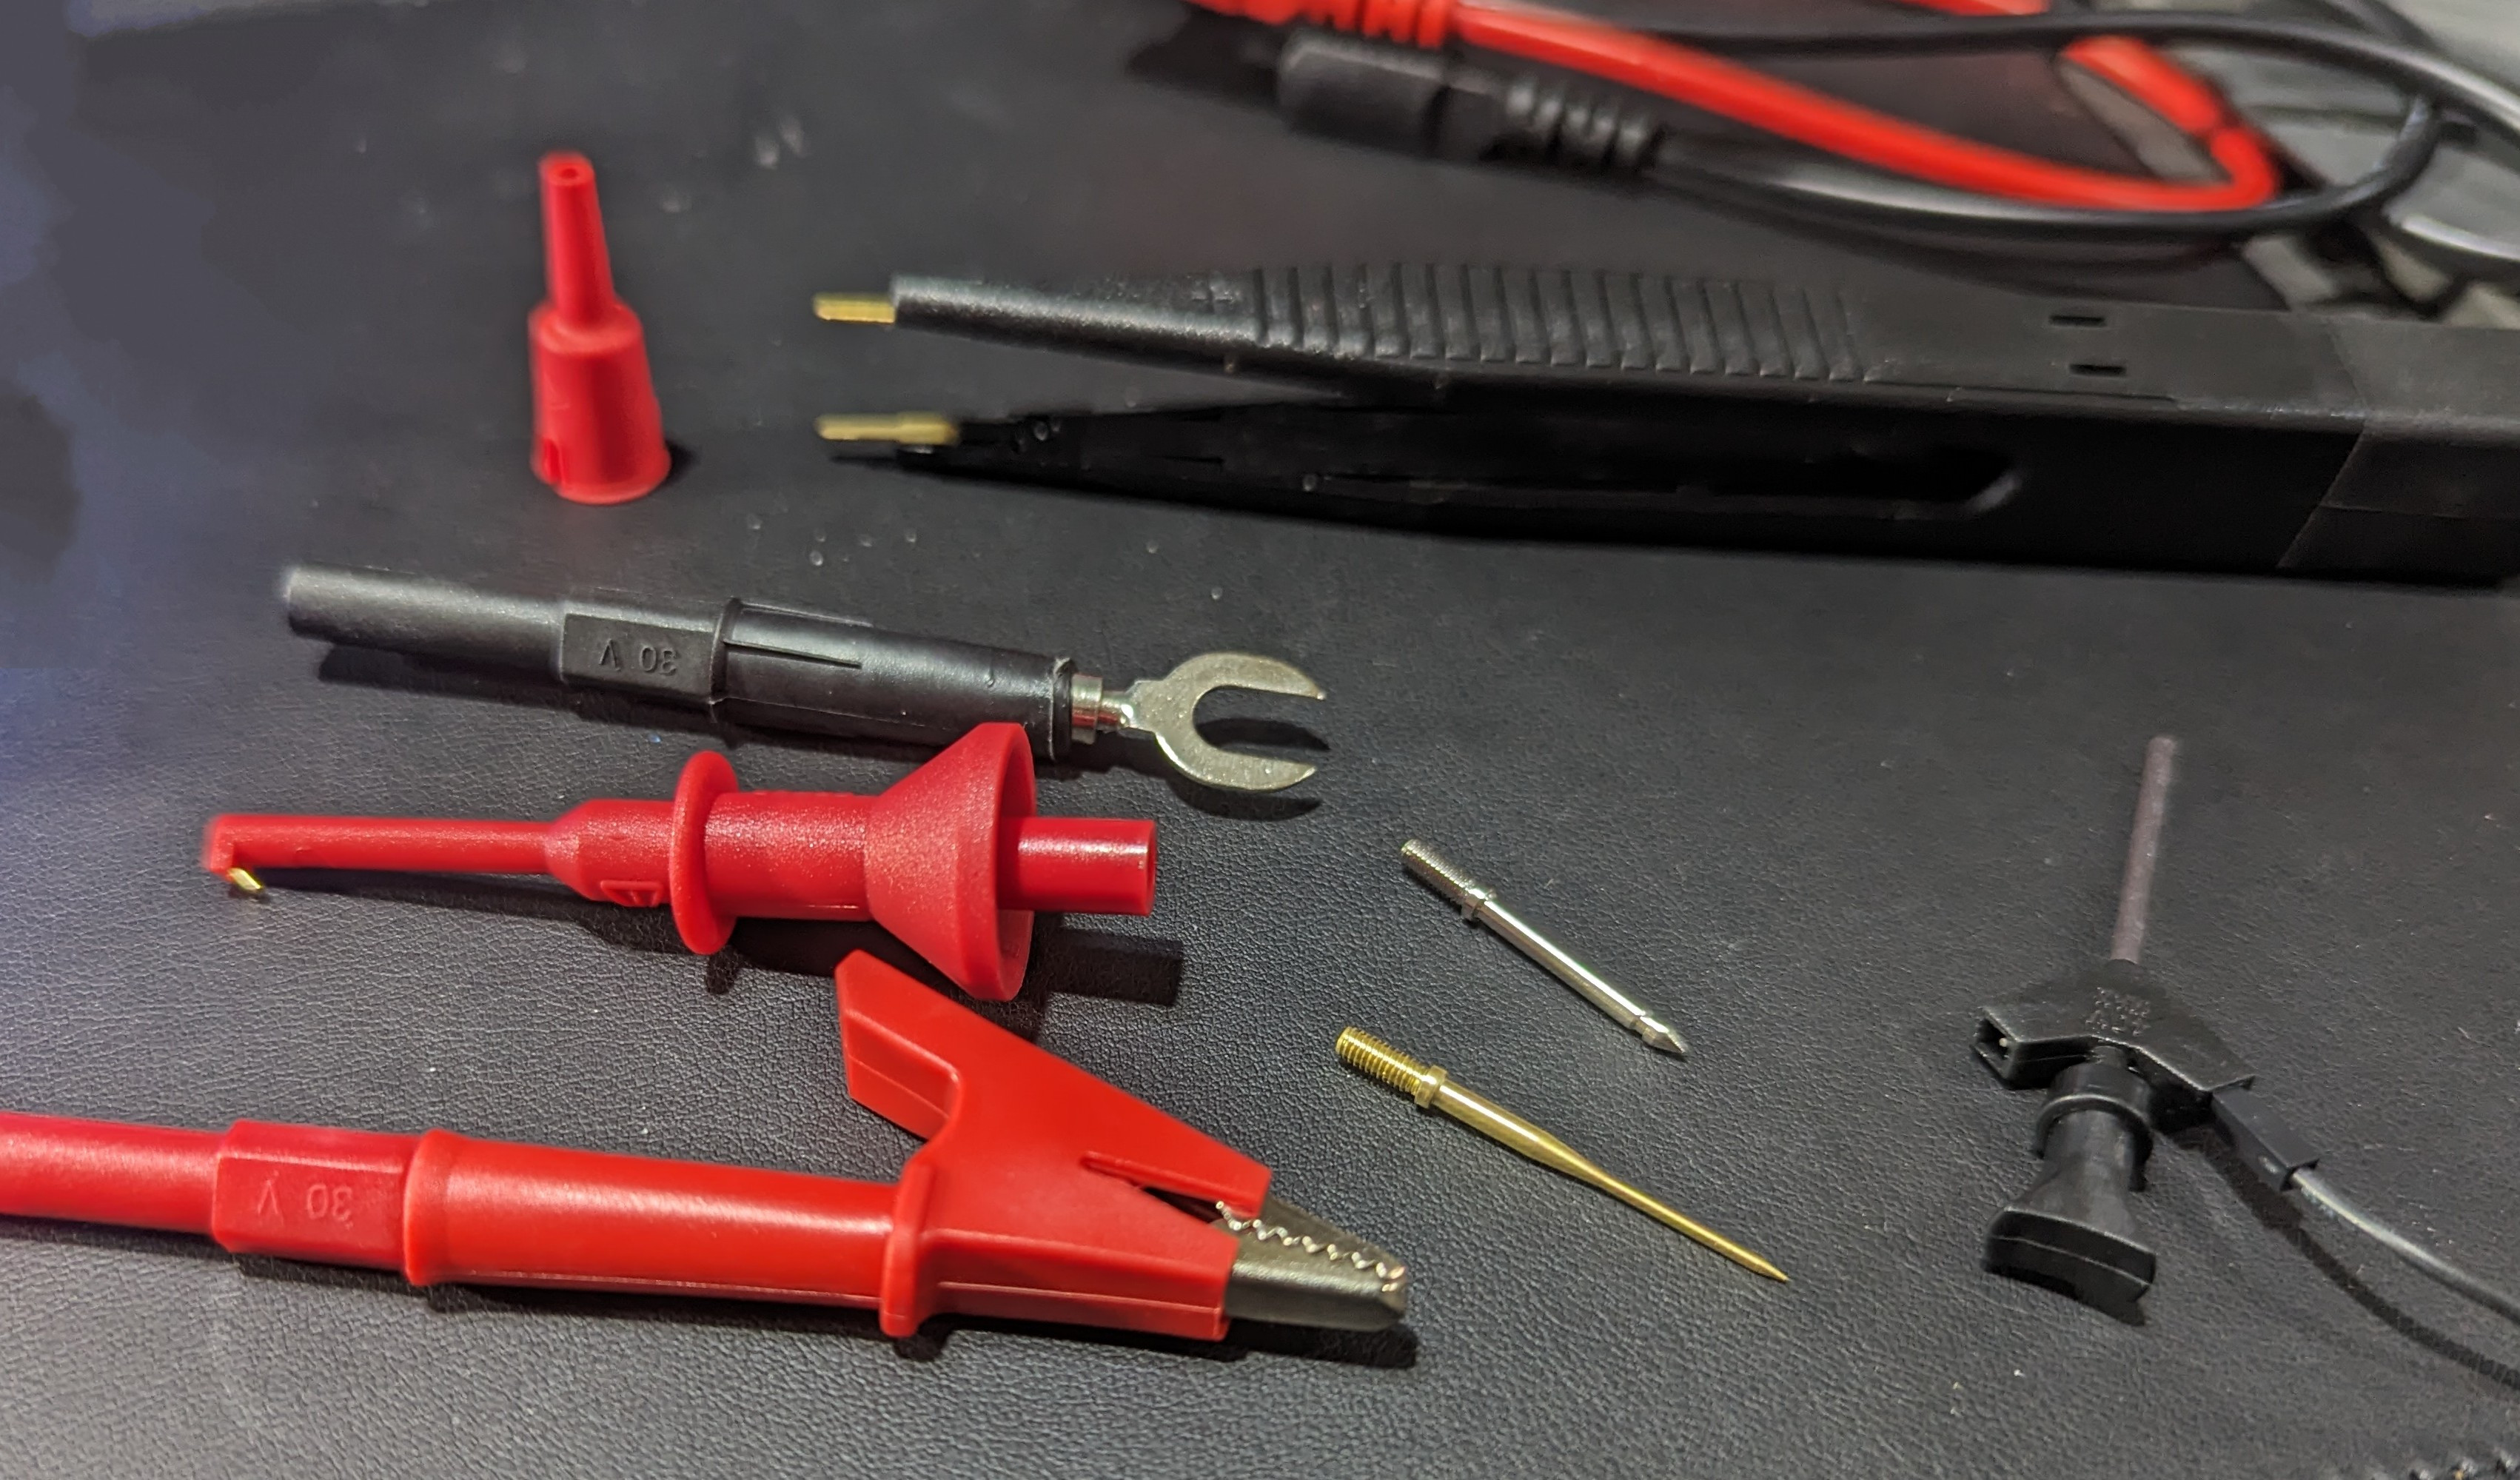
These alligator clips fit over most probes.
I also picked up some little alligator clips that slide over standard 2mm probe tips. These are very handy and prevent you from having to clip a lead to your probe so you can clip the other end to the circuit. However, if you look for a “test lead kit,” you’ll find many options for about $20. One kit had interchangeable probe tips, alligator clips, spades, SMD tweezers, and tiny hooks for IC legs. The alligator clips on the one I bought are the newer style that has a solid insulating body — not the cheap rubbery covers. They feel better and are easier to handle, too.
Breadboarding
Some of the accessories in the test probe kit.
Of course, you can make your own solderless breadboard jumpers, and you’ve probably seen that you can buy jumpers of various kinds. But if you search, you can even find test probes with breadboard wire ends. The other end will terminate in a test hook or alligator clips. You can also get them with banana plugs on the end to plug right into your meter. You can usually find versions with the male pin for a breadboard or a female receptacle for connecting to pins.