A Betavoltaic cell is a device that uses a radioactive source of beta particles and a semiconductor p-n junction to generate electricity. Tritium, an isotope of hydrogen, is often used as the radioactive element. You may think that tritium is hard to obtain or even forbidden, however, recently you can find tritium in self-lightning key chains, and it is also used in watches and firearm night sights. The beta particles (electrons) from the tritium radioactive process causes phosphors in the device to glow, giving a light that can last for years.
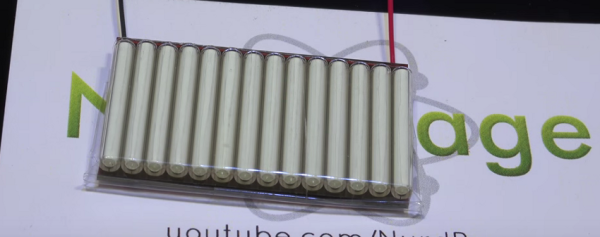
[NurdRage] has just created a nuclear battery using tritium vials from key chains. After getting rid of the plastic containers, he sandwiches the vials between two small solar panels. That’s all! Instant power for the next 15 years. Of course, the amount of power you can get from this device is on the order of microwatts. The battery produces around 1.6 volts at 800 nano amps. He gets 1.23 microwatts, not much, but it is in fact more than the output of commercial units at 0.84 microwatts, for a ten percent of the cost. That minuscule amount of power is actually not easy to measure, and he does a great job explaining the circuit he used to measure the current.