Maker Faire NY: Chipsetter, The Pick And Place For Your Production

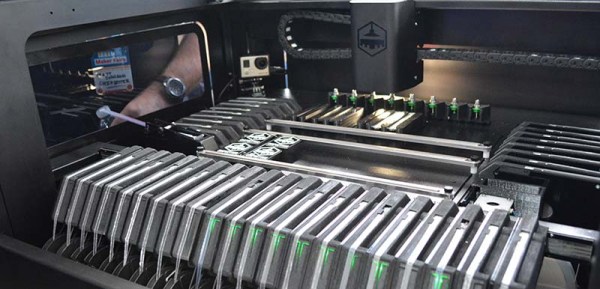
This weekend at Maker Faire, Chipsetter showed off their pick and place machine. It is, in my opinion, the first pick and place machine designed for hackerspaces, design labs, engineering departments, and prototypers in mind. It’s not designed to do everything, but it is designed to everything these places would need, and is much more affordable than the standard, low-end Chinese pick and place machine.

Inexpensive and DIY pick and place machines are familiar territory for us. A few years ago, we saw the Carbide Labs pick and place machine, a machine that allows you to put a board anywhere, pull chips out of tape, and place them on pasted pads. The Retro Populator is a pick and place machine that retrofits onto a 3d printer. The Firepick Delta, another Hackaday Prize project, takes a mini-factory to its logical conclusion and is capable of 3D printing, populating boards, dispensing paste, and creating its own circuit boards. All of these machines have one peculiarity: they are entirely unlike normal, standard, industrial pick and place machines.

The Chipmaker feeder. Production versions of this feeder will be injection-molded plastic. This one is SLA nylon.

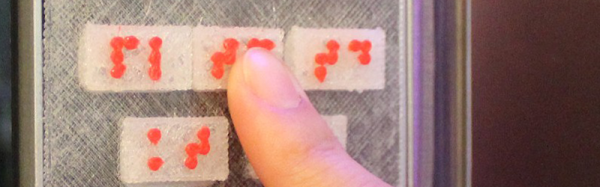
The idea of any startup is to build a minimum product, and the idea behind Chipsetter is to build a minimally viable tool. For their market, that means being able to place 0402 components (although it can do 0201, the team says the reliability of very small packages isn’t up to their standards), it means being able to shoot 1250 components per hour, and it must have inexpensive feeders to accept standard tape.

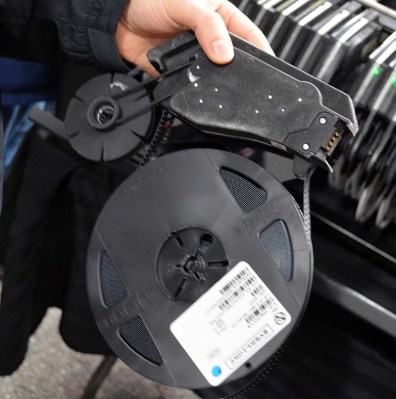
This is a complete departure from the spec sheet of a machine from Manncorp. For the ‘professional’ machines, a single feeder can cost hundreds of dollars. According to Chipsetter founder Alan Sawula, the feeders for this machine will hopefully, eventually cost about $50. That’s almost cheap enough to keep your parts on the feeder. A pro machine can handle 01005 components, but 0402 is good enough for most projects and products.

This is the closest I’ve seen to a pick and place machine designed to bridge the gap between contract manufacturers and hackerspaces. Most of the audience of Hackaday – at least as far as we’re aware – doesn’t have the funds to outsource all their manufacturing to a contract manufacturer. Most of the audience of Hackaday, though, or any hackerspace, could conceivably buy a Chipsetter. The Chipsetter isn’t designed to be the best, but when it comes to placing parts on paste, the best is overkill by a large margin.

The Chipsetter has a Kickstarter going right now. They’re about halfway funded, with a little more than three weeks to go. Right now, if you’re looking at pick and place machines, I’d highly suggest checking out the Chipsetter. It works, and with forty feeders it’s cheaper and more capable than the lowest priced ‘pro’ machines.


Oculus Pi

[WayneKeenan] wrote a proof-of-concept virtual reality system that used a Raspberry Pi and an Oculus Rift. It was about a thousand lines of Python and with a battery pack it was even portable. The problem was that the Pi was struggling to create the 3D views.

[Wayne] recently revisited the demo and found that just about everything has gotten better: the Pi 3 is faster, and the Python libraries have become better. He spent some time building a library — VR Zero — and then recreated the original demo in 80 more lines of Python. You can see a video, below.

Continue reading “Oculus Pi”

Portable Lightweight Foundry

[Makercise] is getting ready for Maker Faire. One of the things he’d really like to do is some casting demonstrations. However, he has no desire to take his expensive and heavy electric kiln based foundry to Maker Faire. So, he made his own.

He got into metal casting during his excellent work on his Gingery lathe series. He started off by modeling his plan in Fusion 360. He’d use a 16qt cook pot turned upside down as the body for his foundry. The top would be lined with ceramic fiber insulation and the lid made out of foundry cement. He uses a Reil style burner, which he also modeled as an exercise. This design is light and even better, allows him to lift the top of foundry off, leaving the crucible completely exposed for easy removal.

All went well with the first iteration. He moved the handles from the top to the bottom of the pot and filled it with insulation. He built legs for the lid and made a nice refractory cement bowl on the bottom. However, when he fired it up the bowl completely cracked along with his crucible. The bowl from design flaw, the crucible from age.

A bit put off, but determined to continue, he moved forward in a different direction. The ceramic insulation was doing so well for the top of the foundry that he decided to get rid of the cement altogether and line the bottom with it as well. The lid, however, would be pretty bad for this, so he purchased another pot and cut the top portion of it off, giving him a steel bowl that matched the top.

The foundry fires up and has worked well through multiple pours. He made some interesting objects to hopefully sell at Makerfaire and to test the demonstrations he has planned. The final foundry weighs in at a mere 15lbs not including the fuel cylinder, which is pretty dang light. Video after the break.

Continue reading “Portable Lightweight Foundry”

Riding Rollercoasters With 3D Printed Kidneys, Passing Stones

Citizen science isn’t limited to the nerd community. When medical professionals get a crazy idea, their options include filling out endless paperwork for human consent forms and grant applications, or hacking something together themselves. When [David Wartinger] noticed that far too many of his patients passed kidney stones while on vacation, riding rollercoasters, he had to test it out.

Without the benefit of his own kidney stones, he did the next best thing: 3D printed a model kidney, collected some urine, and tossed a few stones that he’d collected from patients into the trap. Then he and a colleague rode Big Thunder Mountain Railroad sixty times, holding the model in a backpack at kidney height.

Continue reading “Riding Rollercoasters With 3D Printed Kidneys, Passing Stones”

Tiny Pipe Organ Needs Tiny Church

There are a lot of unusual listings on eBay. If you’re wondering why someone would have a need for shredded cash, or a switchblade comb, or some “unicorn meat” (whatever that is), we’re honestly wondering the same thing. Sometimes, though, a listing that most people would consider bizarre finds its way to the workbench of someone with a little imagination. That was the case when [tinkartank] found three pipe organ pipes on eBay, bought them, and then built his own drivers.

The pipes have pitches of C, D, and F# (which make, as far we can tell, a C add9 flat5 no3 chord). [tinkartank] started by firing up the CNC machine and creating an enclosure to mount the pipes to. He added a church-like embellishment to the front window, and then started working on the controls for the pipes. Each pipe has its own fan, each salvaged from a hot air gun. The three are controlled with an Arduino. [tinkartank] notes that the fan noise is audible over the pipes, but there does seem to be an adequate amount of air going to each pipe.

This project is a good start towards a fully functional organ, provided [tinkartank] gets lucky enough to find the rest of the pipes from the organ. He’s already dreaming about building a full-sized organ of sorts, but in the meantime it might be interesting to use his existing pipes to build something from Myst.

When LEGO Flies

Building your own drone is a common enough pursuit among Hackaday readers. There are quite a few LEGO enthusiasts around, too. A company named Flybrix wants to marry those two pursuits and is offering a kit that allows you to build your drone out of LEGO bricks.

The company isn’t affiliated with LEGO. The kits look like they have some pretty common motors and control hardware. There are a few custom pieces, but the real key appears to be a LEGO compatible mount for the motors. You can see a video about the kit, below.

Continue reading “When LEGO Flies”

Hackaday Prize Entry: Crowdsourced Tactile Interfaces

Your microwave, your TV, and almost the entire inventory of Best Buy have one thing in common: they all uses membrane switches for user interaction, and that means these devices are inaccessible for the blind. This project for the Hackaday Prize is going to change that by building a crowdsourced effort to design Braille keypads for thousands of appliances.

There are two aspects of this project that are exceptionally interesting, the least of which is how to make Braille keypads for a microwave. This is done with a 3D printer using a flexible or semi-flexible filament. These keypads are designed to overlay the membrane keypad on consumer electronic devices, and the initial testing reveals these keypads are robust and useful enough for blind users.

A 3D printed overlay for a microwave is simple, though. The big question is how these overlays are designed. For this, the project suggests a crowdsourced effort of hundreds of designers turning photographs of keypads into Braille overlays. The process begins with a few pictures of a keypad with a reference object – for example, a dollar bill. These photographs are scaled to the correct dimensions, a few outlines are made, and the buttons with Braille text are designed. It’s a brilliant use of people who have just enough experience in Photoshop to be useful, and since this is a crowdsourced effort, work isn’t duplicated. The keypad overlays for one specific make and model of microwave can be printed over and over again, bootstrapping an effort to make membrane keypads useful for all blind people.