Spooky Noise Box Has Post-Halloween Potential

There’s more than one way to scare people on Halloween. Sure, there’s always the low-brow jump scare, but that will generally just annoy the person and possibly cause a heart attack. No, what you need is a sustained soundscape of hellish audio. And where does one find hellish audio? Well, you make your own with a spooky-sounds noise box.

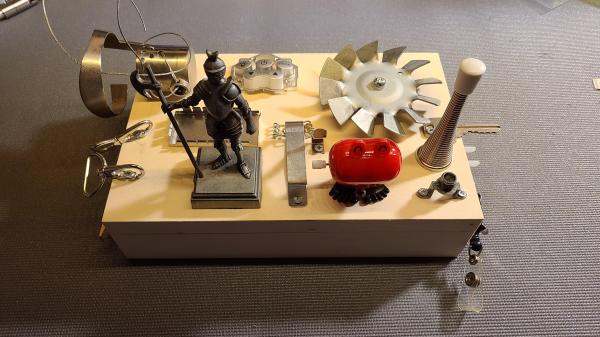
And no, we’re not talking about a soundboard that goes ‘boo’ and ‘ooo-OOO-oooh’ and whatnot. This is a full-on DIY instrument that has potential beyond Halloween. Essentially, the wooden box takes input vibrations from various doodads, and these vibrations are picked up by a piezo disk or two glued to the underside of the lid. The piezos are wired up to a 3.5 mm jack, which runs out to the PC and [SvartalfarQc]’s favorite Digital Audio Workstation (DAW). From there, it’s just a matter of playing around with the sounds — looping them, running them through various instrument voices, adding effects, and so on.

We love the the things that [SvartalfarQc] came up with, including a wind-up walking heart thing, a retractable badge holder, and that noise box mainstay, a sproingy doorstop.

We all know piezos are awesome, but have you ever considered that they can be used to digitize old wax cylinder recordings?

Arduino-Powered Trap Hopes To Catch Mice

The old adage that you’ll make a fortune by developing a better mouse trap is not super realistic, as the engineers behind Sony’s Betamax video tape standard could tell you. However, you can still learn a lot building your own, as this project from [ROBO HUB] demonstrates.

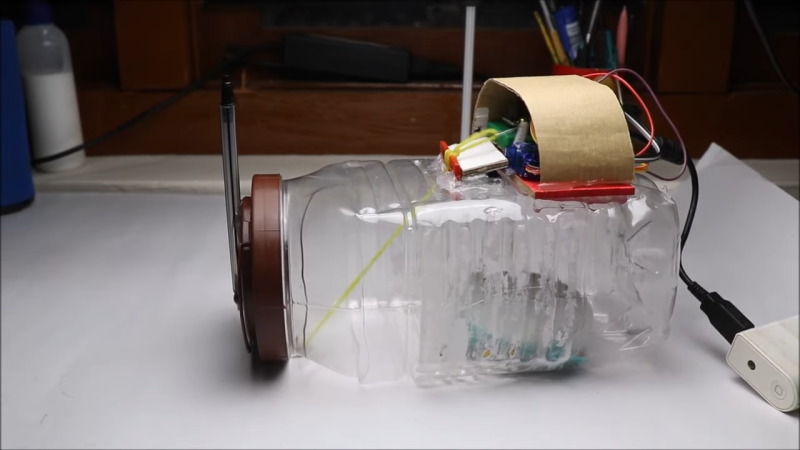
The trap is intended to catch mice in a humane fashion, without injury to the animal. To that end, it uses an Arduino Nano armed with an ultrasonic distance sensor  to detect when mice have entered a plastic container. The container’s hinged door is is held open with a servo. When a mouse is detected, the servo trips the door to snap shut under the power of an elastic band.

The key to making this design work well is ensuring that there are no gaps in the closed container that the mouse can use to escape. They’re wily creatures able to squeeze through positively tiny spaces, so it’s important to get this right. Besides that, you want to check the trap regularly, lest any caught mice simply claw and chew their way out.

We’ve seen a few mousetraps around these parts before, too. Video after the break.

Continue reading “Arduino-Powered Trap Hopes To Catch Mice”

Art of 3D printer in the middle of printing a Hackaday Jolly Wrencher logo

Make Better 3D Printed Molds, For Thermoforming Plastics

Thermoforming — which includes vacuum-forming — has its place in a well-rounded workshop, and Mayku (makers of desktop thermoforming machines) have a short list of tips for getting the best results when 3D printing molds on filament-based printers.

A mold is put into direct, prolonged contact with a hot sheet of semi-molten plastic. If one needs a mold to work more than once, there are a few considerations to take into account. The good news is that a few simple guidelines will help get excellent results. Here are the biggest ones:

  1. The smoother the vertical surfaces, the better. Since thermoforming sucks (or pushes) plastic onto and into a mold like a second skin, keeping layer heights between 0.1 mm and 0.2 mm will make de-molding considerably easier.
  2. Generous draft angles. Aim for a 5 degree draft angle. Draft angles of 1-2 degrees are common in injection molding, but a more aggressive one is appropriate due to layer lines giving FDM prints an inherently non-smooth surface.
  3. Thick perimeters and top layers for added strength. The outside of a mold is in contact with the most heat for the longest time. Mayku suggests walls and top layer between 3 mm to 5 mm thick. Don’t forget vent holes!
  4. Use a high infill to better resist stress. Molds need to stand up to mechanical stress as well as heat. Aim for a 50% or higher infill to make a robust part that helps resist deformation.
  5. Ensure your printer can do the job. 3D printing big pieces with high infill can sometimes lift or warp during printing. Use enclosures or draft shields as needed, depending on your printer and material.
  6. Make the mold out of the right material. Mayku recommends that production molds be printed in nylon, which stands up best to the heat and stress a thermoforming mold will be put under. That being said, other materials will work for prototyping. In my experience, even a PLA mold (which deforms readily under thermoforming heat) is good for at least one molding.

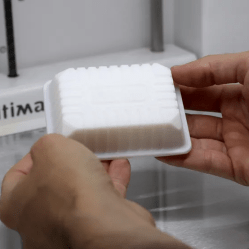
Thermoforming open doors for an enterprising hacker, and 3D printing molds is a great complement. If you’re happy being limited to small parts, small “dental” formers like the one pictured here are available from every discount overseas retailer.  And of course, thermoforming is great for costumes and props. If you want to get more unusual with your application, how about forming your very own custom-shaped mirrors by thermoforming laminated polystyrene?

This Week In Security: Not A Vulnerability, BGP Bug Propogation, And Press Enter To Hack

Curl was recently notified of a CVE, CVE-2020-19909, rated at a hair-raising 9.8 on the CVSS scale. And PostgreSQL has CVE-2020-21469, clocking in with a 7.5 severity. You may notice something odd about those two vulnerabilities, but I promise the 2020 date is only the tip of the iceberg here.

Let’s start with PostgreSQL. That vulnerability was only present in version 12.2, which released in February of 2020, and was fixed with the 12.3 release in May of that same year. The problem is a stack buffer overflow, which doesn’t seem to enable code execution, but does cause a denial of service situation. To trigger the bug? Repeatedly send the PostgreSQL daemon the SIGHUP signal.

If you’re familiar with Linux signals, that might sound odd. See, the SIGHUP signal technically indicates the end of a user session, but most daemons use it to indicate a restart or reload request. And to send this signal, a user has to have elevated privileges — elevated enough to simply stop the daemon altogether. Put simply, it’s not a security vulnerability, just a minor bug.

And now on to curl — This one is just bizarre. The issue is a integer overflow in the --retry-delay argument, which specifies in seconds how often curl should retry a failing download. The value is multiplied by 1000 to convert to milliseconds, resulting in an overflow for very large values. The result of that overflow? A smaller value for the retry delay.

[Daniel Stenberg] makes the point that this tale is a wonderful demonstration of the brokenness of the CVE system and NVD’s handling of it. And in this case, it’s hard not to see this as negligence. We have to work really hard to construct a theoretical scenario where this bug could actually be exploited. The best I’ve been able to come up with is an online download tool, where the user can specify part of the target name and a timeout. If that tool had a check to ensure that the timeout was large enough to avoid excess traffic, this bug could bypass that check. Should we be assigning CVEs for that sort of convoluted, theoretical attack?

But here’s the thing, that attack scenario should rate something like a CVSS of 4.8 at absolute worst. NVD assigned this a 9.8. There’s no way you can squint at this bug hard enough to legitimately rank it that severe. At the time of writing, the NVD lists this as “UNDERGOING REANALYSIS”.
Continue reading “This Week In Security: Not A Vulnerability, BGP Bug Propogation, And Press Enter To Hack”

Why Are We Only Just Now Hearing About LED Beaded Curtains

Beaded curtains are a pretty banal piece of home decor, unlikely to excite most interior design enthusiasts. Throw on some addressable LEDs, though, and you’ve got something eye-catching at the very least, as [Becky] demonstrates.

Joining the LED strands at the bottom made running the wiring easy but made walking through the blinds hard.

The project started with an existing beaded curtain as a base. A series of addressable LED strands were then carefully sewn to the beads using knots tied in plain sewing thread. The strands were configured as a single strand as far as the data lines were concerned, to make animation easy. Power was supplied to both ends of the strand to ensure nice and even brightness across the strands.

The brains of the system is a PixelBlaze controller, which makes it easy to wirelessly control the behavior of the strings. It’s the perfect tool for quickly whipping up fancy animations and pretty effects without hand-assembling a bunch of code yourself.

There was only a few problems with the project. [Becky] found a pretty passable LED beaded curtain from China midway through the project, which reduced her enthusiasm to finish the build. There were also issues walking through the curtain due to the wiring scheme she chose, where the bottom of one strand was connected to its neighbor.

Regardless, it’s a fun blinky build that brings some color to an otherwise drab doorway. It’s hard to complain about that! Video after the break.

Continue reading “Why Are We Only Just Now Hearing About LED Beaded Curtains”

IKEA’s Billy Bookshelf Is A Useful 3D Printing Enclosure

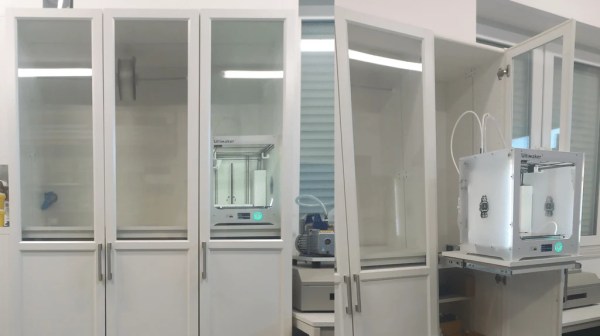
The results from your 3D printer may be improved if you use a dedicated enclosure for the job. This is particularly helpful for printing certain materials which are more sensitive to cold drafts or other thermal disruptions to the working area.  If you want an elegant solution to the problem, consider getting yourself an IKEA Billy bookshelf, says [wavlew].

The Billy makes a remarkably elegant 3D printing workstation, overall. It’s got a nifty slide-out drawer that makes a perfect mounting point for a 3D printer. It lets you slide out the printer for maintenance, using the controls, or extracting finished prints. It also naturally features plenty of storage for your filament, tools, and other accoutrements. When it comes to the business of actually printing though, you just slide the printer inside and shut the door. Its thermal and noise isolating performance can also be further improved by adding a silicone door seal.

We love this idea. Too often, 3D printers are left chugging away on messy desks, where they’re subject to blasts from AC vents and other disruptions. Having everything tidily tucked away in a cupboard neatens things significantly, and could also prove helpful if you pursue fume extraction, too.

If you’ve identified any other nifty maker applications for IKEA furniture, be sure to let us know!

Review: WAINLUX K8, A Diode Laser That’s Ready To Work

Rarely a week goes by that some company doesn’t offer to send us their latest and greatest laser. You know the type — couple of aluminum extrusions, Class 4 diode flopping around in the breeze, and no enclosure to speak of unless you count the cardboard box they shipped it in. In other words, an accident waiting to happen. Such gracious invitations get sent to the trash without a second thought.

Now don’t get me wrong, I have no doubt that the average Hackaday reader would be able to render such a contraption (relatively) safe for use around the shop. Build a box around it, bolt on a powerful enough fan to suck the smoke out through the window, and you’ve turned a liability into a legitimate tool. But the fact remains that we simply can’t put our stamp on something that is designed with such a blatant disregard for basic safety principles.

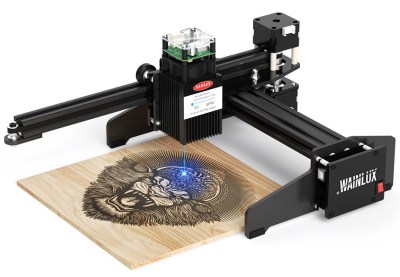
The earlier WAINLUX JL4 — lucky rabbit foot not included.

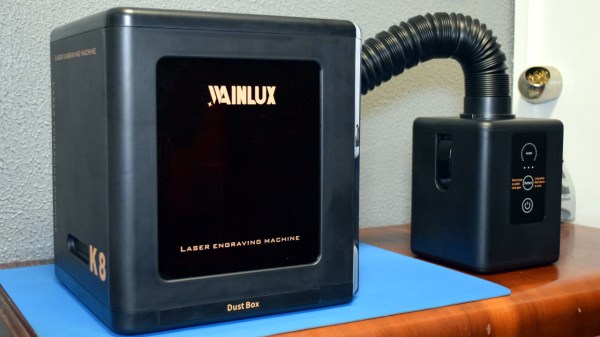
That being the case, a recent email from WAINLUX nearly met the same fate as all those other invitations. But even at a glance it was clear that this new machine they wanted to send out, the K8, was very different from others we’d seen. Different even from what the company themselves have put out to this point. This model was fully enclosed, had a built-in ventilation fan, an optional air filter “sidecar”, and yes, it would even turn off the laser if you opened the door while it was in operation. After reading through the promotional material they sent over, I had to admit, I was intrigued.

It seemed like I wasn’t the only one either; it was only a matter of days before the Kickstarter for the WAINLUX K8 rocketed to six figures. At the time of this writing, the total raised stands at just under $230,000 USD. There’s clearly a demand for this sort of desktop laser, the simplicity of using a diode over a laser tube is already appealing, but one that you could actually use in a home with kids or pets would be a game changer for many people.

But would the reality live up to the hype? I’ve spent the last couple of weeks putting a pre-production WAINLUX K8 through its paces, so let’s take a look and see if WAINLUX has a winner on their hands.

Continue reading “Review: WAINLUX K8, A Diode Laser That’s Ready To Work”