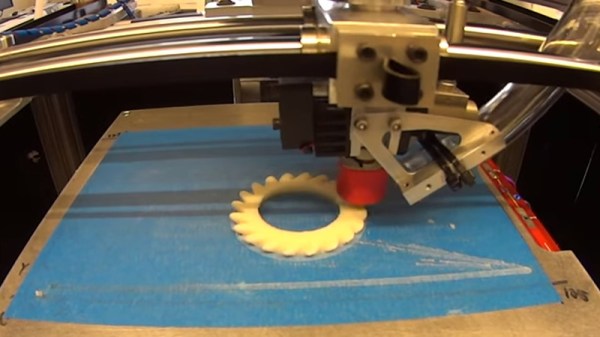
Dual extrusion 3D printers are not as uncommon as they used to be, but there are still a lot of single-extruder machines. [Paul Lang] wanted to refit his printer to take two MK8 extruders, and he documented his experience with a blog post that has a few good tips if you want to try it yourself.
[Paul] used Fusion 360 to design a holder for the extruders that would fit his printer. Since he had accidentally ordered a spool of pink PLA, the whole assembly is shocking pink — not subtle at all. He shares a few design tips about using PLA near the hot areas and making everything fit and level.
[Thomas Sanladerer] is at it again: testing all of the 3D-printer filaments that are fit to print (with). And this year, he’s got a new and improved testing methodology — video embedded below. And have a search for “filaween2” to see what he’s reviewed so far. There’s some sexy filaments in there.
We really love the brand-new impact strength test, where a hammer is swung on a pivot (3D printed, natch), breaks through the part under test, and swings back up to a measurable height. The difference in swing height reflects the amount of energy required to break the test piece. Sweet physics.
[Thomas] ran a similar few-month-long series last year, and we’re stoked to see it return with all the improvements. Here’s to watching oddball plastics melt!
[Asciimation], who previously created an Enigma Machine wristwatch, decided to go all-in and make a 3D-printed Enigma machine. Not a perfect replica, but rather an improved version that works the same but doesn’t concern itself with historical accuracy. For instance, the current step involves building the keyboard. Rather than trying to re-create the spring-and-pin method of the original, he simply swapped in readily available, double-throw micro switches.
This project has a tremendous amount of fascinating detail. [Asciimation] did his research and it shows; he downloaded blueprints of the original and used hacked digital calipers to precisely measure each rotor’s teeth, so that it could be re-created for printing. He even re-created the Enigma font to ensure that his printed rotor wheels would look right–though in doing so he discovered that the original machine used one typeface for the keyboard, one for the wheels, and one for the indicator lamps.
We previously published [Asciimation]’s Enigma machine wristwatch project, where he simulated the functionality of an Enigma with an Arduino.
Initially stored in a compact cube targeted to eventually fit in a CubeSat’s dimension’s, 100 mm x 100 mm x 100 mm, the beam emerges from within the cube and will be able to connect with other cubes to form rigid structures. His hope is that they can one day be made automatically from lunar or Martian regolith (loose surface dirt) munching machines. His current one has 160 mm sides and uses a servo hacked to turn continuously.
In his hackaday.io project logs he shows the trial and error he’s gone through to get to his current stage: experimenting with the links to form a more rigid beam, fine tuning the unreeling of the rolls of links to prevent jamming, adding a safety-ratchet-gear to the gearing to overcome speed issues, and more. He currently 3D prints as many connected sets of links as he can on his Prusa i3, and then manually connects sets together to make a longer chain, but he has his eye on the Printrbot Printrbelt for printing arbitrarily long chains in one piece.
You can see one pretty impressive iteration of the ZBeam in action in the video below and more is on his project page. In fact, the judges for the 2017 Hackaday Prize liked [Ronald]’s projects so much that they designated it as a Best Product finalist.
Here’s some interesting work shared by [Ben Kromhout] and [Lukas Lambrichts] on making flexible 3D prints, but not by using flexible filament. After seeing a project where a sheet of plywood was rendered pliable by cutting a pattern out of it – essentially turning the material into a giant kerf bend – they got interested in whether one could 3D print such a thing directly.
The original project used plywood and a laser cutter and went through many iterations before settling on a rectangular spiral pattern. The results were striking, but the details regarding why the chosen pattern was best were unclear. [Ben] and [Lukas] were interested not just in whether a 3D printer could be used to get a similar result, but also wanted to find out what factors separated success from failure when doing so.
After converting the original project’s rectangular spiral pattern into a 3D model, a quick proof-of-concept showed that three things influenced the flexibility of the end result: the scale of the pattern, the size of the open spaces, and the thickness of the print itself. Early results indicated that the size of the open spaces between the solid elements of the pattern was one of the most important factors; the larger the spacing the better the flexibility. A smaller and denser pattern also helps flexibility, but when 3D printing there is a limit to how small features can be made. If the scale of the pattern is reduced too much, open spaces tend to bridge which is counter-productive.
Kerf bending with laser-cut materials gets some clever results, and it’s interesting to see evidence that the method could cross over to 3D printing, at least in concept.
He built a LEGO-looking enclosure for the battery as well, based on a 2×6 brick. The battery pack sits behind the motor with the tail light on top and holds the radio control receiver as well the twin LiPos. The head and tail lights pack 24-LED discs and are controlled by [James]’ FS-GT2B 3-channel RC transmitter. Its third channel is just a button, and he can trip that button to activate the lights with the help of a Turnigy receiver-controlled switch.
For an added touch he printed some LEGO flowers and a minifig, suitably oversized, and took the skateboard on the road. The thing has some zip! [James] kept his balance while holding the controller in one hand and a selfie stick with the other. The headlamp housings fell off, and a while later the minifig fell off. Fortunately [James] was able to snap them back into place, in proper LEGO fashion.
One of the problems encountered thus far with 3D-printing circuits with conductive filament is that it doesn’t really bond to anything, let alone solder, so how does one use it?
[mikey77] wrote an Instructable showing how to print circuit boards and create simple circuits, using shape of the plastic as a way to control the circuit. We like how he used using the flexible nature of the filament to make buttons, with two layers of conductive material coming together with the press of a finger.
He also created a linear potentiometer with a 3D-printed wiper that increases the ohms of the connection the farther it’s pushed. The filament doesn’t have the same conductivity as copper so [mikey] was able make resistors by stringing pieces of conductive plastic between two leads. There are also some hexagonal touch pads that turned out very nice.