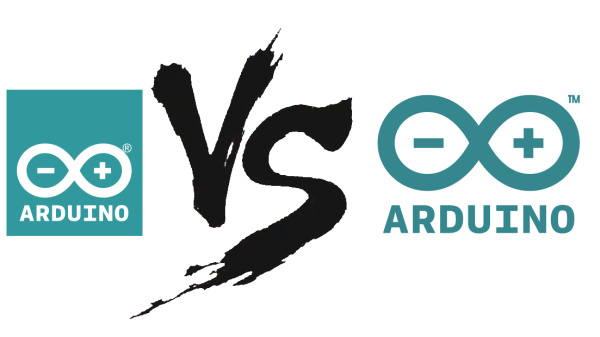
sonar radar assembly

Green-Sweep For Your Ultrasonic Rangefinder

Maybe you’ve never programmed an Arduino before. Or maybe you have, but nothing beyond das blinkenlights. Maybe your soldering iron sits in a corner of your garage, gazing at you reproachfully every time you walk by, like a ball begging to be thrown. Maybe you’ve made a few nifty projects, but have never interfaced them with a PC. If this describes you, then this article and project is just what you need. So grab your favorite beverage, tuck in and prepare to get motivated.

[Anuj Dutt] has not only made a really cool project, he has also done a most excellent job at documenting it. It’s an Arduino controlled “RADAR” like project that uses the familiar Parallax ultrasonic sensor. It’s mounted to a servo and feeds data to a PC where a custom VB.NET program translates the data in to a cool “green radar sweep” screen. It also pushes text to an LCD which reveals the distance from the target.

screenshot of radar program

[Anuj Dutt] hand rolled his Arduino just because, but ran into some trouble getting everything to talk to the PC. He wound up using the ultra user friendly FTDI to save the day. Be sure to check out the video below to see the project in action. [Anuj] published the code for both the Arduino and PC in the video description.

Continue reading “Green-Sweep For Your Ultrasonic Rangefinder”

roomba

IRobot Releases Hackable Roomba — Without The Vacuum

We love forward thinking companies that take a risk and do something different. iRobot, the company behind the iconic Roomba, just released the newest version of their Roomba Create — a programmable Roomba (minus the vacuum) that can be hacked and programmed to do all sorts of things.

The company developed the Create with STEM students in mind — a robotics learning platform. It came out originally back in 2007, and we’ve covered many hacks that have made use of it. Many. Like, a lot. One of our favorites has got to be this data center monitoring robot that makes use of the platform!

Anyway, the newest version of the Create features the typical hardware upgrades you’d expect, and with some special emphasis on 3D printing. In fact, the CEO of iRobot [Colin Angle] thinks that 3D printing is going to make a big difference in a few years:

“Your Roomba could be a software file that you print at home,” he says. He says the Create’s new features are a way for the company to get ready for that day, while also providing a platform that educators and hobbyists can use to tinker.

Kudos to you guys, iRobot! We just wish people would stop giving Roomba’s knives…

[Thanks PSUbj21!]

thermostat

Arduino Thermostat Includes Vacation Mode

When [William’s] thermostat died, he wanted an upgrade. He found a few off-the-shelf Internet enabled thermostats, but they were all very expensive. He knew he could build his own for a fraction of the cost.

The primary unit synchronizes it’s time using NTP. This automatically keeps things up to date and in sync with daylight savings time. There is also a backup real-time clock chip in case the Internet connection is lost. The unit can be controlled via the physical control panel, or via a web interface. The system includes a nifty “vacation mode” that will set the temperature to a cool 60 degrees Fahrenheit while you are away. It will then automatically adjust the temperature to something more comfortable before you return home.

[William’s] home is split into three heat zones. Each zone has its own control panel including an LCD display and simple controls. The zones can be individually configured from either their own control panel or from the central panel. The panels include a DHT22 temperature and humidity sensor, an LCD display, a keypad, and support electronics. This project was clearly well thought out, and includes a host of other small features to make it easy to use.

Desk lamp

Sleek Desk Lamp Changes Colors Based On Sun Position

[Connor] was working on a project for his college manufacturing class when he came up with the idea for this sleek desk lamp. As a college student, he’s not fond of having his papers glowing brightly in front of him at night. This lamp takes care of the problem by adjusting the color temperature based on the position of the sun. It also contains a capacitive touch sensor to adjust the brightness without the need for buttons with moving parts.

The base is made from two sheets of aluminum and a bar of aluminum. These were cut and milled to the final shape. [Connor] found a nice DC barrel jack from Jameco that fits nicely with this design. The head of the lamp was made from another piece of aluminum bar stock. All of the aluminum pieces are held together with brass screws.

A slot was milled out of the bottom of the head-piece to make room for an LED strip and a piece of 1/8″ acrylic. This piece of acrylic acts as a light diffuser.  Another piece of acrylic was cut and added to the bottom of the base of the lamp. This makes for a nice glowing outline around the bottom that gives it an almost futuristic look.

The capacitive touch sensor is a pretty simple circuit. [Connor] used the Arduino capacitive touch sensor library to make his life a bit easier. The electronic circuit really only requires a single resistor between two Arduino pins. One of the pins is also attached to the aluminum body of the lamp. Now simply touching the lamp body allows [Connor] to adjust the brightness of the lamp.

[Connor] ended up using an Electric Imp to track the sun. The Imp uses the wunderground API to connect to the weather site and track the sun’s location. In the earlier parts of the day, the LED colors are cooler and have more blues. In the evening when the sun is setting or has already set, the lights turn more red and warm. This is easier on the eyes when you are hunched over your desk studying for your next exam. The end result is not only functional, but also looks like something you might find at that fancy gadget store in your local shopping mall.

Hacklet 26 – Arduino Projects

Arduino is one of those boards that has become synonymous with hacking and making. Since its introduction in 2005, over 700,000 official Arduino boards have been sold, along with untold millions of compatible and clone boards. Hackers and makers around the world have found the Arduino platform a cheap and simple way to get their projects off the ground. This weeks Hacket focuses on some of the best Arduino based projects we’ve found on Hackday.io!

drawingbot[Niazangels] gets the ball – or ballpoint pen – rolling with Roboartist, a robot which creates line drawings. Roboartist is more than just a plotter though. [Niazangels] created a custom PC program which creates line drawings from images captured by a webcam. The line drawings are converted to coordinates, and sent to an Arduino, which controls all the motors that move the pen. [Niazangels] went with Dynamixel closed loop servo motors rather than the stepper motors we often see in 3D printers.

tape[Peter Edwards] is preserving the past with Tapuino, the $20 C64 Tape Emulator. Plenty of programs for the Commodore 64, 128, and compatibles were only distributed on tape. Those tapes are slowly degrading, though the classic Commodore herdware is still going strong. Tapuino preserves those tapes by using an Arduino nano to play the files from an SD card into the original Datasette interface. [Peter] also plans to add recording functionality to the Tapuino, which will make it the total package for preserving  your data. All that’s missing is that satisfying clunk when pressing the mechanical Play button!

infinity

[Dushyant Ahuja] knows what time it is, thanks to his Infinity Mirror Clock. This clock tells time with the help of some WS2812B RGB LED. [Dushyant] debugged the clock with a regular Arduino, but when it came time to finish the project, he used an ATmega328 to create an Arduino compatible board from scratch. Programming is easy with an on-board Bluetooth module. [Dushyant] plans to add a TFT lcd which will show weather and other information when those power-hungry LEDs are switched off.

alarm2[IngGaro] built an entire home alarm system with his project Arduino anti-theft alarm shield. [IngGaro] needed an alarm system for his home. That’s a lot to ask of a standard ATmega328p powered Arduino Uno. However, the extra I/O lines available on an Arduino Mega2560 were just what the doctor ordered. [IngGaro] performed some amazing point-to-point perfboard wiring to produce a custom shield that looks and works great! The alarm can interface with just about any sensor, and can be controlled via the internet. You can even disarm the system through an RFID keycard.

Want MORE Arduino in your life? Check out our curated Arduino List!

That’s about all the millis()  we have for this weeks Hacklet. As always, see you next week. Same hack time, same hack channel, bringing you the best of Hackaday.io!

Over-engineering Ding Dong Ditch

One day, [Samy]’s best friend [Matt] mentioned he had a wireless doorbell. Astonishing. Even more amazing is the fact that anyone can buy a software defined radio for $20, a small radio module from eBay for $4, and a GSM breakout board for $40. Connect these pieces together, and you have a device that can ring [Matt]’s doorbell from anywhere on the planet. Yes, it’s the ultimate over-engineered ding dong ditch, and a great example of how far you can take practical jokes if you know which end of a soldering iron to pick up.

Simply knowing [Matt] has a wireless doorbell is not enough; [Samy] needed to know the frequency, the modulation scheme, and what the doorbell was sending. Some of this information can be found by looking up the FCC ID, but [Samy] found a better way. When [Matt] was out of his house, [Samy] simply rang the doorbell a bunch of times while looking at the waterfall plot with an RTL-SDR TV tuner. There are a few common frequencies tiny, cheap remote controls will commonly use – 315 MHz, 433 MHz, and 900 MHz. Eventually, [Samy] found the frequency the doorbell was transmitting at – 433.8 MHz.

After capturing the radio signal from the doorbell, [Samy] looked at the audio waveform in Audacity. It looked like this doorbell used On-Off Keying, or just turning the radio on for a binary ‘1’ and off for a binary ‘0’. In Audacity, everything the doorbell transmits becomes crystal clear, and with a $4 434 MHz transmitter from SparkFun, [Samy] can replicate the output of the doorbell.

For the rest of the build, [Samy] is using a mini GSM cellular breakout board from Adafruit. This module listens for any text message containing the word ‘doorbell’ and sends a signal to an Arduino. The Arduino then sends out the doorbell code with the transmitter. It’s evil, and extraordinarily over-engineered.

Right now, the ding dong ditch project is set up somewhere across the street from [Matt]’s house. The device reportedly works great, and hopefully hasn’t been abused too much. Video below.

Continue reading “Over-engineering Ding Dong Ditch”

8 Bit Message In A Digital Bottle

As seasoned data-travelers, we’re used to wielding the internet to send messages and communicate to others without any limitations. No one has to be stranded on a figurative island blowing smoke signals… unless of course they wanted to be. What [Harm Alexander Aldick] has done with his project “Lorem Ipsum”, is create a situation where others can only communicate to him through a sort of message in a bottle. The bottle in this case is an electronic widget.

In this social experiment, [Harm] has stationed a small Ikea picture frame at his desk, which shows images and text sent to him in real-time from others in the world. With an Arduino as the brain, a small 8×8 LED matrix mounted at the bottom right of the frame displays the data received by means of an ethernet module. Anyone can use his web interface to modify the pixels of the matrix on a virtual version of the installation. Once sent, the message is transmitted through an IPv6 internet connection and is translated to UDP which the unit is controlled by.

[Harm]’s project investigates how people react when given the chance to send a message in complete anonymity to someone they don’t know… in of all things, the form of something as limited as 64 pixels. The project name “Lorem Ipsum” refers to the filler text used in graphic design to hold the place of what would otherwise be more meaningful information, so that it doesn’t detract from the experience of viewing the layout. Curious about what sort of ‘graphical experience’ I would come up with myself, I took a shot at punching away at [Harm’s] GUI. I got momentarily lost in turning the little red dots on and off and eventually turned out this little ditty:

ipsum1

It was supposed to be something of a triangle, yet turned into a crop circle… or pronged nipple. After it was sent, I wondered whether or not [Harm] actually saw it. In the case that he did, I can only imagine what I communicated to our fellow hacker abroad with my squall of dots. All of these thoughts though are the whole point of the project. Awesome work!