Fireball-Flinging Figurine Feeds Fiction

If you’re writing a screenplay or novel, there will likely be points along the way at which you can’t get enough encouragement from friends and family. While kind words are kind, acts such as [scubabear]’s can provide a push like no other. By commissioning another 3D designer friend to model a character from the first friend’s screenplay so he could print and animate it, [scubabear] fed two birds with one scone, you might say.

Designer friend [Sean] modeled the mighty Braomar in Maya and Z-brush, and [scubabear] did test prints on a Formlabs Form2 as they went along to keep an eye on things. Eventually, they had a discussion about making space for wires and such, so [Sean] took to Blender to make Braomar hollow enough for wires, but not so empty that he would collapse under the stress of being (we presume) the main character.

Braomar stands upon a sigil that changes color thanks to an RGB LED ring in the base that’s driven by an Arduino Nano. A single pixel in the fireball is wired through Braomar’s body and flickers with the help of an addressable LED sequencer board.

Our favorite part of this build has to be the power scheme. Not content to have a wire running out from the base or even a remote control for power-draining concerns, [scubabear] used disc magnets in the base to switch on the 9 V battery when Screenplay Friend rotates it.

Of course, if you need inspiration to even thing about beginning to write a screenplay or novel, maybe you should lead with the maquette-building and then construct a story around your creation.


This project was an entry into the 2022 Sci-Fi Contest. Check out all of the winning entries here.

Arduino And Git: Two Views

You can’t do much development without running into Git, the version control management system. Part of that is because so much code lives on GitHub which uses Git, although you don’t need to know anything about that if all you want to do is download code. [Dr. Torq] has a good primer on using Git with the Arduino IDE, if you need to get your toes wet.

You might think if you develop by yourself you don’t need something like Git. However, using a version control system is a great convenience, especially if you use it correctly. There’s a bug out in the field? What version of the firmware? You can immediately get a copy of the source code at that point in time using Git. A feature is broken? It is very easy to see exactly what changed. So even if you don’t work in a team, there are advantages to having source code under control.

Continue reading “Arduino And Git: Two Views”

Digital To Analog In The Darkroom

As the world becomes more and more digital, there are still a few holdouts from the analog world we’ve left behind. Vinyl records are making quite the comeback, and film photography is still hanging on as well. While records and a turntable have a low barrier for entry, photography is a little more involved, especially when developing the film. But with the right kind of equipment you can bridge the gap from digital to analog with a darkroom setup that takes digital photographs and converts them to analog prints.

The project’s creator, [Muth], has been working on this project since he found a 4K monochrome display. These displays are often used in resin 3D printers, but he thought he could put them to use developing photographs. This is much different from traditional darkroom methods, though. The monochrome display is put into contact with photo-sensitive paper, and then exposed to light. Black pixels will block the light while white pixels allow it through, creating a digital-to-analog negative of sorts. With some calibration done to know exactly how long to expose each “pixel” of the paper, the device can create black-and-white analog images from a digital photograph.

[Muth] notes that this method isn’t quite as good as professional print, but we wouldn’t expect it to be. It creates excellent black-and-white prints with a unique method that we think generates striking results. The 4K displays needed to reproduce this method aren’t too hard to find, either, so it’s fairly accessible to those willing to build a small darkroom to experiment. For those willing to go further, take a look at some other darkroom builds we’ve seen in the past.

Continue reading “Digital To Analog In The Darkroom”

Edible Electronics Let Us Hear The Lamentations Of The Chocolate Bunnies

Yet another Day of the Chocolate Bunnies has passed by, and what did you do to mark the occasion? You likely kicked back and relaxed, surrounded by whatever you gave up for Lent, but good for you if you mixed chocolate and electronics like [Repeated Failure] did. They created a completely edible chocolate Easter bunny that screams when bitten.

So obviously, the hardest part is figuring out something to build the circuit with that is both conductive and safe to eat. [Repeated Failure] spent a lot of time with carbon oleogel paste, which is made from natural oils and waxes. Not only was it less conductive than [Repeated Failure]’s skin, it came out pitch black and tasted like nothing, which kind of a bonus, when you think about it.

Then came the cake paint, which [Repeated Failure] laced with trace amounts of silver powder. While that worked somewhat better, a successful circuit would have likely required near-fatal amounts of the stuff. Yikes!

The winner turned out to be edible silver leaf, which is like gold leaf but cheaper. Ever had Goldschläger? Gold leaf is what’s suspended inside. The really nice thing about silver leaf is that it comes in thin sheets and can easily be cut into circuit traces with scissors and connected to I/O pins with copper tape. Be sure to check it out after the break, including [Repeated Failure]’s friend’s reaction to innocently biting the chocolate bunny’s ears off, as one tends to do first.

Think you’d rather hear plants giggle? Sure, it sounds cute, but it’s actually kind of creepy.

Continue reading “Edible Electronics Let Us Hear The Lamentations Of The Chocolate Bunnies”

Paper Tape Reader Self-calibrates, Speaks USB

Input devices consisting of optical readers for punched paper tape have been around since the earliest days of computing, so why stop now? [Jürgen]’s Paper Tape Reader project connects to any modern computer over USB, acting like a serial communications device. Thanks to the device’s automatic calibration, it works with a variety of paper materials. As for reading speed, it’s pretty much only limited to how fast one can pull tape through without damaging it.

Stacked 1.6 mm PCBs act as an enclosure, of sorts.

While [Jürgen]’s device uses LEDs and phototransistors to detect the presence or absence of punched holes, it doesn’t rely on hardware calibration. Instead, the device takes analog readings of each phototransistor, and uses software-adjusted thresholds to differentiate ones from zeros. This allows it to easily deal with a wide variety of tape types and colors, even working with translucent materials. Reading 500 characters per second isn’t a problem if the device has had a chance to calibrate.

Interested in making your own? The build section of the project has all the design files; it uses only through-hole components, and since the device is constructed from a stack of 1.6 mm thick PCBs, there’s no separate enclosure needed.

Paper tape and readers have a certain charm to them. Cyphercon 4.0 badges featured tape readers, and we’ve even seen the unusual approach of encoding an I2C byte stream directly onto tape.

This DIY UPDI Programmer Is Nice And Cheap

[Daumemo] likes experimenting with DIY electronics, and like many people, eventually ran across an AVR microcontroller with a Unified Program and Debug Interface (UPDI). One option is of course to purchase an UPDI programmer, but an even better solution was to make a DIY USB version from nice, cheap parts.

Programming an Attiny404 over the UPDI interface.

UPDI is an interface for external programming and on-chip debugging of microcontrollers, and [Daumemo]’s solution is based on the jtag2updi project. It combines an Arduino Nano (in this case, a clone) with a single resistor, a single capacitor, and a six pin angled header (with a cleverly bent pin) to enable programming UPDI devices over a USB connection. [Daumemo] is happy to report that the device works just fine in both Microchip Studio with AVRDUDE, or PlatformIO.

Is an Arduino Nano a bit overpowered in this role? Maybe, but the price is certainly right. There’s no need for a custom PCB either, since everything can be soldered direct to the Nano board. A matching 3D printed enclosure is about all that’s needed to make a robust and reliable DIY USB UPDI programmer out of a handful of parts, and that sounds good to us.

On the other hand, if you do find yourself making custom PCBs, you may be interested in another of [Daumemo]’s DIY projects: a printable structure to turn a rotary tool into a PCB drill press.

Coin Acceptors Are Higher-Tech Than You Think

Coin-operated machines have a longer history than you might think. Ancient temples used them to dispense, for example, holy water to the faithful in return for their coins. Old payphones rang a bell when you inserted a coin so the operator knew you paid. Old pinball machines had a wire to catch things with holes in the middle so you couldn’t play with washers. But like everything else, coin acceptors have advanced quite a bit. [Electronoobs] shows a unit that can accept coins from different countries and it is surprisingly complex inside. He used what he learned from the teardown to build his own Arduino-based version.

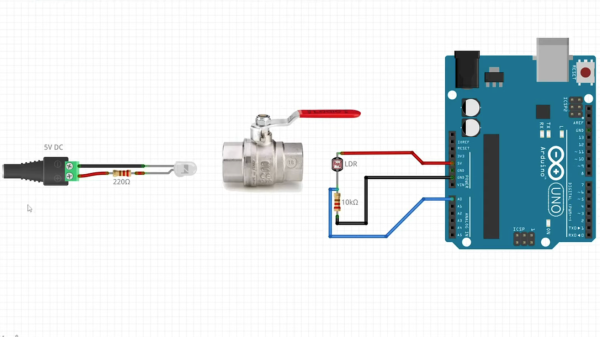
For scale, there is the obligatory banana. Inside the box there are several induction coils and some photo electronics. In particular, there are two optical sensors that watch the coin roll down a ramp. This produces two pulses. The width of the pulse indicates the diameter of the coin, and the time between the pulses tells its speed.

Continue reading “Coin Acceptors Are Higher-Tech Than You Think”