Stars Looking A Bit Dim? Throw Some Math At Them.

As the cost of high-resolution images sensors gets lower, and the availability of small and cheap single board computers skyrockets, we are starting to see more astrophotography projects than ever before. When you can put a $5 Raspberry Pi Zero and a decent webcam outside in a box to take autonomous pictures of the sky all night, why not give it a shot? But in doing so, many hackers are recognizing a fact well-known to traditional telescope jockeys: seeing a few stars is easy, seeing a lot of stars is another story entirely.

The problem is that stars are fairly dim; a problem compounded by the light pollution you get unless you’re out in a rural area. You can’t just brighten up the images either, as that only increases the noise in the image. A programmer always in search of a challenge, [Benedikt Bitterli] decided to take a shot at using software to improve astrophotography images. He documented the entire process, failures and all, on his blog for anyone else who might be curious about what it really takes to create the incredible images of the night sky we see in textbooks.

In principle it’s simple: just take a lot of pictures of the sky, stack them on top of each other, and identify which points of light are stars and which ones are noise artifacts. But of course the execution is considerably more difficult. For one thing, unless the camera was on a mount that was automatically tracking the sky, the stars will have slightly moved in each image. To help with this process, [Benedikt] used a navigational trick that humanity has relied on for millennia: mapping constellations. By comparing groupings of stars in each image, his software is able to accurately overlay each image.

But that’s only one part of the equation. In his post, [Benedikt] goes over the incredible amount of math that goes into identifying individual stars in the sea of noise you get when a digital image sensor looks into the black. You certainly don’t need to understand all the math to appreciate the final results, but it’s a fascinating read for those with an interest in computer vision concepts.

This kind of software is precisely what you want to pair with your 3D printed star tracker, or even better a Raspberry Pi sky monitoring station.

[Thanks to Helio Machado for the tip.]

3D Printed Clockwork Star Tracker

Astrophotography is one of those things you naturally assume must be pretty difficult; surely something so awesome requires years of practice and specialized equipment which costs as much as your car. You shake your fist at the sky (since you have given up on taking pictures of it), and move on with your life. Another experience you’ll miss out on.

But in reality, dramatic results don’t necessarily require sticker shock. We’ve covered cheap DIY star trackers before on Hackaday, but this design posted on Thingiverse by [Tinfoil_Haberdashery] is perhaps the easiest we’ve ever seen. It keeps things simple by using a cheap 24 hour clock movement to rotate a GoPro as the Earth spins. The result is a time-lapse where the stars appear to be stationary while the horizon rotates.

Using a 24 hour clock movement is an absolutely brilliant way to synchronize the camera with the Earth’s rotation without the hoops one usually has to jump through. Sure you could do with a microcontroller, a stepper motor, and some math. But a clock is a device that’s essentially been designed from the ground up for keeping track of the planet’s rotation, so why not use it?

If there’s a downside to the clock movement, it’s the fact that it doesn’t have much torque. It was intended to move an hour hand, not your camera, so it doesn’t take much to stall out. The GoPro (and other “action” cameras) should be light enough that it’s not a big deal; but don’t expect to mount your DSLR up to one. Even in the video after the break, it looks like the clock may skip a few steps on the way down as the weight of the camera starts pushing on the gears.

If you want something with a bit more muscle, we’ve recently covered a very slick Arduino powered “barn door” star tracker. But there’re simpler options if you’re looking to get some shots tonight.

Continue reading “3D Printed Clockwork Star Tracker”

People With Dementia Can DRESS Smarter

People with dementia have trouble with some of the things we take for granted, including dressing themselves. It can be a remarkably difficult task involving skills like balance, pattern recognition inside of other patterns, ordering, gross motor skill, and dexterity to name a few. Just because something is common, doesn’t mean it is easy. The good folks at NYU Rory Meyers College of Nursing, Arizona State University, and MGH Institute of Health Professions talked with a caregiver focus group to find a way for patients to regain their privacy and replace frustration with independence.

Although this is in the context of medical assistance, this represents one of the ways we can offload cognition or judgment to computers. The system works by detecting movement when someone approaches the dresser with five drawers. Vocal directions and green lights on the top drawer light up when it is time to open the drawer and don the clothing inside. Once the system detects the article is being worn appropriately, the next drawer’s light comes one. A camera seeks a matrix code on each piece of clothing, and if it times out, a caregiver is notified. There is no need for an internet connection, nor should one be given.

Currently, the system has a good track record with identifying the clothing, but it is not proficient at detecting when it is worn correctly, which could lead to frustrating false alarms. Matrix codes seemed like a logical choice since they could adhere to any article of clothing and get washed repeatedly but there has to be a more reliable way. Perhaps IR reflective threads could be sewn into clothing with varying stitch lengths, so the inside and outside patterns are inverted to detect when clothing is inside-out. Perhaps a combination of IR reflective and absorbing material could make large codes without being visible to the human eye. How would you make a machine-washable, machine-readable visual code?

Helping people with dementia is not easy but we are not afraid to start, like this music player. If matrix codes and barcodes get you moving, check out this hacked scrap-store barcode scanner.

Thank you, [Qes] for the tip.

Arduino Star Tracker Raises The Bar

Proving that astrophotography doesn’t have to break the bank, [Gerald Gattringer] has recently documented his DIY “barn door” style star tracker which is built almost entirely from scratch. Short of the Arduino and stepper motor, all the components were either made by hand or are standard hardware store finds.

The build starts with three aluminum plates which [Gerald] cut by hand with an angle grinder. He then drilled all the necessary screw holes and a rectangular opening for the threaded rod to pass through. He even used epoxy to mount a nut to the bottom plate which would eventually attach it to the tripod.

The plates were then roughed up and spray painted black so they wouldn’t reflect light. The addition of a couple of screws, nuts, and a standard hinge.

Motion is provided by a 28BYJ-48 stepper which is connected to the drive nut by way of a belt. The spinning nut is used to raise and lower the threaded rod which opens and closes the “door”. To control the motor, [Gerald] is using an Arduino Nano coupled with a ULN2003 Darlington array which live on a routed PCB he made with his school’s Qbot MINImill. While some might say the Arduino is unnecessary for this project, it does make the final calibration of the device much easier.

We’ve covered a number of similar star trackers here on Hackaday, including one that you crank by hand. But the professional looking final result really makes this build stand out.

Impossibly Huge Depth Of Focus In Microscope Photographs

Sometimes, less is more. Sometimes, more is more. There is a type of person who believes that if enough photos of the same subject are taken, one of them will shine above the rest as a gleaming example of what is possible with a phone camera and a steady hand. Other people know how to frame a picture before hitting the shutter button. In some cases, the best method may be snapping a handful of photos to get one good one, not by chance, but by design.

[The Thought Emporium]’s video, also below the break, is about getting crisp pictures from a DSLR camera and a microscope using focus stacking, sometimes called image stacking. The premise is to take a series of photos that each have a different part of the subject in focus. In a microscope, this range will be microscopic but in a park, that could be several meters. When the images are combined, he uses Adobe products, the areas in focus are saved while the out-of-focus areas are discarded and the result is a single photo with an impossible depth of focus. We can’t help but remember those light-field cameras which didn’t rely on moving lenses to focus but took many photos, each at a different focal range.

[The Thought Emporium] has shown us his photography passion before, as well as his affinity for taking the cells out of plants and unusual cuts from the butcher and even taking a noble stab at beating lactose intolerance.

Continue reading “Impossibly Huge Depth Of Focus In Microscope Photographs”

Heat Seeking Robot And Camera Tear Down

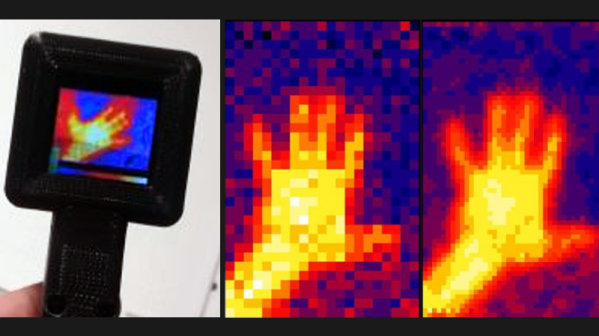
[Marco Reps] found an HT02 thermal imaging camera in his mailbox. He found the resolution was fine for looking at big objects but worthless for examining circuit boards. So he decided to just tear it into pieces — an urge we totally understand.

Inside was a thermopile sensor that was easy to reverse engineer. So [Marco] decided to rework a Raspberry Pi robot to use the camera and turn it into a heat seeker.

Continue reading “Heat Seeking Robot And Camera Tear Down”

Polaroid Gets Thermal Printer And Raspberry Pi

Despite what you may have read in the comments, we here at Hackaday are not unaware that there’s something of a “Pi Fatigue” brewing. Similar to how “Arduino” was once a dirty word around these parts, projects that are built around the world’s most popular Linux SBC are occasionally getting dismissed as lazy. Hacker crams Raspberry Pi into an old electronic device, applies hot glue liberally, posts a gallery on Imgur, and boom! Lather, rinse, repeat.

We only mention this because the following project, despite featuring the Raspberry Pi Zero grafted into a vintage Polaroid camera, is anything but lazy. In the impeccably detailed and photographed write-up, [mitxela] explains how the Pi Zero and a thermal camera recreated the classic Polaroid experience of going from shutter button to physical picture in seconds. The workmanship and attention to detail on this build is simply phenomenal, and should quell any doubts our Dear Readers may have about Raspberry Pi projects. For now, anyway.

The video after the break will show you the modded camera in operation and goes over a few highlights of the build, but for this one you really should take the time to read the entire process start to finish. [mitxela] starts off by disassembling the Polaroid camera, complete with plenty of fantastic pictures that show how this legendary piece of consumer electronics was put together. If you’ve never seen the inside of one of these cameras, you might be surprised to see what kind of interesting hardware is lurking underneath that rather unassuming exterior. From the screw-less construction to the circuits with paper substrate, a lot of fascinating engineering went into getting this camera to a mass-market price. Frankly, the teardown alone is worth checking out.

But once the camera has been stripped down to the bare frame, the real fun begins. At the conceptual level, [mitxela] replaces the camera optics with a cheap webcam, the “brains” with a Raspberry Pi Zero, and the film mechanism with the type of thermal printer used for receipts. But how he got it all connected is why this project is so impressive. Nearly every decision made during the design and construction of this camera was for the purposes of reducing boot-time. Nobody wants a camera that takes 30, 15, or even 10 seconds to boot. It has to be available as soon as you need it.

Getting this Linux-powered camera boot up in as little as 2 seconds took a lot of clever software hacks that you’ll absolutely want to check out if you’ve ever considered building an embedded Linux device. You can’t just throw a stock Raspbian image on an SD card and hope for the best. [mitxela] used buildroot to craft a custom Linux image containing only what was needed for the camera to operate, plus a bunch of esoteric tweaks that the Junior Penguin Wrangler would likely never consider. Like shaving a full second off of the boot time by disabling dumping kernel messages to the serial port during startup.

[mitxela] brought his camera to show off at the recent Hackaday London meetup, but it was far from the first time we’ve come across his handiwork. From his servo-powered music box earlier this year to his penchant for tiny MIDI devices, he’s consistently impressed our cold robot hearts.

Continue reading “Polaroid Gets Thermal Printer And Raspberry Pi”