Shutter Bug Goes Extreme With Scratch-Built Film Camera

Should a camera build start with a sand mold and molten aluminum? That’s the route [CroppedCamera] took with this thoroughly impressive camera project.

When we think of cameras these days, chances are we picture the ones that live inside the phones in our pockets. They’re the go-to image capture devices for most of us, but even for the more photographically advanced among us, when a more capable camera is called for, it’s usually an off-the-shelf DSLR from Canon, Nikon, or the like. Where do hand-built cameras fall in today’s photography world? They’re a great way to add a film option to your camera collection.

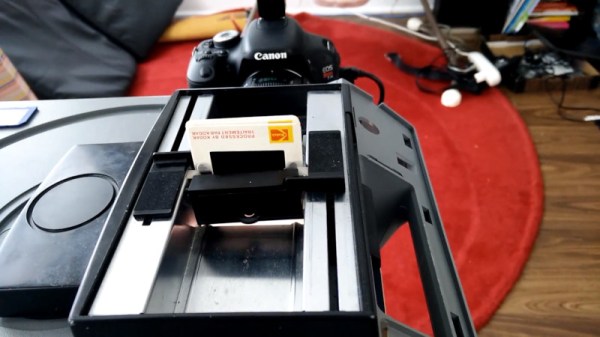
[CroppedCamera] previously built a completely custom large-format view camera, but for this build he decided that something a bit more portable might do. The body of the camera is scratch-built from aluminum, acting as the lightproof box to hold the roll film and mount the leaf-shutter lens. There’s an impressive amount of metalwork here — sand casting, bending, TIG welding, and machining all came into play, and most of them new skills to [CroppedCamera]. We were especially impressed with the shrink-fit of the lens cone to the body. It’s unconventional looking for sure, but not without its charm, and it’s sure to make a statement dangling around his neck.

It’s tough to find non-digital DIY camera builds around here — best we could do were these laser-cut plywood modular cameras. Then again, you can’t beat this wearable camera for functional style.

Continue reading “Shutter Bug Goes Extreme With Scratch-Built Film Camera”

Improved camera slider controls

Improving Controls For A Camera Slider Kit

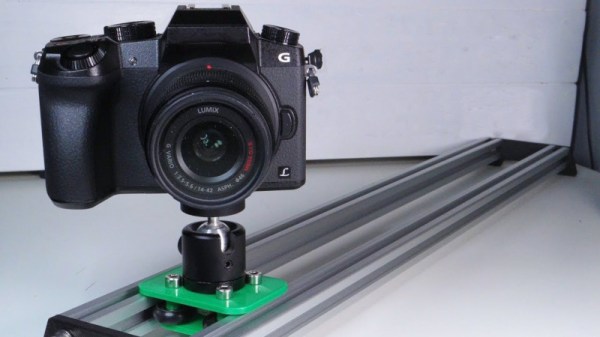
We’ve all gone through it. You buy a kit or even an assembled consumer item, and it’s either not quite right or it’s only a part of what you need. Either you do a fix, or you add to it. In [Jeremy S. Cook’s] case, he’d been working for a while with a camera slider kit which came with just the slider. He’d added a motor and limit switches but turning it on/off and reversing direction were still done by manipulating alligator clips. Now he’s put together some far better, and more professional-looking controls.

He started by replacing the DC motor with a servo motor modified for continuous rotation. Then he built a circuit around an Arduino Nano for controlling the motor and put it all in a carefully made box which he bolted to the side of the slider. A switch built into the box turns it on and off, and a potentiometer sets the direction of the slider. While not necessarily new, we do like when we see different approaches being taken, and in this case, he’s using magnets to not only hold the case’s cover on for easy access, but also a couple of them to hold the 9-volt battery in place. Check out his construction process and the new slider in action in the video below.

Continue reading “Improving Controls For A Camera Slider Kit”

Customizing STLs For Off-Brand Devices

[Rob Clarke] needed a mount for his off-brand action camera, but it’s not exactly the kind of thing with a bustling accessory market. To make matters worse, it turns out the camera is so low-key that he couldn’t find a 3D printable mount for it either. Luckily, a check with his calipers confirmed his camera is just about the same size as an old GoPro Hero 3, so all he had to do was modify an existing design to fit his needs.

As anyone who’s worked with STL files will tell you, they are a pain to modify. An STL is essentially a completed solid model, and not really meant to be fiddled around with. It’s a bit like trying to take an edited image and get back to the layers that were used to create it in Photoshop or GIMP. The final output has been “flattened”, so that granular control is lost.

That being said, [Rob] got rather lucky in this case. He found a GoPro mount that was about 90% there, he just needed to adjust the depth and change the positioning of the holes on the side. He loaded the STL into SketchUp, deleted the two sides, and replaced them with new surfaces. This gave him a clean slate to add the appropriate openings for his camera’s USB port and microSD card. To adjust the depth of the mount, he simply stretched the model out on the Z axis.

[Rob] event went ahead and released his modified STLs as a remix of the original case he found on Thingiverse for anyone else that has the same camera. That’s what we love to see.

If you’re interested in learning more about using SketchUp for designing 3D printed parts, check out this excellent guide by our very own [Brian Benchoff].

Continue reading “Customizing STLs For Off-Brand Devices”

Photographing Starman From A Million Miles Away

Love it or loathe it, launching a sports car into space is a hell of a spectacle, and did a great job at focusing the spotlight on the Falcon Heavy spacecraft. This led [Rogelio] to wonder – would it be possible to snap a photo of Starman from Earth?

[Rogelio] isn’t new to the astrophotography game, possessing a capable twin-telescope rig with star tracking capabilities and chilled CCDs for reducing noise in low-light conditions. Identifying the location of the Tesla Roadster was made easier thanks to NASA JPL tracking the object and providing ephemeris data.

Imaging the Roadster took some commitment – from [Rogelio]’s chosen shooting location, it would only be visible between 3AM and 5:30AM. Initial attempts were unsuccessful, but after staying up all night, giving up wasn’t an option. A return visit days later was similarly hopeless, and scuppered by cloud cover.

It was only after significant analysis that the problem became clear – when calculating the ephemeris of the object on NASA’s website, [Rogelio] had used the standard coordinates instead of the actual imaging location. This created enough error and meant they were looking at the wrong spot. Thanks to the wide field of view of the telescopes, however, after further analysis – Starman was captured, not just in still, but in video!

[Rogelio]’s work is a great example of practical astronomy, and if you’re keen to get involved, why not consider building your own star tracking rig? Video after the break.

[Thanks to arnonymous for the tip! If that’s a nickname and not just a request to be anonymous but misspelled.]

Continue reading “Photographing Starman From A Million Miles Away”

Photograph Of Single Atom Captured With A Plain Old Camera

The Engineering and Physical Sciences Research Council awarded a remarkable photograph its overall prize in science photography. The subject of the photograph? A single atom visible to the naked eye. Well, perhaps not exactly the naked eye, but without a microscope. In the picture above (click here to enlarge), the atom is that pale blue dot between the two needle-like structures.

You probably learned in school that you couldn’t see a single atom, and that’s usually true. But [David Nadlinger] from the University of Oxford, trapped a positively charged strontium atom in an ion trap and then irradiated it with a blue-violet laser. The atom absorbs and reemits the light, and a camera can pick up the light, creating a one-of-a-kind photograph. The camera was a Canon 5D Mk II with a 50mm f/1.8 lens — a nice camera, but nothing too exotic.

The ion trap keeps the single atom balanced between two small needle points about 2 millimeters apart. [Nadlinger] did some math that convinced him the photograph could be possible and made it a reality on a Sunday afternoon. The pale dot isn’t especially spectacular by itself, but when you realize that it is the visual effect of a single atom, it is mind-blowing. Turns out, the lab has taken some similar photographs in the past. They don’t remember who took it, but they have a picture of 9 calcium-43 ions trapped, that you can seen below. The ions are 10 microns apart and at an effective temperature of 0.001 degrees Kelvin.

Other winning photographs included patterns on a soap bubble, an EEG headset in use, and microbubbles used to deliver drugs. There’s also an underwater robot, a machine for molecular beam epitaxy that looks like a James Bond villain’s torture device, and lattices made with selective laser melting 3D printing.

If you want to look at atoms from the comfort of your own home, maybe you should build an STM. You might even try NIST’s improved atom probe while you are at it. Just remember you can’t trust atoms. They make up everything.

Photo credit: David Nadlinger

Pipes, Tees, And Gears Result In Smooth Video Shots

It’s depressingly easy to make bad videos, but it only takes a little care to turn that around. After ample lighting and decent audio — and not shooting in portrait — perhaps the biggest improvements come from stabilizing the camera while it’s moving. Giving your viewers motion sickness is bad form, after all, and to smooth out those beauty shots, a camera slider can be a big help.

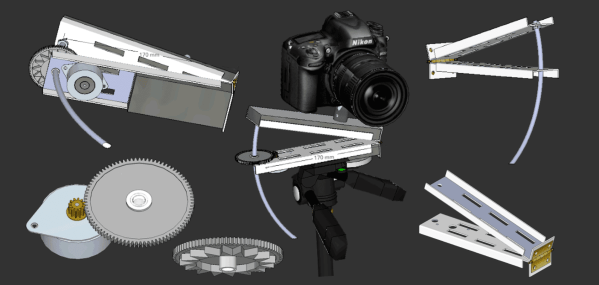
Not all camera sliders are built alike, though, and we must admit to being baffled while first watching [Rulof Maker]’s build of a smooth, synchronized pan and slide camera rig. We just couldn’t figure out how those gears were going to be put to use, but as the video below progresses, it becomes clear that this is an adjustable pantograph rig, and that [Rulof]’s eBay gears are intended to link the two sets of pantograph arms together. The arms are formed from threaded pipe and tee fittings with bearings pressed into them, which is a pretty clever construction technique that seems highly dependent on having the good fortune to find bearings with an interference fit into the threads. But still, [Rulof] makes it work, and with a little epoxy and a fair amount of finagling, he ends up with a complex linkage that yields the desired effects. And bonus points for being able to configure the motion with small adjustments to the camera bracket pivot points.

We saw a similar pantograph slider a few months back. That one was 3D-printed and linked with timing belts, but the principles are the same and the shots from both look great.

Continue reading “Pipes, Tees, And Gears Result In Smooth Video Shots”

Plastic Model Emulates The First Untethered Spacewalk

Here’s something really wonderful. [Dave Akerman] wrote up the results of his attempt to use a high-altitude balloon to try to re-create a famous image of NASA’s Bruce McCandless floating freely in space with the Earth in the background. [Dave] did this in celebration of the 34th anniversary of the first untethered spacewalk, even going so far as to launch on the same day as the original event in 1984. He had excellent results, with plenty of video and images recorded by his payload.

80’s “Astronaut with MMU” model kit.

Adhering to the actual day of the spacewalk wasn’t the only hurdle [Dave] jumped to make this happen. He tracked down an old and rare “Astronaut with MMU” (Mobile Maneuvering Unit) plastic model kit made by Revell USA and proceeded to build it and arrange for it to remain in view of the cameras. Raspberry Pi Zero Ws with cameras, LoRA hardware, action cameras, and a UBlox GPS unit all make an appearance in the balloon’s payload.

Sadly, [Bruce McCandless] passed away in late 2017, but this project is a wonderful reminder of that first untethered spacewalk. Details on the build and the payload, as well as the tracking system, are covered here on [Dave]’s blog. Videos of the launch and the inevitable balloon burst are embedded below, but more is available in the summary write-up.

Continue reading “Plastic Model Emulates The First Untethered Spacewalk”