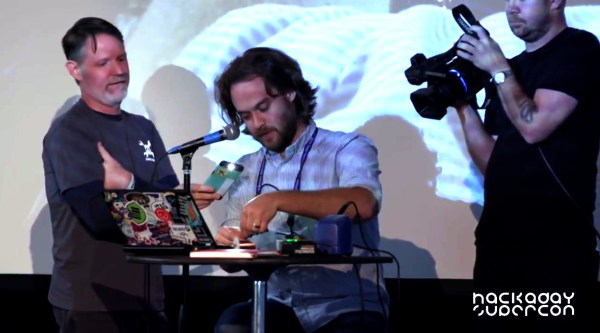
You can define the word crazy in myriad ways. Some would say using SMD resistors and QFN microcontrollers as structural elements is crazy. Some would say hand soldering QFN is crazy, much less trying to do it on edge rather than in the orientation the footprint is designed for. And of course doing it live on stage in front of people who eat flux for breakfast is just bonkers. But Zach did it anyway and I’m delighted he did.
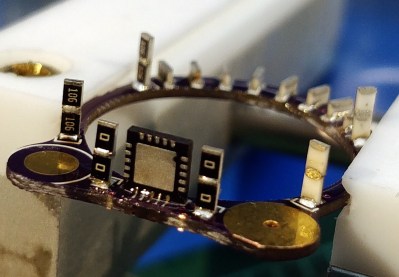
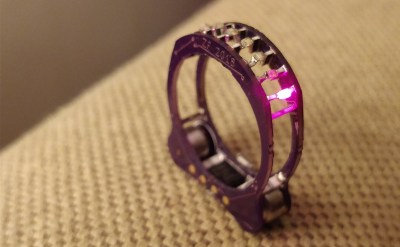 This is the cyborg ring, and it’s a one-of-a-kind leap in imagination — the kind of leap people have come to expect from Zach Fredin who modeled neurons on PCBs, depopulated an SMD LED matrix and airwired it, and replaced his ThinkPad fingerprint reader with an ARM debugger port. The construction leverages the precise nature of manufactured parts: the ATtiny85 that drives the ring is exactly twice the width of an 0805 component. This means he can bridge the two circuit boards that make up the ring with the QFN microcontroller, and then use two 10M Ohm resistors as structural spacers in a few places around the ring. The jewels in this gem of a project are red LEDs that can be addressed in an animated pattern.
 There’s an adage that all live talk demos are doomed to fail, and indeed the uC in this project doesn’t want to speak to the programmer at the end of the 9-minute exhibition. But Zach did manage to solder the two halves on the ring together live on stage, and it’s worth enduring the camera issues and low starting volume at the start of this livestream to watch him perform some crazy magic. Good on you Zach for putting yourself out there and showing everyone that there’s more than one way to stack resistors.
If this demo leaves you wanting to hear more of what Zach’s adventures, we recommend checking out his 2016 Supercon talk on the Neurobytes development and manufacturing process.
Continue reading “The Craziest Live Soldering Demo Is The Cyborg Ring”