Remoticon Video: The Mechanics Of Finite Element Analysis

Hardware hacking can be extremely multidisciplinary. If you only know bits and bytes, but not solder and electrons, you’re limited in what you can build. The same is true for mechanical design, where the forces of stress and strain suddenly apply to your project and the pile of code and PCBs comes crashing to the ground.

In the first half of his workshop, Naman Pushp walks you through some of the important first concepts in mechanical engineering — how to think about the forces in the world that act on physical objects. And he brings along a great range of home-built Jugaad props that include a gravity-defying tensegrity string sculpture and some fancy origami that help hammer the topics home.

In the second half of the workshop, Naman takes these concepts into computer simulation, and gives us good insight into the way that finite-element analysis simulation packages model these same forces on tiny chunks of your project’s geometry to see if it’ll hold up under real world load. The software he uses isn’t free by any definition — it’s not even cheap unless you have a student license — but it’s nonetheless illuminating to watch him work through the flow of roughly designing an object, putting simulated stresses and strains on it, and interpreting the results. If you’ve never used FEA tools before, or are looking for a compressed introduction to first-semester mechanical engineering, this talk might be right up your alley. Continue reading “Remoticon Video: The Mechanics Of Finite Element Analysis”

Remoticon Video: KiCad To Blender PCB Renders

We seem to want our PCB design software to do everything these days, and it almost delivers. You can not only lay it all out, check electrical and design rules, and even spit out a bill of materials, but many PCB tools produce 3D models that are good enough to check parts clearance or are useful in designing enclosures. But when it comes to producing photorealistic output, whether for advertising or just for eye-candy, you might want to turn to 3D design tools.

In this workshop, Anool Mahidharia takes the output of KiCad’s VRML export, gets it rendering in Blender, and then starts tweaking the result until you’re almost not sure if it’s the real thing or a 3D model. He starts off with a board in KiCad, included in the project’s GitHub repo, and you can follow along through the basic import, or go all the way to copying the graphics off the top of an ATtiny85 and making sure that the insides of the through-plated holes match the tops.

If you don’t know Blender, maybe you don’t know how comprehensive a 3D modelling and animation tool it is. And with the incredible power comes a notoriously steep learning curve up a high mountain. Anool doesn’t even try to turn you into a Blender expert, but focuses on the tweaks and tricks that you’ll need to make good looking PCB renders. You’ll find general purpose Blender tutorials everywhere on the net, but if you want something PCB-specific, you’ve come to the right place.

Continue reading “Remoticon Video: KiCad To Blender PCB Renders”

Remoticon Video: How To Use Max In Your Interactive Projects

When you want to quickly pull together a combination of media and user interaction, looking to some building blocks for the heavy lifting can be a lifesaver. That’s the idea behind Max, a graphical programming language that’s gained a loyal following among anyone building art installations, technology demos (think children’s museum), and user Kiosks.

Guy Dupont gets us up to speed with a how to get started with Max workshop that was held during the 2020 Hackaday Remoticon. His crash course goes through the basics of the program, and provides a set of sixteen demos that you can play with to get your feet under you. As he puts it, if you need sound, video, images, buttons, knobs, sensors, and Internet data for both input and output, then Max is worth a look. Video of the workshop can be found below.

Continue reading “Remoticon Video: How To Use Max In Your Interactive Projects”

Remoticon Video: Breaking Encrypted Firmware Workshop

If only you could get your hands on the code to fix the broken features on your beloved electronic widget. But wait, hardware hackers have the skills to write their own firmware… as long as we can get the compiled binary into a format the hardware needs.

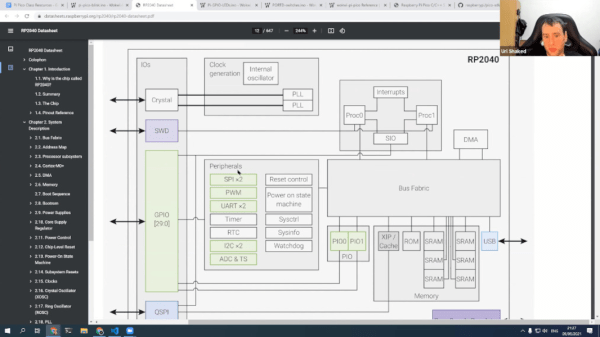
Luckily, we have Uri Shaked to walk us through that process. This workshop from the 2020 Hackaday Remoticon demonstrates how to decipher the encryption scheme used on the firmware binary of a 3D printer. Along the way, we learn about the tools and techniques that are useful for many encrypted binary deciphering adventures.

Continue reading “Remoticon Video: Breaking Encrypted Firmware Workshop”

Remoticon Video: Making Microphones And Finding Sound

A yogurt lid and embroidery hoop are key components in building this microphone. It’s a super low tech, entry-level project to get into “found sound” and exactly what is needed to start hacking around in the audio world. This workshop presented by Helen Leigh and Robyn Hails shows you how to build a simple microphone and use it as the electronic gateway to all kinds of audio shenanigans.

Key to this build are the piezo element and an amp to process the signals it generates. All other materials are common around most households, but put them together as shown in this live hands-on seminar from the 2020 Hackaday Remoticon, and I think you’ll surprise yourself with how good the thing sounds!

Continue reading “Remoticon Video: Making Microphones And Finding Sound”

Exploring Custom Firmware On Xiaomi Thermometers

If we’ve learned anything over the years, it’s that hackers love to know what the temperature is. Seriously. A stroll through the archives here at Hackaday uncovers an overwhelming number of bespoke gadgets for recording, displaying, and transmitting the current conditions. From outdoor weather stations to an ESP8266 with a DHT11 soldered on, there’s no shortage of prior art should you want to start collecting your own environmental data.

Now obviously we’re big fans of DIY it here, that’s sort of the point of the whole website. But there’s no denying that it can be hard to compete with the economies of scale, especially when dealing with imported goods. Even the most experienced hardware hacker would have trouble building something like the Xiaomi LYWSD03MMC. For as little as $4 USD each, you’ve got a slick energy efficient sensor with an integrated LCD that broadcasts the current temperature and humidity over Bluetooth Low Energy.

You could probably build your own…but why?

It’s pretty much the ideal platform for setting up a whole-house environmental monitoring system except for one detail: it’s designed to work as part of Xiaomi’s home automation system, and not necessarily the hacked-together setups that folks like us have going on at home. But that was before Aaron Christophel got on the case.

We first brought news of his ambitious project to create an open source firmware for these low-cost sensors last month, and unsurprisingly it generated quite a bit of interest. After all, folks taking existing pieces of hardware, making them better, and sharing how they did it with the world is a core tenet of this community.

Believing that such a well crafted projected deserved a second look, and frankly because I wanted to start monitoring the conditions in my own home on the cheap, I decided to order a pack of Xiaomi thermometers and dive in.

Continue reading “Exploring Custom Firmware On Xiaomi Thermometers”

How To Get Into Lost Wax Casting (with A Dash Of 3D Printing)

I’ve always thought that there are three things you can do with metal: cut it, bend it, and join it. Sure, I knew you could melt it, but that was always something that happened in big foundries- you design something and ship it off to be cast in some large angular building churning out smoke. After all, melting most metals is hard. Silver melts at 1,763 °F. Copper at 1,983 °F. Not only do you need to create an environment that can hit those temperatures, but you need to build it from materials that can withstand them.

Turns out, melting metal is not so bad. Surprisingly, I’ve found that the hardest part of the process for an engineer like myself at least, is creating the pattern to be replicated in metal. That part is pure art, but thankfully I learned that we can use technology to cheat a bit.

When I decided to take up casting earlier this year, I knew pretty much nothing about it. Before we dive into the details here, let’s go through a quick rundown to save you the first day I spent researching the process. At it’s core, here are the steps involved in lost wax, or investment, casting:

  1. Make a pattern: a wax or plastic replica of the part you’d like to create in metal
  2. Make a mold: pour plaster around the pattern, then burn out the wax to leave a hollow cavity
  3. Pour the metal: melt some metal and pour it into the cavity

I had been kicking around the idea of trying this since last fall, but didn’t really know where to begin. There seemed to be a lot of equipment involved, and I’m no sculptor, so I knew that making patterns would be a challenge. I had heard that you could 3D-print wax patterns instead of carving them by hand, but the best machine for the job is an SLA printer which is prohibitively expensive, or so I thought. Continue reading “How To Get Into Lost Wax Casting (with A Dash Of 3D Printing)”