ESP8266 Beacon Announces Your Arrival

It used to be people were happy enough to just have to push a button in their car and have the garage door open. But pushing a button means you have to use your hands, like it’s a baby toy or something. We’re living in the 21st century, surely there must be a better way! Well, if you’ve got a home automation system setup and a spare ESP8266 laying around, [aderusha] may have your solution with MQTTCarPresence.

The theory of operation here is very clever. The ESP8266 is powered via the in-dash USB port, which turns on and off with the engine. When the engine is started, the ESP8266 is powered up and immediately connects to the WiFi network and pushes an MQTT message to Home Assistant. When Home Assistant gets the notification that the ESP8266 has connected, it opens the garage door.

When [aderusha] drives out of the garage and away from the house, the ESP8266 loses connection to the network, and Home Assistant closes the door. The same principle works when he comes home: as the car approaches the house it connects to the network and the garage door opens, and when the engine is shut off in the garage, the door closes again.

The hardware side of the setup is really just a WeMos D1 mini Pro board, though he’s added an external antenna to make sure the signal gets picked up when the vehicle is rolling up. He’s also designed a very slick 3D printed case to keep it all together in a neat little package.

We’ve covered automated entry systems based on the ESP8266 before, though usually the ESP stays at home. Be sure to check out the awesome series [Elliot Williams] has on the wonders of MQTT if you’re looking to setup your own automation system.

Tricked-out Barbecue Will Make You Do A Spit Take

[Strn] and his friends love to barbecue no matter what it’s like outside. But something always seems to interrupt the fun: either it’s time to get up and turn the meat, or the music stops because somebody’s phone ran out of juice, or darkness falls and there aren’t enough flashlights or charged-up phones. He had the idea to build the Swiss Army knife of barbecues, a portable powerhouse that solves all of these problems and more (translated).

Most importantly, the E-Mangal rotates the skewers for even cooking. It does this with a 3D-printed worm gear system driven by the heater flap actuator from a car. After 25 minutes of slow rotation, a voice announces that it’s time to eat. [Strn] and friends will never hurt for music options between the pre-loaded tracks, Bluetooth audio, FM antenna, USB, and SD options running through a 3W amp. Two USB lights illuminate nighttime barbecuing, and the 10 Ah battery can do it all and keep everyone’s phone charged. For safety’s sake, [Strn] included a half-liter water tank to extinguish the coals via jet stream. Everything is run by a PIC18F, and it can be controlled at the box or through a simple web interface.

We love the look of this barbecue controller almost as much as the functionality. The sturdy stance of those short, angled legs give it a mid-century appliance feel, and seeing all the guts on display is always a plus. Grab a turkey leg and take the tour after the break.

The E-Mangal has a thermocouple in the coal box to measure the temperature, but there’s no direct control. If you’re more interested in temperature options than entertainment, here’s a project that micromanages everything on the grill.

Continue reading “Tricked-out Barbecue Will Make You Do A Spit Take”

Microsoft Gets Hacker Friendly

You don’t often hear hackers say a lot of good things about Microsoft. Sure, you might use Windows, especially if you have one of those embarrassing day jobs. But at night in a hacker’s secret lab, you are likely to find something that looks more like Unix, even if it has a penguin, a piece of fruit, or even a green robot on the label. But we’ll give Microsoft credit. Their new MakeCode site will be a great boon for educators, students, and anyone who wants to learn how to code. What’s more is they are joined by a lot of familiar hacker faces including AdaFruit, Sparkfun, and Seeed Studios.

The idea is to have tutorials and if that was all there was to it, this would be a short post. But what is really entertaining about the site is that there are web-based emulators for all the hardware so you can actually do the projects in your browser with no extra hardware. You can also do your own projects from scratch.

Continue reading “Microsoft Gets Hacker Friendly”

Improvising An EPROM Eraser

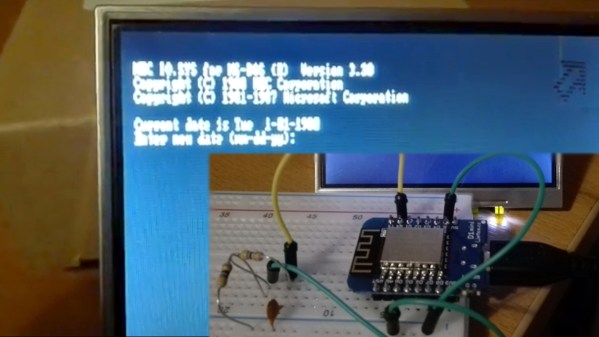
Back in the old days, when we were still twiddling bits with magnetized needles, changing the data on an EPROM wasn’t as simple as shoving it in a programmer. These memory chips were erased with UV light shining through a quartz window onto a silicon die. At the time, there were neat little blacklights in a box sold to erase these chips. There’s little need for these chip erasers now, so how do you erase and program a chip these days? Build your own chip eraser using components that would have blown minds back in the 70s.

[Charles] got his hands on an old 2764 EPROM for a project, but this chip had a problem — there was still data on it. Fortunately, old electronics are highly resistant to abuse, so he pulled out the obvious equipment to erase this chip, a 300 watt tanning lamp. This almost burnt down the house, and after a second round of erasing of six hours under the lamp, there were still unerased bits.

Our ability to generate UV light has improved dramatically over the last fifty years, and [Charles] remembered he had an assortment of LEDs, including a few tiny 5mW UV LEDs. Can five milliwatts do what three hundred watts couldn’t? Yes; the LED had the right frequency to flip a bit, and erasing an EPROM is a function of intensity and time. All you really need to do is shine a LED onto a chip for a few hours.

With this vintage chip erased, [Charles] slapped together an EPROM programmer — with a programming voltage of 21V — out of an ATMega and a bench power supply. It eventually worked, allowing [Charles]’ project, a vintage liquid crystal display, to have the right data using vintage-correct parts.

Imagine A Cluster Of ESP32s

When the ESP32 microcontroller first appeared on the market it’s a fair certainty that somewhere in a long-forgotten corner of the Internet a person said: “Imagine a Beowulf cluster of those things!”.

Someone had to do it, and it seems that the someone in question was [Kodera2t], who has made a mini-cluster of 4 ESP32 modules on a custom PCB. They might not be the boxed computers that would come to mind from a traditional cluster, but an ESP32 module is a little standalone computer with processing power that wouldn’t have looked too bad on your desktop only in the last decade. The WiFi on an ESP32 would impose an unacceptable overhead for communication between processors, and ESP32s are not blessed with wired Ethernet, so instead the board has a parallel bus formed by linking together a group of GPIO lines. There is also a shared SPI SRAM chip with a bus switchable between the four units by one of the ESp32s acting as the controller.

You might ask what the point is of such an exercise, and indeed as it is made clear, there is no point beyond interest and edification. It’s unclear what software will run upon this mini-cluster as it has so far only just reached the point of a first hardware implementation, but since ESP32 clusters aren’t exactly mainstream it will have to be something written especially for the platform.

This cluster may be somewhat unusual, but in the past we’ve brought you more conventional Beowulf clusters such as this one using the ever-popular Raspberry Pi.

Digital Mouse Trap

Plenty of PC games rely on the mouse for input, and browser games are no exception. Unfortunately though, this isn’t always the most intuitive controller. [Nathan Ramanathan] combined a couple hacks to get the controller he wanted for playing browser games like Agar and Slither. No rodents were harmed in this project.

The games he wanted to dominate were top-down view so there was no need to move the mouse far from the center of the screen. For a more intuitive interface, a Wii nunchuck with its integrated joystick was selected. Nunchucks were notoriously hackable. An Arduino converted the nunchuck’s data into mouse movements. Inside the computer, Autohotkey kept the mouse pointer reined in where it was useful. Autohotkey was a scripting tool for executing keyboard and mouse macros.

The result was a joystick which controlled these browser games exactly the way you would expect a joystick to control a game. Mouse functionality, including standard and fast scrolling, was an added bonus so games like Minecraft aren’t left behind. The ergonomics of the nunchuck make us wonder why it hasn’t been seen in more wearable hacks.

Custom game controllers are no stranger to Hackaday readers. We’ve seen them built from LEGO blocks, automobiles, and even a decorative rug.

Continue reading “Digital Mouse Trap”

Ocelot Arcade System Illustrates The Scope Of Vector Graphics

Who knows how far the Vectrex system, or vector graphics gaming in general could have gone if not for the crash of ’83? The console wars might have been completely different if not for this market saturation-based reset button.

[Matt Carr] doesn’t own a Vectrex, but he does have a Tektronix 465 oscilloscope. After an intense labor of love and documentation, he also has a shiny new vector graphics arcade system that he built himself. It’s based on a dsPIC33 and uses a dual-channel DAC to produce wire frame 3-D graphics and send X-Y coordinates to the ‘scope via phono outputs. The PIC’s internal DAC is meant for audio and didn’t do so well with graphics, so [Matt] used a TLV5618A piggybacked on the PIC’s DAC pins.

The Ocelot doesn’t take cartridges, though it might someday. For now, changing games means getting out the PICkit. There are currently two to choose from: Star Lynx, an awesome flying shooter where you get to save a feline population, and Mattsteroids, which is exactly what it sounds like. There’s only one Ocelot in existence, and although it isn’t for sale, [Matt] has terrific technical documentation should you care to replicate it. One thing you might not be able to replicate is the awesome vintage advert he made for the Ocelot, which is cued up after the break.

Don’t have a ‘scope? You can do vector graphics on a CRT with an FPGA.

Continue reading “Ocelot Arcade System Illustrates The Scope Of Vector Graphics”