Tracking Planes With An ESP8266

While there are apps that will display plane locations, [squix] wanted to build a dedicated device for plane spotting. The ESP8266 PlaneSpotter Color is a standalone device that displays a live map with plane data on a color TFT screen. This device expands on his PlaneSpotter project, adding a color display and mapping functions.

First up, the device needs to know where planes are. The ADS-B data that is transmitted from planes contains useful data including altitude, velocity, position, and an identifier unique to the aircraft. While commercial services exist for getting this data, the PlaneSpotter uses ADS-B Exchange. You can set up a Raspberry Pi to record this data, and provide it to ADS-B Exchange.

With the plane data being received from the ADS-B Exchange API, it’s time to draw to the screen. The JPEGDecoder fork for ESP8266 is used for drawing images, which are fetched from the MapQuest API as JPEGs.

Finally, geolocation is needed to determine where in the world the PlaneSpotter is. Rather than adding a GPS module, [squix] went with a cheap solution: WiFi geolocation. This uses identifying information and signal strengths from nearby WiFi access points to determine location. This project uses a public API by [Alexander Mylnikov], which returns a JSON object with longitude and latitude.

This project demonstrates what the ESP8266 is capable of, and brings together some neat techniques. If you’re looking to geolocate or display maps on an ESP8266, the code is available on Github.

Continue reading “Tracking Planes With An ESP8266”

ESP-ing A Philips Sound System.

IoT-ifying old stuff is cool. Or even new, offline stuff. It seems to be a trend. And it’s sexy. Yes, it is. Why are people doing this, you may ask: we say why not? Why shouldn’t a toaster be on the IoT? Or a drill press? Or a radio? Yes, a radio.

[Dr. Wummi] just added another device to the IoT, the Internet of Thongs as he calls it. It’s a Philips MCM205 Micro Sound System radio. He wanted to automate his radio but his original idea of building a setup with an infrared LED to remotely control it failed. He blamed it to “some funky IR voodoo”.  So he decided to go for an ESP8266 based solution with a NodeMCU. ESP8266 IR remotes have been known to work before but maybe those were just not voodoo grade.

After opening the radio up, he quickly found that the actual AM/FM Radio was a separate module. The manufacturer was kind enough to leave the pins nicely labelled on the mainboard. Pins labelled SCL/SDA hinted that AM/FM module spoke I²C. He tapped in the protocol via Bus Pirate and it was clear that the radio had an EEPROM somewhere on the main PCB. A search revealed a 24C02 IC in the board, which is a 2K I²C EEPROM. So far so good but there were other functionalities left to control, like volume or CD playing. For that, he planned to tap into the front push button knob. The push button had different resistors and were wired in series so they generated different voltages at the main board radio ADC Pins. He tried to PWM with the NodeMCU to simulate this but it just didn’t work.

Continue reading “ESP-ing A Philips Sound System.”

Hands On With The First Open Source Microcontroller

2016 was a great year for Open Hardware. The Open Source Hardware Association released their certification program, and late in the year, a few silicon wizards met in Mountain View to show off the latest happenings in the RISC-V instruction set architecture.

The RISC-V ISA is completely unlike any other computer architecture. Nearly every other chip you’ll find out there, from the 8051s in embedded controllers, 6502s found in millions of toys, to AVR, PIC, and whatever Intel is working on are closed-source designs. You cannot study these chips, you cannot manufacture these chips, and if you want to use one of these chips, your list of suppliers is dependent on who has a licensing agreement with who.

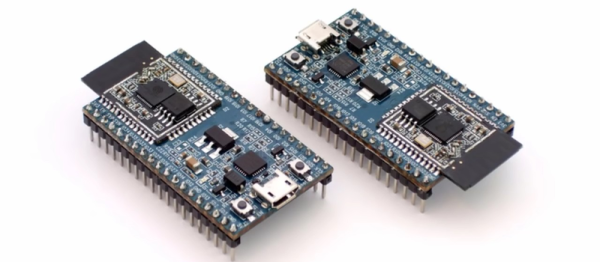
We’ve seen a lot of RISC-V stuff in recent months, from OnChip’s Open-V, and now the HiFive 1 from SiFive. The folks at SiFive offered to give me a look at the HiFive 1, so here it is, the first hands-on with the first Open Hardware microcontroller.

Continue reading “Hands On With The First Open Source Microcontroller”

Rust Running On The Realtek RTL8710: ESP8266 Alternative?

For simply getting your project connected to WiFi, a least among hacker circles, nothing beats the ESP8266. But it’s not the only player out there, and we love to see diversity in the parts and languages that we use. One of the big shortcomings of the ESP8266 is the slightly-oddball Xtensa CPU. It’s just not as widely supported by various toolchains as its ARM-based brethren.

And so, when [Zach] wanted to do some embedded work in Rust, the ESP8266 was out of the picture. He turned to the RTL8710, a very similar WiFi module made by Realtek. Documentation for the RTL8710 is, at the moment, crappy, much as the ESP8266 documentation was before the hacker community had at it. But in trade for this shortcoming, [Zach] got to use the LLVM compiler, which supports the ARM architecture, and that means he can code in Rust.

In the end, the setup that [Zach] describes is a mix of FreeRTOS and some of the mbed libraries, which should be more than enough to get you up and running fairly painlessly on the chip. We’ve actually ordered a couple of these modules ourselves, and were looking to get started in straight C, but having Rust examples working doesn’t hurt, and doesn’t look all that different.

Is anyone else using the RTL8710? An ARM-based, cheap WiFi chip should be interesting.

A Singing Arc Lighter

We’ve all been guilty of buying things we want, but don’t need. And that’s how [PodeCoet] found himself in possession of a couple of double-arc electric lighters, thanks to those far-eastern websites purveying cheap goods. ‘Tis the season of giving after all, justified [PodeCoet]. Being a hacker, the obvious thing to do was to make them belt out tinny tunes. If you’re still holding on to your gas lighters, don’t — because these electric ones are ‘oh so hackable’. Dual-arcs are the same, but twice the fun.

[PodeCoet] starts off with a tear down of the lighter, to figure out the schematic and understand how it works. There’s a charger IC for the LiPo, an unidentifiable micro-controller, a pair of FET’s driving a pair of power transistors, which in turn drive the HF output transformer at around 15.6kHz. He guesses that the “original micro-controller is probably an OTP part like a 12C508” but in the absence of a chipID he couldn’t be sure.

Instead of trying to break his head over it, he just swapped in a pin-compatible PIC12F1840. All that’s left to do is to write some quick-n-dirty code and sprinkle it with funny comments in order to modulate the output signal at audio frequencies. His first choice of tune was “We are Number One” by Lazy Town, the Icelandic educational musical comedy children’s television series (phew). But redditors are awesome, and someone asked him to add the “Imperial March” and [PodeCoet] obliged.

Since he was going to gift these lighters, the sneaky hacker added a prank in the code. Every time the button is pressed for more than two seconds, it works as normally expected and a counter is incremented. On the 20th count, and for one time only, the tune is played. No amount of pressing the button will play the tune again, confounding the user to wonder if he was hallucinating. This also helps ensure the lighter does not self-destruct prematurely, since the output transformer is likely designed for low duty cycles. His blog post contains all of the information needed to do this hack along with handy tips to avoid the problems he faced. A “Happy Birthday” tune would be great when lighting some birthday candles, we think.

[PodeCoet] has a fancy for high voltage stuff – check out “Home built Stun Baton turns you into a cop from Demolition Man“. This man surely loves his pranks, as evidenced by “Hacking your Co-Workers Label Makers“. And the farce is strong in this one — “Student trolls anti-Arduino Prof with parasite MCU“.

Continue reading “A Singing Arc Lighter”

Retrocomputing For $4 With A Z80

Sure, you’d like to get in on all the retrocomputing action you read about on Hackaday. But that takes a lot of money to buy vintage hardware, right? Sure, you can build your own, but who has time for a big major project? [Just4Fun] has a Hackaday.io project that disproves those two myths and gives you no more excuses. His retrocomputer? A 4MHz Z80 that can run BASIC with 64K of RAM, all built on a breadboard with 4 ICs. The cost? About $4.

Of course, that’s with some power shopping on eBay and assuming you have the usual stuff like breadboards, wire, small components, and a power supply. While it will gall the anti-Arduino crowd, [Just4Fun] uses an Arduino (well, an ATmega32A with the Arduino bootloader) to stand in for a host of Z80 peripheral devices. You can see a video of the device below, and there are more on the Hackaday.io project page.

Continue reading “Retrocomputing For $4 With A Z80”

8008 Exposed

[Ken Shirriff] is no stranger to Hackaday. His latest blog post is just the kind of thing we expect from him: a tear down of the venerable 8008 CPU. We suspect [Ken’s] earlier post on early CPUs pointed out the lack of a good 8008 die photo. Of course, he wasn’t satisfied to just snap the picture. He also does an analysis of the different constructs on the die.

Ever wonder why the 8008 ALU is laid out in a triangle shape? In all fairness, you probably haven’t, but you might after you look at the photomicrograph of the die. [Ken] explains why.

Continue reading “8008 Exposed”