The MIDI spec was released in 1983, and for more than thirty years every synthesizer, drum machine, and piece of computer hardware with MIDI has sported an enormous DIN-5 jack on the back. Why did they choose such a large connector? Well, MiniDIN connectors hadn’t even been invented yet, and today even MiniDIN connectors are rarely-seen, obsolete connectors.
In the last decade, MIDI has found its way into some very small machines. Those Pocket Operators have MIDI sync, you can control a Game Boy with MIDI using the right hardware, and the cute little Korg synths also have MIDI tucked away in there somewhere. You can’t put a DIN-5 jack on those things, leading to some weird implementations of MIDI over non-standard connectors.
Now the MIDI Association has weighed in on the situation. There’s now a spec for MIDI over 2.5mm and 3.5mm TRS jacks. In just a few short decades, you’ll be able to connect MIDI gear with an audio aux cable.
Although there are five connectors in a DIN-5 jack, most implementations use only two connectors to send and receive data. Synth manufacturers have capitalized on this fact and cheap TRS connectors to build their own implementation of MIDI using smaller connectors, sometimes with incompatable pinouts.
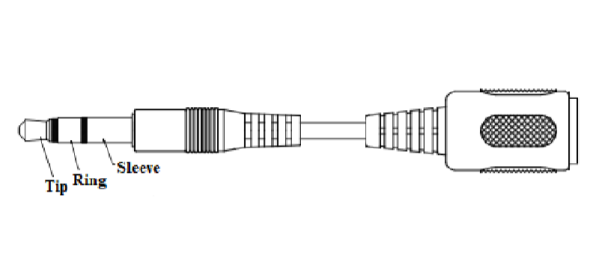
Now, though, there’s a standard. For TRS connectors, the tip is pin 5 on the DIN-5, the ring is pin 4, and the sleeve is pin 2. It sends and receives data to synths and drum machines from 1983, and it doesn’t use gigantic connectors.
The only caveats to the new MIDI standard is that 2.5mm TRS connectors are recommended, and that protection circuitry is strongly recommended in the case a headphone driver is inevitably connected to a MIDI device. Other than that, everything’s coming up roses, and this opens up the door to MIDI jacks that are much, much easier to source.


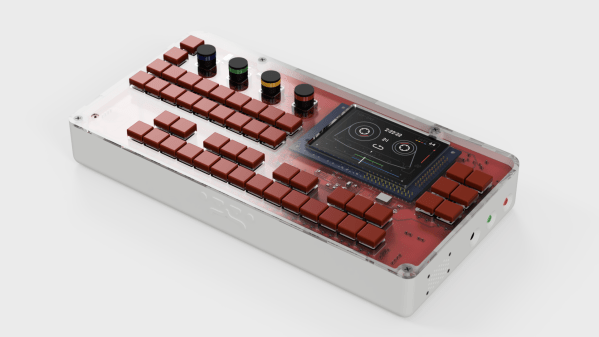
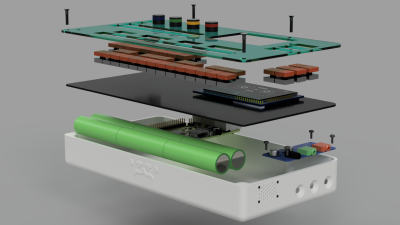 On the hardware side, the heart of the OTTO is a Raspberry Pi 3. The all-important audio interface is a Fe-Pi Audio Z V2, though a USB interface can be used. The 48 switches and four rotary encoders are wrangled by a pair of Arduino pro micros which pass the data on to the Pi. Data is related to the user through a 320×200 LCD.