MIDI To CV/Gate The Easy Way

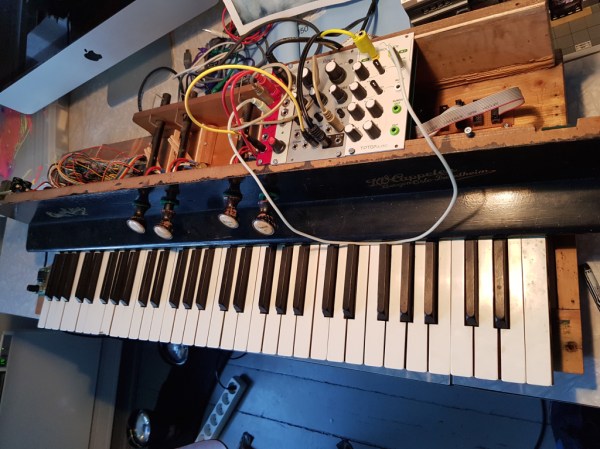
Let’s say you’ve got a modular synthesizer. You’re probably a pretty cool person. But all your cool laptop DJ friends keep showing off their MIDI-controlled hardware, and you’re getting jealous. Well, [little-scale] has the build for you.

The Teensy 3.6 is the current top-of-the-line Teensy from PJRC, and it’s [little-scale]’s weapon of choice here. With USB-MIDI and two 12-bit DACs on board, it’s made creating an interface between the worlds of analog and digital music into a remarkably simple job. Control voltages for pitch and velocity are pushed out over the analog pins, while pin 29 is used for gate signals.

It’s a testament to the amount of development that has gone into the Teensy platform that such projects can be built with virtually no off-board components. The build is a further step forward in simplicity from [little-scale]’s previous work, using a Teensy 2 with an offboard DAC to generate the output voltages.

Here at Hackaday, we’ve always been big fans of adding computer control to analog hardware. This CNC mod to a guitar pickup winding machine is a great example.

Cheap DIY MIDI To USB Adapter

[Joonas] became frustrated with cheap but crappy MIDI to USB converters, and the better commercial ones were beyond his budget. He used a Teensy LC to build one for himself and it did the job quite well. But he needed several converters, and using the Teensy LC was going to cost him a lot more than he was willing to spend. With some tinkering, he was able to build one using an Adafruit Pro Trinket which has onboard hardware UART (but no USB). This lack of USB support was a deal killer for him, so after hunting some more he settled on a clone of the Sparkfun Pro Micro. Based on the ATmega32U4, these clones were just right for his application, and the cheapest to boot. He reckons it cost him about $5 to build each of his cheap USB MIDI adapters which receive notes and pedal data from the keyboard’s MIDI OUT and transmit them to a computer

Besides the Pro Micro clone, the only other parts he used are a generic opto-coupler, a couple of resistors and a MIDI connector. After testing his simple circuit on a bread board, he managed to squeeze it all inside an old USB dongle housing, stuffing it in dead-bug style.

The heavy lifting is all done in the firmware, for which [Joonas] used LUFA — the Lightweight USB Framework for AVR’s. He wrote his own code to handle MIDI (UART) to USB MIDI messages conversion. The interesting part is his use of a 32.15 kbps baud rate even though the MIDI specification requires 31.25 kbps. He found that a slightly higher baud rate fixes a problem in the AVR USART implementation which tends to miss consecutive bytes due to the START edge not being detected. Besides this, his code is limited in functionality to only handle a few messages, mainly for playing a piano, and does not have full-fledged MIDI capabilities.

We’ve featured several of [Joonas]’s hacks here over the years, the most recent being the Beaglebone Pin-Toggling Torture Test and from earlier, How to Turn A PC On With a Knock And An ATTiny.

Adaptive guitar: pick board and controller

Hackaday Prize Entry: Adaptive Guitar

Due to a skiing accident, [Joe]’s new friend severed the motor nerves controlling her left arm. Sadly she was an avid musician who loved to play guitar — and of course, a guitar requires two hands. Or does it? Pressing the string to play the complex chords is more easily done using fingers, but strumming the strings could be done electromechanically under the control of a foot pedal. At least that’s the solution [Joe] implemented so beautifully when his friend’s family reached out for help.

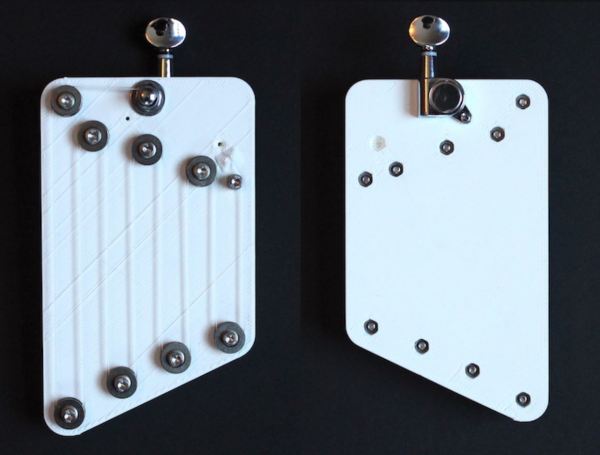
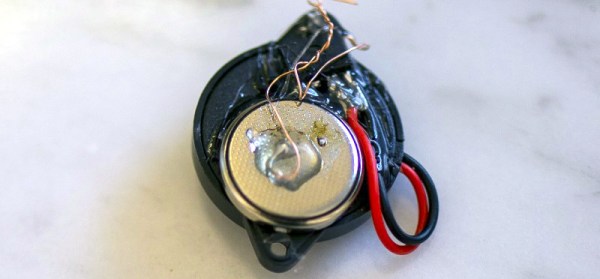
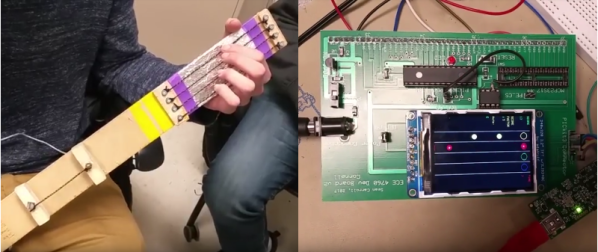
There are just so many things to enjoy while reading through [Joe]’s project logs on his hackaday.io page, which he’s entered into the Hackaday Prize. He starts out with researching how others have solved this problem. Then he takes us through his first attempts and experiments. For example, an early discovery is how pressing the strings on the fretboard pulls the string down where the picks are located, causing him to rethink his initial pick design. His criteria for the pick actuators leads him to make his own. And the actuators he made are a thing of beauty: quiet, compact, and the actuator body even doubles as part of a heat sink for his custom controller board. During his pick design iterations he gets great results using spring steel for flexibility leading up to the pick, but thinking of someday going into production, he comes up with his own custom-designed, laser-cut leaf springs, different for each string.  Needing Force Sensitive Resistors (FCRs) for the foot pedal, he iterates to making his own, laying out the needed interlinked traces on a PCB (using an Eagle script) and putting a piece of conductive rubber over it all. And that’s just a sample of the adventure he takes us on.

In terms of practicality, he’s made great efforts to make it compact and easy to set up. The foot pedal even talks to the control board on the guitar wirelessly. Non-damaging adhesives attach magnets and velcro to the guitar so that the control board and pick bridge can be precisely, yet easily, attached single-handedly. The result is something easy to manage by someone with only one working hand, both for set-up and actual playing. See it for yourself in the video below.

Continue reading “Hackaday Prize Entry: Adaptive Guitar”

Push Buttons, Create Music With A MIDI Fighter

Musicians have an array of electronic tools at their disposal to help make music these days. Some of these are instruments in and of themselves, and [Wai Lun] — inspired by the likes of Choke and Shawn Wasabi — built himself a midi fighter

Midi fighters are programmable instruments where each button can be either a note, sound byte, effect, or anything else which can be triggered by a button. [Lun]’s is controlled by an ATmega32u4 running Arduino libraries — flashed to be recognized as a Leonardo — and is compatible with a number of music production programs. He opted for anodized aluminum PCBs to eliminate flex when plugging away and give the device a more refined look. Check it out in action after the break!

Continue reading “Push Buttons, Create Music With A MIDI Fighter”

Wind Chimes And Dry Ice Make An Unusual Musical Instrument

When it comes to making music, there are really only a few ways to create the tones needed — pluck something, blow into something, or hit something. But where does that leave this dry-ice powered organ that recreates tunes with wind chimes and blocks of solid CO2?

It turns out this is firmly in the “hit something” camp, as [Leah Edwards] explains of her project. When the metal wind chime tubes come in contact with dry ice, the temperature difference sublimates the solid CO2. The puff of gas lifts the tube slightly, letting it fall back against the brick of dry ice and making a tone. The process is repeated rapidly, providing a vibrato effect while the tube is down. [Leah] used solenoids to lift the tubes and, having recently completed a stint at National Instruments, a bunch of NI gear to control them. The videos below show a few popular tunes and a little bit about the organ build. But what — no songs from Frozen?

We can easily imagine this same build using an Arduino or some other microcontroller. In fact, it puts us in mind of a recent reed organ MIDI project that has a few ideas to offer, like ways to quiet those solenoids.  Continue reading “Wind Chimes And Dry Ice Make An Unusual Musical Instrument”

Music Box Plays “Still Alive” Thanks To Automated Hole Puncher

Custom hole punch and feed system

Most projects have one or two significant aspects in which custom work or clever execution is showcased, but this Music Box Hole Punching Machine by [Josh Sheldon] and his roommate [Matt] is a delight on many levels. Not only was custom hardware made to automate punching holes in long spools of paper for feeding through a music box, but a software front end to process MIDI files means that in a way, this project is really a MIDI-to-hand-cranked-music-box converter. What a time to be alive.

The hole punch is an entirely custom-made assembly, and as [Josh] observes, making a reliable hole punch turns out to be extremely challenging. Plenty of trial and error was involved, and the project’s documentation as well as an overview video go into plenty of detail. Don’t miss the music box version of “Still Alive”, either. Both are embedded below.

Continue reading “Music Box Plays “Still Alive” Thanks To Automated Hole Puncher”

Remote Controlled Streaming Speakers

For want of a better use of a spare Raspberry Pi Zero W and a set of LogitechZ-680 surround sound speakers, [Andre van Kammen] hacked them together to make them stream music playing from his phone.

It was stumbling across the Pi Music Box distribution that really got the ball rolling, and the purchase of a pHAT DAC laid the foundation. Cracking open the speakers’ controller case, [Kammen] was able to get 5V of power off some terminals even when the speakers were on standby — awesome! — which the Pi could use. Power and volume are controlled via the Pi’s GPIO pins with a diode to drop the voltage and prevent shorts.

Now, how to tell whether the speakers are on or off? Well, a pin on the display connector changes to 4.3V when it’s on, so wiring a 10k resistor and a diode to said pin is a hackable solution. Finishing off the wired connections, it proved possible to cram the pHAT DAC inside the controller case with the GPIO header sticking out the back to mount the Pi upon with no other external wires — double awesome!

Continue reading “Remote Controlled Streaming Speakers”