Quick And Dirty MIDI Interface With USBASP

[Robson Couto] recently found himself in need of MIDI interface for a project he was working on, but didn’t want to buy one just to use it once; we’ve all been there. Being the creative fellow that he is, he decided to come up with something that not only used the parts he had on-hand but could be completed in one afternoon. Truly a hacker after our own hearts.

Searching around online, he found documentation for using an ATtiny microcontroller as a MIDI interface using V-USB. He figured it shouldn’t be too difficult to adapt that project to run on one of the many USBASP programmers he had laying around, and got to work updating the code.

Originally written for the ATtiny2313, [Robson] first had to change around the pin configuration so it would work on the ATmega8 in the USBASP, and also updated the USB-V implementation to the latest version. With the code updated, he programmed one of the USBASP adapters with a second one by connecting them together and putting a jumper on the J2 header.

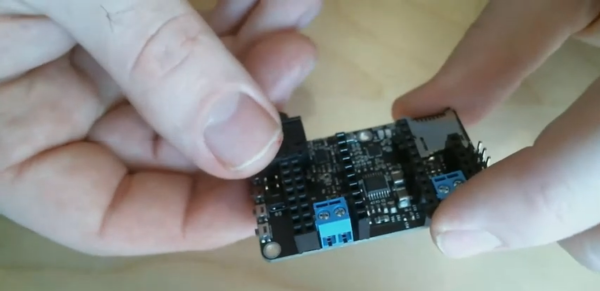
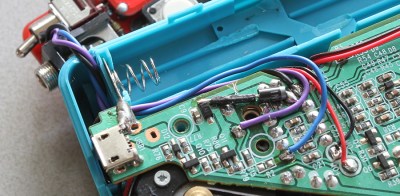
He had the software sorted, but there was still a bit of hardware work to do. To provide isolation for the MIDI device, he put together a small circuit utilizing a 6N137 optoisolator and a couple of passive components on a piece of perf board. It’s not pretty, but it does fit right into the programming connector on the USBASP. He could have fired up his PCB CNC but thought it was a bit overkill for such a simple board.

[Robson] notes that he hasn’t implemented MIDI output with his adapter, but that the code and the chip are perfectly capable of it if you need it for your project. Finding the schematic to hook up to the programmer’s TX pin is left as an exercise for the reader.

If you don’t have a USBASP in the parts bin, we’ve seen a very similar trick done with an Arduino clone in the past.

Redesigning The Musical Keyboard With Light-Up Buttons

A piano’s keyboard doesn’t make sense. If you want to want to play an F major chord, just hit an F, an A, and a C — all white keys, all in a row. If you want to play a B major chord, you hit B, a D#, and an F#. One white key, then two black ones. The piano keyboard is not isomorphic, meaning chords of the same quality have different shapes. For their entry into the Hackaday Prize, [CSCircuits] and their crew are working on a keyboard that makes chords intuitive. It’s called the Kord Kontroller, and it’s a device that would also look good hooked up to Ableton.

The layout of the Kord Kontroller puts all the scale degrees arranged in the circle of fifths in the top of the keyboard. To play 90% of western music, you’ll hit one button for a I chord, move one button to the left for a IV chord, and two buttons to the right for a V chord. Chord quality is determined by the bottom of the keyboard, with buttons for flat thirds, fourths, ninths, elevenths and fourteenths replacing or augmenting notes in the chords you want to play. Since this is effectively a MIDI controller, there are buttons to change octaves and modes.

As far as hardware goes, this keyboard is constructed out of Adafruit Trellis modules that are a 4×4 grid of silicone buttons and LEDs that can be connected together and put on a single I2C bus. The enclosure wraps these buttons up into a single 3D printed grid of button holes, and with a bit of work and hot glue, everything looks as it should.

It’s an interesting musical device, and was named as a finalist in the Musical Instrument Challenge. You can check out a demo video with a jam sesh below.

Continue reading “Redesigning The Musical Keyboard With Light-Up Buttons”

Launchpad MIDI Controller Put To Work With Python

For Hackaday readers who might not spend their free time spinning electronic beats at raves, the Launchpad by Novation is a popular peripheral for creating digital music with tools such as Ableton Live. It’s 8×8 grid of RGB LED backlit buttons are used to trigger different beats and clips by sending MIDI commands to the computer over USB. While not a strict requirement for performing digital music, it also helps that it looks like you’re flying a spaceship when using it.

It’s definitely a slick piece of gear, but the limited stock functionality means you’re unlikely to see one outside of the Beat Laboratory. Though that might change soon thanks to LPHK, created by [Ella Jameson]. She’s created a program in Python that allows you to use the Novation Launchpad as a general purpose input device. But rather than taking the easy way out by just turning the hardware into a USB HID device or something along those lines, LPHK implements an impressive set of features including its own internal scripting language.

In the video after the break, [Ella] walks us through some basic use cases, such as launching programs or controlling the system volume with individual buttons. LPKH has a GUI which provides a virtual representation of the Launchpad, and allows configuring each button’s color and function as well as saving and loading complete layouts.

For more advanced functionality, LPHK utilizes a scripting language that was inspired by the Hak5 USB Rubber Ducky. Scripts are written with plain English commands and very simple syntax, meaning you don’t need to have any programming experience to create your own functions. There’s also a script scheduling system with visual feedback right on the board: if a button is pulsing red it means it has a script waiting for its turn to execute. When the key is rapidly flashing the script is actively running. A second tap of the button will either remove it from the queue or kill the running script, depending on what the status was when you hit it.

[Ella] makes it clear this software is still a work in progress; it’s not as polished as she’d like and still has bugs, but it’s definitely functional for anyone who’s looking to wring a bit more functionality out of their $150 Launchpad. She’s actively looking for beta testers and feedback, so if you’ve already got one of these boards give it a shot and let her know what you think.

In the past we’ve seen hackers fiddling with the open source API Novation released for their Launchpad controllers, but overall there hasn’t been a lot of work done with these devices. Perhaps that will soon change with powerful software like this in development.

Continue reading “Launchpad MIDI Controller Put To Work With Python”

Analog Synth, But In Cello Form

For one reason or another, electronic synthesizing musical instruments are mostly based around the keyboard. Sure, you’ve got the theremin and other oddities, but VCAs and VCFs are mostly the domain of keyboard-style instruments, and have been for decades. That’s a shame, because the user interface of an instrument has a great deal to do with the repertoire of that instrument. Case in point: [jaromir]’s entry for the Hackaday Prize. It’s an electronic analog synth, in cello form. There’s no reason something like this couldn’t have been built in the 60s, and we’re shocked it wasn’t.

Instead of an electrified cello with a piezo on the bridge or some sort of magnetic pickup, this cello is a purely electronic instrument. The fingerboard is metal, and the strings are made of kanthal wire, the same wire that goes into wire-wound resistors. As a note is fingered, the length of the string is ‘measured’ as a value of resistance and used to control an oscillator. Yes, it’s weird, but we’re wondering why we haven’t seen anything like this before.

How does this cello sound? Remarkably like a cello. [jaromir] admits there are a few problems with the build — the fingerboard is too wide, and the fingerboard should probably be curved. That’s really an issue with the cellist, not the instrument itself, though. Seeing as how [jaromir] has never even held a cello, we’re calling this one a success. You can check out a video of this instrument playing Cello Suite No. 1 below. It actually does sound good, and there’s a lot of promise here.

Continue reading “Analog Synth, But In Cello Form”

The Portable, Digital, Visual Theremin

The theremin is, for some reason, what people think of first when they think of electronic musical instruments. Maybe that’s because it was arguably the first purely electronic musical instrument, or because there’s no mechanical analog to something that makes sound simply by waving your hand over it. This project takes that idea and cranks it up to eleven. It’s a portable synthesizer that’s controlled by IR reflectors. Just wave your hand in front of it, and that’s what pitch is going to sound.

The audio hardware for this synth is, like so many winners in the Musical Instrument Challenge in this year’s Hackaday Prize, based on the Teensy and its incredible Audio library. The code consists of two oscillators and a pink noise generator. Pressing down button one activates the oscillators, and the frequency is determined by the IR sensor. Button two cycles through various waveforms, while the third and fourth buttons shift the octaves up and down. The output is I2S, and from there everything is out to an amplifier and speaker.

Of course, it’s really not a musical instrument unless it looks cool, and that’s where this project is really great. It’s a fully 3D printed enclosure that actually looks good. There’s an 8×8 LED array to display the current waveform, and this is something that could actually be a product instead of a project. It’s a great synth, and we’re happy to have it in the running for the Hackaday Prize.

Continue reading “The Portable, Digital, Visual Theremin”

The Swiss Army Knife Of Audio Synthesis

Thirty years ago, we would be lucky if a computer could play audio. Take a computer from twenty years ago, and you’ll be lucky if it can play an MP3 in real-time. Now, computers can handle hundreds of tracks of CD-quality audio, and microcontrollers are several times more powerful than a desktop computer of the mid-90s. This means, of course, that microcontrollers can do audio very, very well. For his entry to the Hackaday Prize, [Fabien] is capitalizing on this power to create a Swiss Army knife of audio synthesis. It’s called the Noise Nugget, and it’s just what you need when you want to put audio in anything.

The microcontroller in question is an ARM Cortex-M4 running at 180MHz, with a quality DAC. There’s connectivity in the form of USB, two audio outs, one audio in, I2C, UART, and GPIOs. With this, you’ve got a digital synthesizer with a MIDI interface, audio effects for guitar pedal tomfoolery, an audio effect trigger board for playing pre-recorded sounds, a digital recorder, and a USB sound interface.

So, with all that processing power, what can the Noise Nugget actually do? Well, first of all, it’s a sampler. [Fabien] has a video demo of the Noise Nugget set up in sampler mode, where it can play a lute-ish sample and a cat sound. All of this is controlled over MIDI and played through a cheap speaker. The results — except for the cat sample — sound great. You can check that video out below.

Continue reading “The Swiss Army Knife Of Audio Synthesis”

Wavetable General MIDI For Everyone

There are only so many ways to generate music with a computer, and by far the most popular method is MIDI. It’s been around for thirty-five years, and you don’t get to be a decades-old standard for no reason. That said, turning MIDI into audio is a pain, but this project in the Musical Instrument Challenge for the Hackaday Prize makes it easy. It’s a Fluxamasynth Module that turns MIDI into something you can hear.

The key to this build is a single chip that takes MIDI data in and spits out audio, according to the 128 general MIDI sounds. This might not sound like much, but if you’ve ever tried to turn MIDI into sound, you’ll find your options are limited. There is exactly one chip that can do this and is easily obtainable: the SAM2695 from Dream Sound Synthesis. This chip was originally designed for cheap toy keyboards, but if you have a chip, you can do anything with it.

The Fluxamasynth Modules are inspired by the original Fluxamasynth, an Arduino shield that is basically a breakout board for the SAM chip. There’s a MIDI in, and an 1/8″ jack for output, and not much else. The Fluxamasynth Modules extend the capability by adding more support, including stereo output, reverb, chorus, flange, and delay effects, and digs down deep into the configurable parameters for tuning.

The hardware is basically an audio appliance for the Arduino, Raspberry Pi, and the ESP32, and allows for generative music through code. You can see an example of this project in the video below.

Continue reading “Wavetable General MIDI For Everyone”