DIY Gaming Mouse Beats The Competition, Costs Less

We’ve seen plenty of custom keyboards here on Hackaday. Seriously, like more than we can count. But custom mice? Those are far more elusive. Though we wouldn’t be surprised to see that change should this excellent example from [Tyler Richard] catch on.

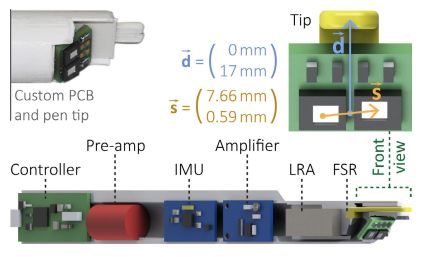
How the mouse sees the date on a US quarter

The goal was to build a customizable mouse that could match the performance of Logitech’s MX Master 3, but without the $100 USD price tag. In the end, [Tyler] says his mouse is around 10x as responsive thanks to a 1,000 Hz refresh rate, and the total cost is just a fraction of the retail price of the Logitech. Though as you might expect, there’s a catch or two.

For one thing, he says getting your hands on the PixArt PMW3389 mouse sensor in single quantities can be difficult. It seems like he was able to secure a sample because he’s a student, but you’ll have to figure out your own way to con secure one from the company. There’s also no friendly GUI to configure the mouse, and indeed, you’ll need to write some code should you want to modify any of its buttons. Oh, and despite the fact that the cheapo donor mouse you need to use for parts is wireless, the replacement guts you’ll be fitting it with currently only support wired operation.

Alright, we’ll admit it’s not perfect. But it’s still a huge step in the right direction if you care about being able to spin up your own input devices. With some refinement, and perhaps somebody willing to do bulk buy of the sensors, we could see this project becoming quite popular. In the meantime, you may have to settle for a macro stool.

Want To Use A Classic Mac Mouse On A Modern Computer? No? Here’s How To Do It Anyway

Need to hook a classic Mac mouse up to your modern machine with the help of a DIY USB adapter? [John Floren] has you covered. [John]’s solution uses a board with an ATmega32U4 microcontroller on it to connect to the Mac mouse on one end, and emulate a USB HID (Human Interface Device) on the other. A modern machine therefore recognizes it like it would any other USB input device.

Why is this necessary? The connector on the classic Mac mouse may look like a familiar DE-9 connector, but it is not an RS-232 device and wouldn’t work if it were plugged into a 9-pin serial port. The classic Mac mouse uses a different pinout, and doesn’t have much for brains on the inside. It relies on the host computer to read its encoders and button states directly.

This project is actually a bit of an update to a piece of earlier work [John] did in making a vintage Depraz mouse work with modern systems. He suspected that it wouldn’t take much to have it also work with a classic Mac mouse, and he was right — all it took was updating the pin connections and adding some pull-up resistors. The source code and design files are on GitHub.

Even if one does not particularly want to use a classic Mac mouse for daily work, there’s definitely value in this kind of thing for those who deal in vintage hardware: it allows one to function-check old peripherals without having to fire up a vintage machine.

Continue reading “Want To Use A Classic Mac Mouse On A Modern Computer? No? Here’s How To Do It Anyway”

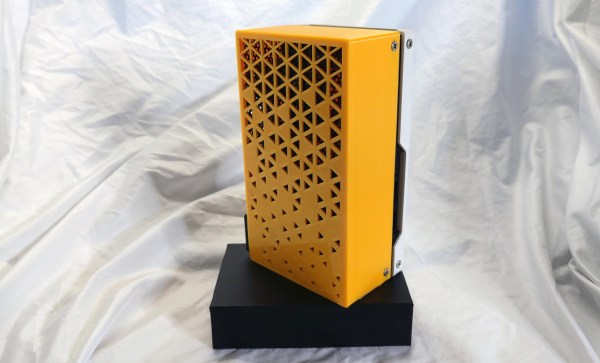
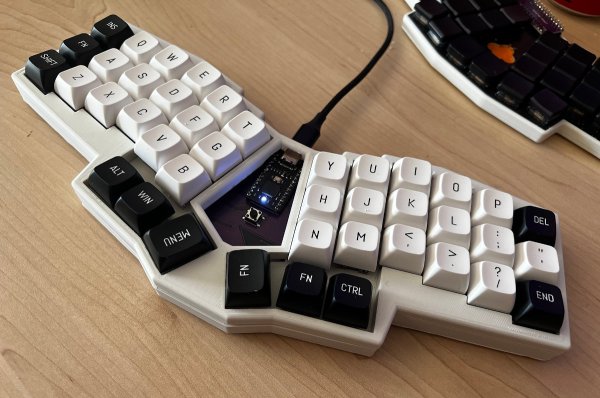
The keyboard, fully assembled, with black 3D printed body.

From Product To Burnout To Open-Source: The Ergo S-1 Keyboard Story

[Andrew] from [Wizard Keyboards] emailed us and asked if we were interested in his story of developing an ergonomic keyboard as a product. Many of us can relate to trying to bring one of our ideas to market. [Andrew], being a mechanical keyboard geek, knew a niche with no product to satisfy it, and had a vision he wanted to implement. He started meticulously going through steps for bringing his keyboard idea into life as a manufacturable product, and gave himself six months to get it done.

 Internals of the keyboard, showing the lower half with the mainboard on the left, and upper half of the keyboard with an FPC connecting keyswitches together on the right

After evaluating competing products and setting a price point, he designed the case, the keyboard’s mainboard, and even flexible circuit boards for wiring the keys up. The mechanical design alone had him go through many iterations and decisions, and he walks us through the different paths he’s faced. Whether it’s these insights, a story of a module with fraudulent FCC certification, or an approach to electronics design that led to him passing EMC tests with flying colors, there’s plenty to learn from [Andrew]’s journey.

Sadly, at some point, the project quickly outgrew the intended goal and became a drain. For instance, tuning the 3D printing processes alone took three months instead of one as planned. As the design was done, he got stuck on marketing material production – a field that turned out to be unexpectedly hostile to a hacker like him. After a year of work and five thousand hours of work spent on the project, he took a break, and afterwards, as he was trying to come back, [Andrew] realized that he has burned out. He took a few month long hiatus, and having recovered a bit, revisited the project. Still not thrilled about the product route, he decided that open-sourcing the keyboard would be the best outcome – doing justice to the time and effort spent working on it.

This is where the story ends – for now. [Andrew] has open-sourced everything one would need to create such a keyboard by yourself, designed assembly instructions, and even sells kit parts for those who’d like to take a shortcut. This wasn’t what he aimed for, but it’s a honorable ending – most commercial projects never get open-sourced even if they utterly fail to launch. Thanks to [Andrew], we got an insightful journey, a postmortem, and an open-source ergonomic keyboard project. Product stories grace our pages every now and then – here’s a similarly swerving story about a MIDI controller.

The Rollercoaster Of Developing The Ultimate Hackable Keyboard

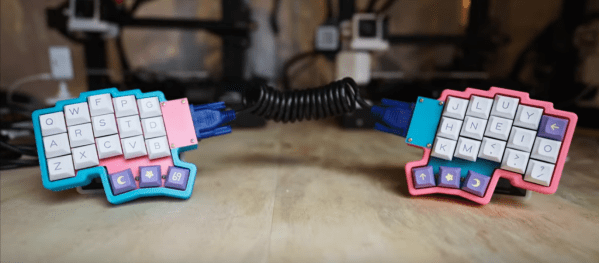
When designing anything with “hackable” in the punchline, scope creep is an integral part of the process. You end up trying to create something to potentially be an infinite number of things for an infinite number of users. [Zack Freedman] is going really deep down the rabbit hole with his MiRage keyboard and has been documenting the progress in his usual entertaining style, with some cautionary notes included.

The most fascinating tale from this come about as a result of adding RGB LEDs beneath the keys, while still allowing everything to function when the keyboard is split in two. Thanks to an IO expander chip in one side of the board, a standard TRRS audio cable is enough to link both sides together. But the addition of addressable LEDs meant more lines were required.

[Zack] thought he had found a solution in the form of SATA cables, but it turns out all SATA cables internally connect pins 1,3, and 7, making them useless for this application. He realized he had no choice but to add a second microcontroller to the “dumb” side of the keyboard and return to I2C over a TRRS cable. However, the RP2040-based Seeed XIAO’s I2C absolutely refused to play along. After a fortnight of frustrating debugging, it turns out there was a bug in the pin definitions. Fortunately, this also revealed that the XIAO had an undocumented secondary I2C interface, which he plans to configure as a peripheral to make the keyboard almost infinitely expandable with additional keys.

An earlier version of the MiRage featured tactile OLED displays, but it turns out the thin panes of glass don’t handle repeated flexing well, so they had to be scrapped. In their place came a touchscreen E-paper display, but now this seems to be evolving into a pluggable module for any input device that your heart desires, including possibly a haptic SmartKnob. Another major update are PCB footprints that support both CHOC and MX switches.

It all started with the MiRage V1 keyboard intended to for use in an updated version of [Zack]’s cyberdeck. After realizing how many people were interested in the keyboard but not the cyberdeck, he shifted focus to refining the MiRage.

This project still has some way to go, so we’ll certainly be keeping our eye on it. In the meantime, we’ve recently covered another exceptionally customizable keyboard that might catch your fancy.

Continue reading “The Rollercoaster Of Developing The Ultimate Hackable Keyboard”

Upgraded Film Scanner Handles Bigger Formats At No Cost

Film scanners are a useful tool for digitizing slides and negatives, and the Plustek 8100 that [Christian Chapman] had was capable, but limited to small format film only. Rather than pay for a much more expensive medium format scanner that could handle 120 film, he modified his 8100 to accomplish the same thing with a combination of good old software and hardware tampering.

On the software side, [Christian] modified a driver for the Plustek 8100 so that it sweeps the scan head further than usual. At the application level, to scan medium format frames, it does a total of four scans: one for each quadrant. The results get stitched together in software with a thoughtfully-designed shell script that provides previews and handles failures and restarts gracefully.

Hardware-wise, the scanning carriage needs modification to ensure nothing interferes with the scan head as it moves further than originally designed. Some CAD and 3D printing made short work of this. Incidentally, this hardware mod is an excellent demonstration of one of the core strengths of 3D printing: the ability to make geometrically-straightforward objects that would nevertheless be troublesome or impractical to construct in any other way.

A Customizable Macropad To Make Anyone’s Tail Wag

[Gili Yankovitch] has always wanted some kind of macro keypad for all those boss-slaying combos he keeps up the sleeve of his wizard robe while playing WoW. Seventeen years later, he finally threw down the gauntlet and built one. But really, this is an understatement, because Paws is kind of the customizable macropad to end all customizable macropads.

This thing is completely bespoke, and yet cookie cutter at the same time — but we mean that in the best possible way. Paws can be made in any shape or form, and quite easily. How is this even possible, you ask? Well, every single key has its own microcontroller.

Yep, each key has an ATtiny85 and a cute little ribbon cable, and these form a token ring network that talks to an Arduino, which provides the keyboard interface to the computer. To make things even easier, [Gili] built a simple programming UI that automatically recognizes the configuration and number of keys, and lets the user choose the most important bit of all — the color of the LED.

[Gili] wanted to combine all the skills he’s learned since the worst timeline started in early 2020 — embedded software, CAD, electronics, and PCB design. We’d like to add networking to that list, especially since he figured out a nice workaround for the slowness of I²C and the limitations of communication between the ‘tiny85s and the Arduino. Though [Gili] may have started out with a tall order, he definitely filled it. Want to get your paws on the design files? Just claw your way over to GitHub.

If your customization interests lie more toward what program is in focus, be sure to check out Keybon, which was one of the many awesome winners of our Odd Inputs and Peculiar Peripherals contest.