Dynamic Macro Keyboard Controls All The Things

Keyboard shortcuts are great. Even so, a person can only be expected to remember so many shortcuts and hit them accurately while giving a presentation over Zoom. [Sebastian] needed a good set of of shortcuts for OBS and decided to make a macro keyboard to help out. By the time he was finished, [Sebastian] had macro’d all the things and built a beautiful and smart peripheral that anyone with a pulse would likely love to have gracing their desk.

The design started with OBS, but this slick little keyboard turned into a system-wide assistant. It assigns the eight keys dynamically based on the program that has focus, and even updates the icon to show changes like the microphone status.

This is done with a Python script on the PC that monitors the running programs and updates the macro keeb accordingly using a serial protocol that [Sebastian] wrote. Thanks to the flexibility of this design, [Sebastian] can even use it to control the office light over MQTT and make the CO2 monitor send a color-coded warning to the jog wheel when there’s trouble in the air.

This project is wide open with fabulous documentation, and [Sebastian] is eager to see what improvements and alternative enclosure materials people come up with. Be sure to check out the walk-through/build video after the break.

Inspired to make your own, but want to start smaller? There are plenty to admire around here.

Continue reading “Dynamic Macro Keyboard Controls All The Things”

Using MIDI To Solve A Keyboard Shortcut Problem

[Pete] admits that his MIDI-based slide advance alert system is definitely a niche solution to a niche problem, but it is a wonderful example of using available tools to serve a specific need. The issue was this: [Pete] is involved in numerous presentations streamed over video, and needed a simple and effective way for the Presenter to notify the Producer (the one responsible for the video streaming and camera switching) to discreetly advance slides on cue.

To most of us, this is a simple problem to solve. Provide the presenter with a USB macro keyboard to trigger the keyboard shortcuts for slide advancement, and the job’s done. But that didn’t quite cut it for [Pete]. In their situation, the Producer is managing more than just the slides as they switch between cameras, watch the chat window, and manage the video streaming itself. Triggering slide advancement via keyboard shortcuts only works if the presentation software is in focus when the buttons are pressed, which isn’t guaranteed.

[Pete’s] solution was to make a small two-button device (one button for next slide, one for previous slide) that uses MIDI to communicate with a small custom application on the producer’s machine, and doesn’t care about application focus. Pressing the slide advance button plays a distinct tone into the producer’s headphones, plus the custom application displays “Forward”, “Back”, or “Waiting” in a window, depending on the state of the Presenter’s buttons. The design is available on Instructables for anyone wanting a closer look.

[Pete] reports that it works and it’s far more discreet than saying “next slide, please” twenty or more times per presentation. You may notice from the photo that LEGO bricks play a prominent part in the device, and if you’d like to see more of that sort of thing, make sure to check out these other brick-mountable PCB designs.

FreeTouchDeck Upgrades Its Hardware And Its Name: ESP32 Touchdown

With many folks continuing to work from home for far longer than they ever thought, it’s no surprise that we’re seeing the rise of small DIY devices to make that video call or virtual presentation a little easier. [Dustin Watts] was interested in the functionality of the Elgato Stream Deck — a macro keyboard where each key is its own screen. But that kind of fancy hardware comes with a formidable price tag. So he built his own, and made it open source!

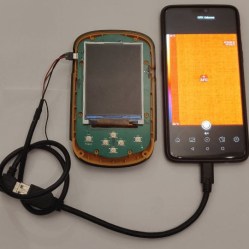
His first iteration — FreeTouchDeck — was built using commonly available modules but has since evolved into the ESP32 Touchdown which does it all with a single PCB. It’s a highly-customizable touchscreen macro keyboard which provide easy access shortcuts and macros for quick actions. Need a quick mute button, want to switch camera views on OBS, or maybe you want smarter shortcut keys for your CAD of choice. This will can get you there.

There a few key differences from the first version (FreeTouchDeck). The ESP32 dev board was ditched for a tidy PCB the directly integrates the module. This one has a capacitive touch controller (FT6236) rather than a resistive one as the capacitive screens deliver a far nicer user experience. A built-in battery and charger circuit (which the FreeTouchDesk didn’t have) allows for the extra bit of flexibility to stream from anywhere (within wireless range of course). Multiple case designs are available in STL form that allows it to be placed on a wall or desk with ease.

Datasheets, gerbers, kicad files, BOMs, and example firmware is provided on GitHub. The software is easily configurable so it can be set up to do any sort of macro, key combination, or action. This isn’t just limited to emulating a Bluetooth keyboard as there are examples showing how to connect to Home Assistant. All in all, this is a wonderful example of continued iteration on a project.

Thanks [Timothy Gregory] for sending this one in!

This Joy-Con Grip Steers Its Way To Sweaty Victory

Here at Hackaday we’re always exited to see hacks that recycle our favorite childhood consoles into something new and interesting. In that context, it’s not so uncommon to see mods which combine new and unusual control methods with old devices in ways that their manufacturers never intended. What [Mike Choi] has built with the Labo Fit Adventure Kit is the rare hack that combines radically new control schemes with a modern console: without actually modifying any hardware.

Face button pusher in blue

In short, the Labo Fit Adventure Kit lets the player play Mario Kart on the Nintendo Switch by riding a stationary exercise bike, steering with a wheel, and squeezing that wheel to use items. The Fit Kit combines the theme of Labo, Nintendo’s excellent cardboard building kit for the Nintendo Switch with the existing Ring-Con accessory for the unrelated Nintendo game Ring Fit Adventure plus a collection of custom hardware to tie it all together. That hardware senses cadence on the stationary bike, watches for the user to squeeze the handheld wheel controller, and translates those inputs to button presses on the controller to play the game.

Shoulder button pusher in green

The most fascinating element of this project is the TAPBO module which adapts the Joy-Con controller to remote input. The module includes electronics, actuators, and a clever mechanical design to allow it to be mounted to the Ring-Con in place of an unmodified Joy-Con. Electrically the components will be familiar to regular Hackaday readers; there is a breakout board for a Teensy which also holds an XBee module to receive inputs remotely and drive a pair of servos. The entire module is described in detail starting at 4:42 in the video.

Mechanically the TAPBO relies on a pair of cam-actuated arms which translate rotational servo motion into linear action to press shoulder or face buttons. The module directly measures flex of the Ring-Con with an added flexible resistor and receives cadence information from another module embedded in the stationary bike via Zigbee. When these inputs exceed set thresholds they drive the servos to press the appropriate controller buttons to accelerate or use an item.

We’ve focused pretty heavily on the technical aspects of this project, but this significantly undersells the level of polish and easy to understand documentation [Mike] has produced. It includes a TAPBO Amiibo in customized packaging, and more. Check out the full video to get the complete scope of this project.

Continue reading “This Joy-Con Grip Steers Its Way To Sweaty Victory”

Master Video Call Control Panel Is Made Of PCBs

[memestra] is a teacher whose life has become a series of videoconferences over the last year or so. With all the classes and meetings, they spend the whole day switching between either Zoom, Teams, or Meet. If anyone needs a single piece of hardware to control them all, it’s [memestra]. Well, and every other teacher out there.

The hardware — an Arduino Pro Micro and some buttons — should come as no surprise, except for maybe [memstra]’s use of a resistor network for the LEDs. Still, there’s a lot to like about this little box, starting with the enclosure. That’s not milled or laser-cut metal — each side is a PCB, and they’re all soldered together into a box.

We especially like the top panel, which fits down over the PCB that all the components are soldered to. Each of the non-volume buttons has multiple functions that are accessed by pressing, long pressing, or double pressing. But even the volume buttons do double duty: press them together to mute and un-mute. If [memestra] ever forgets which button does what and how, there’s a handy reference table silkscreened on the bottom panel.

In true teacher fashion, [memestra] has written comprehensive instructions for anyone looking to build a similar device. The heavily-commented code should make it a cinch to drop in keyboard shortcuts for Discord or anything else you might be using, though it’s worth noting that this box is optimized for the desktop apps and not the browser-based versions.

Just looking for a fun way to end video calls? Pull chains are pretty fun.

Giant DIY Mouse Sets The Ball Free

Make the move to a split keyboard and the first thing you’ll notice is that you have all this real estate between the two halves. (Well, as long as you’re doing it right). This is the perfect place to keep your cat, your coffee cup, or in [Jacek]’s case, your fantastic DIY trackball mouse.

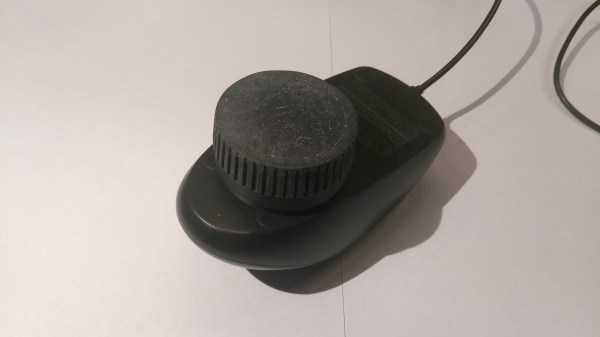
Don’t be fooled by the orange plastic base — all the electronics are rolled up inside that big sexy ball, which [Jacek] printed in two halves and glued together. Inside the ball there’s an Adafruit Feather nRF52840 Sense, which has an onboard accelerometer, gyroscope, and magnetometer. As you’ll see in the video after the break, the Feather takes readings from these and applies a sensor-fusing algorithm to determine the ball’s orientation in 3D space before sending its position to the computer. To send the click events, [Jacek] baked some mouse buttons into the keyboard’s firmware. Among the other Feather sensors is a PDM MEMS microphone, so detecting taps on the ball and translating them to clicks is not out of the question for a future version.

Here comes the really clever part: there are two reed switches inside the ball. One is used as a power switch, and the other is for setting the ‘up’ direction of the trackball. The ball charges wirelessly in a 3D printed base, which also has a small neodymium magnet for activating the reed switches. Check out the demo after the break, which shows [Jacek] putting the trackball through its paces on a mouse accuracy testing program.

If you prefer your DIY trackballs to be more standard looking, click on over to the Ploopy project.

Continue reading “Giant DIY Mouse Sets The Ball Free”

This Negative Reinforcement Keyboard May Shock You

We wouldn’t be where we are today without Mrs. Coldiron’s middle school typing class. Even though she may have wanted to, she never did use negative reinforcement to improve our typing speed or technique. We unruly teenagers might have learned to type a lot faster if those IBM Selectrics had been wired up for discipline like [3DPrintedLife]’s terrifying, tingle-inducing typist trainer keyboard (YouTube, embedded below).

This keyboard uses capsense modules and a neural network to detect whether the user is touch-typing or just hunting and pecking. If you’re doing it wrong, you’ll get a shock from the guts of a prank shock pen every time you peck the T or Y keys. Oh, and just for fun, there’s a 20 V LED bar across the top that is supposed to deter you from looking down at your hands with randomized and blindingly bright strobing light.

Twenty-four of the keys are connected in groups of three by finger usage — for example Q, A, and Z are wired to the same capsense module. These are all wired up to a Raspberry Pi Zero along with the light bar. [3DPrintedLife] was getting a lot of cross-talk between capsense modules, so they solved the problem in software by training a TensorFlow model with a ton of both proper and improper typing data.

We love the little meter on the touchscreen that shows at a glance how you’re doing in the touch typing department. As the meter inches leftward, you know you’re in for a shock. [3DPrintedLife] even built in some games that use pain to promote faster and more accurate typing. Check out the build video after the break, but don’t say we didn’t warn you about the strobing lights.

The secret to the shock pen is a tiny flyback transformer like the kind used in CRT televisions. Find a full-sized flyback transformer and you can build yourself a handheld high-voltage power supply.

Continue reading “This Negative Reinforcement Keyboard May Shock You”