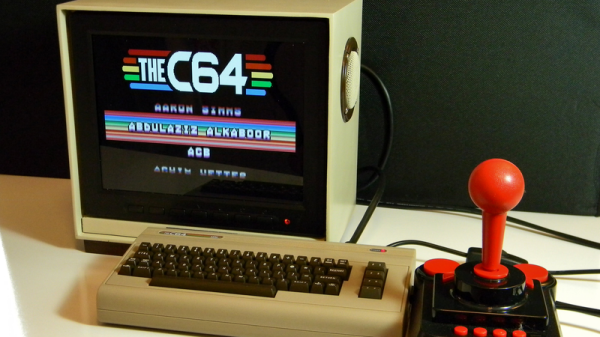
Classic games never seem to have gone out of style and with the emulation powers of the Raspberry Pi, there seems to be no end of projects folks have been coming up with. [Chris Mills] project is a great looking monitor to get his Commodore 64 fix by combining the retro looks of a home-made 64-style monitor with the Raspberry Pi.
[Chris] is only interested in Commodore 64 emulation, at least with this project, and wanted something that would fit on a desk without taking up too much room. An eight inch LCD security monitor fit the bill perfectly. [Chris] ended up building a wooden enclosure for the monitor to give it that Commodore look. The monitor, power supply and cable connections fit inside along with speakers; each of these having their inputs on the back. A fan vents in the back as well and the Pi sits outside running the Combian 64 emulation software.
[Chris] has put up some galleries of buildpics. The logo from the old Commodore logo is a nice touch. Read over the Hackaday site and you could build your own Commodore 64, or use the Commodore 64 itself to house the Raspberry Pi if you wanted.
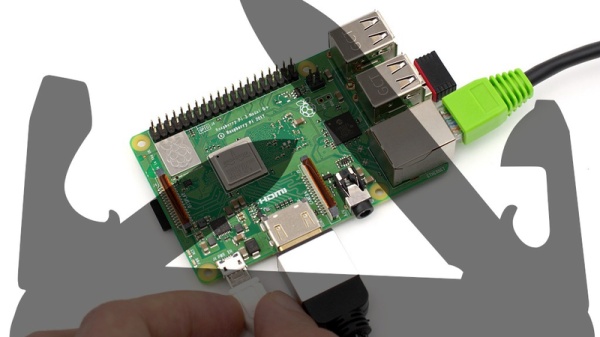
By now most of us have used a Raspberry Pi at some level or another. As a headless server it’s a great tool because of its price point, and as an interface to the outside world the GPIO pins are incredibly easy to access with a simple Python script. For anyone looking for guidance on using this device at a higher level, though, [Arun] recently created a how-to for using some of the Pi’s available communications protocols.
Intended to be a do-everything “poor man’s hardware hacking tool” as [Arun] claims, his instruction manual details all the ways that a Raspberry Pi can communicate with other devices using SPI and I2C, two of the most common methods of interacting with other hardware beyond simple relays. If you need to go deeper, the Pi can also be used as a full JTAG interface or SWD programmer for ARM chips. Naturally, UART serial is baked in. What more do you need?
As either a tool to keep in your toolbox for all the times you need to communicate with various pieces of hardware, or as a primer for understanding more intricate ways of using a Raspberry Pi to communicate with things like sensors or other computers, this is a great write-up. We also have more information about SPI if you’re curious as to how the protocol works.
Back in February at the Hacker Hotel camp in the Netherlands, among the many pieces of work around the venue was a rather attractive LED cube. Very pretty, but LED cubes have been done many times before.
If a casual attendee had taken the time to ask though, they might have found something a little more interesting, for while the cube in question might have had the same hardware as the others it certainy didn’t have the same software. [Polyfloyd] had equipped his LED cube with OpenGL shaders to map arbitrary images to the cube’s pixels in 3D space.
Hardware-wise it’s the same collection of AliExpress LED panels and Raspberry Pi driver board that the other cubes use, in this case mounted on a custom laser-cut frame. Driver software comes from an open-source library round which he’s put a wrapper allowing input through a UNIX pipe. This can take the RGB output of an OpenGL shader, of which he has created both 2D to 3D and spherical projection versions. The must-see demo is a global map of light pollution, and the result is a rather impressive piece of work.
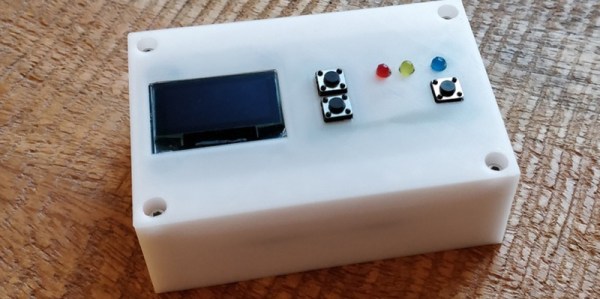
Unless you’re one of the cool people who uses the same password everywhere, you might be in need of a hardware device that keeps your usernames and passwords handy. The Passkeeper is a hardware password storage system built on a Raspberry Pi. It encrypts your passwords, and only through the magic of a special key fob will you ever get your passwords out of this device.
The hardware for this device is built around the Raspberry Pi Zero. You might be questioning the use of a Pi Zero, but given that it’s an entire Linux system for just a few bucks, it only makes sense. The rest of the hardware is a tiny OLED SPI display, an RFID card reader, a few LEDs, some wire, and some solder. A 3D printed case keeps everything together.
Of course, this build is all about the software, and for that, the Passkeeper device is built in Go, with a system that builds a web interface, builds the firmware, and writes everything to an SD card. Usage is simply plugging the Passkeeper into the USB port of your computer where it presents itself as a network interface. Everything is available by pinging an IP address, and after that the web UI will log your usernames and passwords. All this data is encrypted, and can only be unlocked if an RFID key fob is present. It’s an interesting idea and certinaly inexpensive. It’s not quite as polished as something like the Mooltipass, but if you have a Pi around and don’t have a password keeper, this is something to build this weekend.
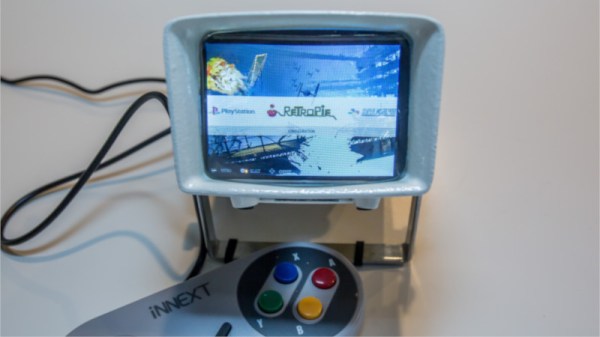
35mm still photography is still hanging on out in the wild, with its hardcore fans ensuring it never quite dies out despite the onward march of digital imaging. Slides are an even more obsolete technology, forgotten long ago when the quality of color negative films improved. The related paraphernalia from the era of the photographic slide continues to clutter up attics and garages the world over. [Martin Burlus] was in possession of some retro slide viewers, and found they made an excellent basis for a RetroPie build.
The build relies on stock standard fundamentals – a Pi Zero runs the show, combined with a USB hub and a power supply. [Martin] then chose to build this all inside the case of the slide viewer, combined with a 2.8″ PiTFT display. This neatly slots directly on to the Pi Zero’s 40-pin header, and comes complete with a touch screen. It’s the perfect size to slide into most slide viewers, though some models required removal of the tact buttons.
Audio systems in Linux are terrible. You’ve never known true pain until you’ve tried to set up a recording or broadcasting workstation running Linux. I did, twenty years ago, and nothing has changed since. This wasn’t really a problem when Linux was either used in server spaces or some nerd’s battle station, but now we have small single board computers that everyone uses and wants to turn into a modular synth. Welcome to paintown, because the Linux audio stack is terrible.
For the past ten years, [Dynobot] has been working on improving audio in Linux. This is a decade of reading manuals from IBM and Oracle, and a deep knowledge of how to adjust settings so audio actually works. All of this work is now combined into a single script that improves everything. This means the priority of the Audio group is changed, the thread priority is better, the latency is better, and for anyone who wants to set up a local streaming service, the network latency is better. It’s not everything, and there’s no mention of recording multitrack audio, but we’ll accept the baby steps here.
There are two relevant Github repositories for this, the first containing audio adjustments for Debian-based systems, including the Raspberry Pi. This should work on any single board computer running Debian, and has been tested on all the Raspberry Pis, the Allo Sparky, ASUS Tinkerboard, and the Odroid C2. There’s also a version for TinyCore-based Linux systems that improves the priority of the audio threads, changes the thread scheduling from ‘whatever’ to FIFO, and improves the latency. If you’re running Linux, and you’re doing something with audio, this is what you need.
Visitors to the Wizarding World of Harry Potter at Universal Studios are able to cast “spells” by waving special interactive wands in the air. Hackers like us understand that there must be some unknown machinations happening behind the scenes to detect how the wands are moving, but for the kids wielding them, it might as well be real magic. So when his son asked to have a Harry Potter themed birthday party, [Adam Thole] decided to try recreating the system used at Universal Studios in his own home.
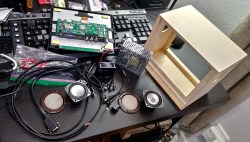
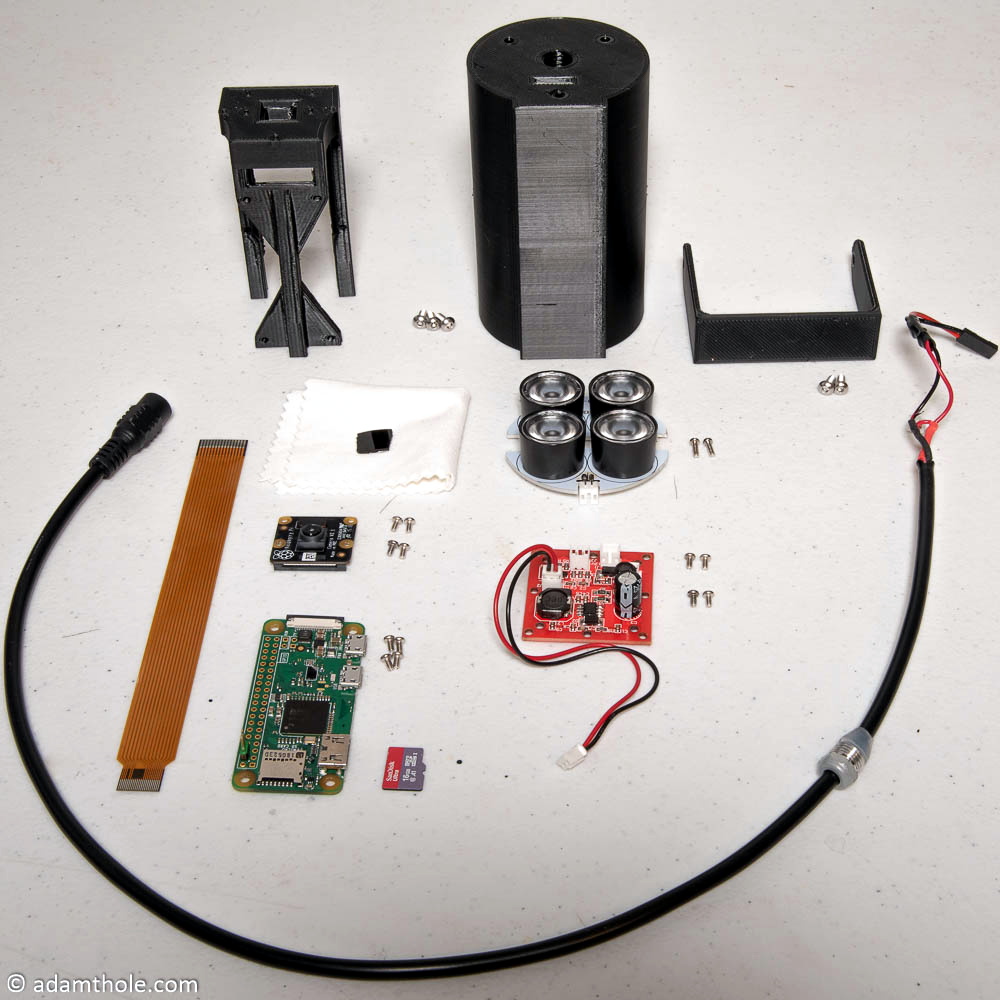
Components used in the IR streaming camera
The basic idea is that each wand has a reflector in the tip, which coupled with strong IR illumination makes them glow on camera. This allows for easy gesture recognition using computer vision techniques, all without any active components in the wand itself.
[Adam] notes that you can actually buy the official interactive wands from the Universal Studios online store, and they’d even work with his system, but at $50 USD each they were too expensive to distribute to the guests at the birthday party. His solution was to simply 3D print the wands and put a bit of white prismatic reflective tape on the ends.
With the wands out of the way, he turned his attention to the IR imaging side of the system. His final design is a very impressive 3D printed unit which includes four IR illuminators, a Raspberry Pi Zero with the NoIR camera module. [Adam] notes that his software setup specifically locks the camera at 41 FPS, as that triggers it to use a reduced field of view by essentially “zooming in” on the image. If you don’t request a FPS higher than 40, the camera will deliver a wider image which didn’t have any advantage in this particular project.
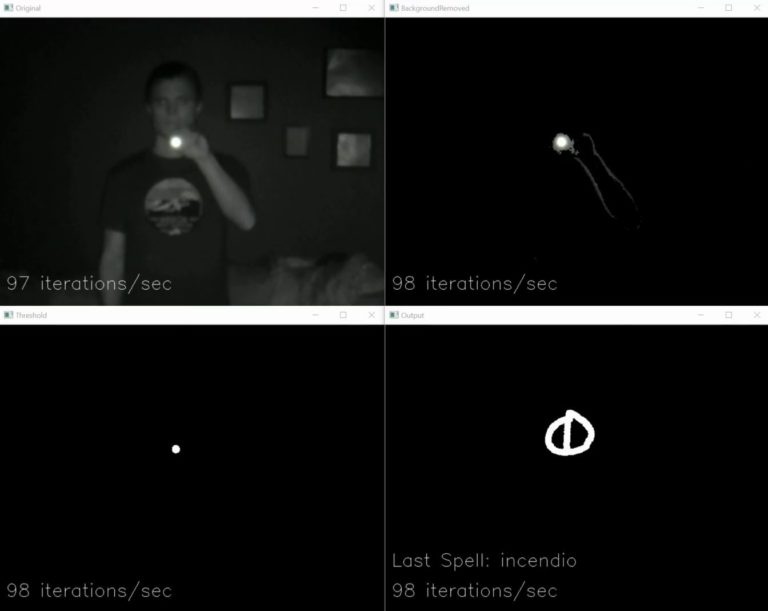
The last part of the project was taking the video stream from his IR camera and processing it to detect the bright glow of a wand’s tip. For each frame of the video the background is first removed and then any remaining pixel that doesn’t exceed a set brightness level if ignored. The end result is an isolated point of light representing the tip of the wand, which can be fed into Open CV’s optical flow function to show [Adam] what shape the user was trying to make. From there, his software just needs to match the shape with one of the stock “spells”, and execute the appropriate function (such as changing the color of the lights in the room) with Home Assistant.
Overall, it’s an exceptionally well designed system considering the goal was simply to entertain a group of children for a few hours. We almost feel bad for the other parents in the neighborhood; it’s going to take more than a piñata to impress these kids after [Adam] had them conjuring the Dark Arts at his son’s party.