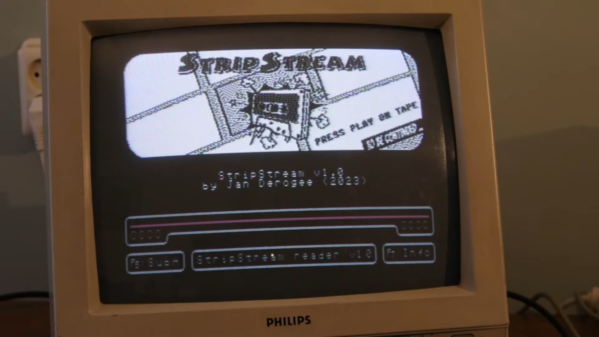
Comic books are traditionally printed on paper, either as regular saddle-bound issues or in hardcover compilations. If you wanted to read them on a low-resolution screen run by an 8-bit computer, you were usually out of luck. Until now! Enter StripStream, the comic book reader for the Commodore 64.
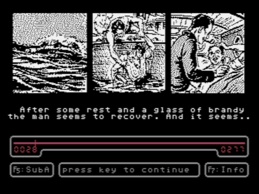 StripStream runs on a stock PAL C64 system, using the Datasette interface. A PC program is used to compose a comic into a suitable format for the C64. It then generates a .TAP file which can either be played in a C64 emulator, or recorded onto an audio tape for loading on real hardware.
According to [janderogee], who created the software, just 34 minutes of tape can store over 300 images and 1200 lines of subtitle text. Cassettes were chosen for the storage method as standard 5 1/2″ C64 disks could only hold 165 kilobytes of data per side, meaning two whole double-sided disks would be needed to store the same amount of data. Plus, the linear nature of tape makes sense for a sequentially-read comic story. Just don’t get any ideas about doing a choose-your-adventure thing here, as StripStream isn’t built for random access.
If you don’t want to read regular comics, you can always use a tool to automatically generate them from existing media. Incidentally, StripStream is a great name, but we would have called it Comicdore 64.
Continue reading “Read Comic Books On The Commodore 64 With StripStream”