An Old Way To Make A New Crank Handle

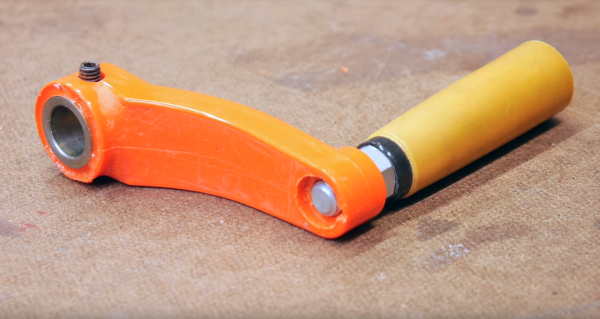
When the crank handle on [Eric Strebel]’s cheapo drill press broke in two, did he design and print a replacement? Nah. He kicked it old school and cast a new one in urethane resin.

In his newest video, [Eric] shows us his approach to molding and casting a handle that’s likely stronger than the original. The old crank handle attached to the shaft with a brass collar and a grub screw, so he planned around their reuse. After gluing the two pieces together and smoothing the joint with body filler, he packs the back of the handle with clay. This is a great idea. The original handle just has hollow ribbing, which is probably why it broke in the first place. It also simplifies the cast a great deal.

Here’s where things get really interesting. [Eric] planned to make a one-piece mold instead of two halves. At this point it becomes injection molding, so before he gets out the reusable molding box, he adds an injection sprue as an entry point for the resin, and a plug to support the sprue and the handle. Finally, [Eric] mixes up some nice bright Chevy orange resin and casts the new handle. A few hours later, he was back to drilling.

Crank past the break to watch [Eric]’s process, because it’s pretty fun to watch the resin rise in the clear silicone mold. If you want to take a deeper dive into injection molding, we can fill that need.

Continue reading “An Old Way To Make A New Crank Handle”

Thermal Camera Diagnoses Thermal Issue On A Sonoff Switch

No matter what your experience level with troubleshooting, there’s always at least a little apprehension when you have to start poking through a mains powered device. A little fear is a good thing; it keeps you focused. For some, though, the aversion to playing with high voltage is too much, which can cause problems when something fails. So what do you do when you’re reluctant to even open the case? Easy — diagnose the problem with an infrared camera.

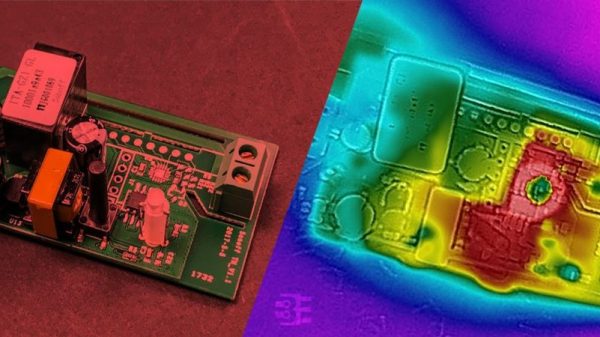
[Bald Engineer]’s electrophobia started early, with some ill-advised experiments in transcutaneous conduction. So when his new Sonoff WiFi switch failed soon after deploying it to control a lamp in his studio, popping the top while it was powered up was out of the question. The piquant aroma of hot plastic was his first clue to the problem, so he whipped out his Flir One Thermal Camera and watched the device as it powered up. The GIF nearby shows that there was clearly a problem, with a bloom of heat quickly spreading out from the center of the unit. A few IR images of the top and bottom gave him some clues as to the culprits, but probing the board in those areas once power was removed revealed no obviously damaged components.

[Bald Engineer] hasn’t yet gotten to the bottom of this, but his current thinking is that the NCP1117 regulator might be bad, since it rapidly spikes to 115°C. Still, we think this is a nifty diagnostic technique to add to our toolkit, and a great excuse to buy an IR camera. Or, we could go with an open-source thermal camera instead.

[via Dangerous Prototypes]

Fire Extinguisher Ball Mill Destined To Grind Kitty Litter

Nothing says hack like a tool quickly assembled from a few scrap-heap parts. For [Turbo Conquering Mega Eagle], his junkyard finds were a fire extinguisher, an old office fan, and a few scraps of plywood; the result was a quick and easy ball mill.

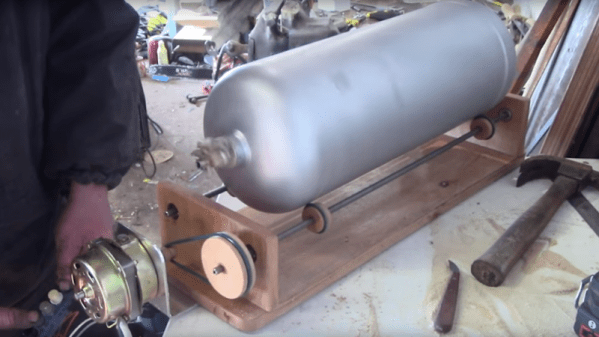
There’s very little mention of what said ball mill will be for — [TCME] said something about milling bentonite clay, AKA kitty litter — but that’s hardly the point. Having previously fabricated a much smaller version of this ball mill that could chuck up in his lathe, he scaled this one up considerably. The spent fire extinguisher was relieved of the valve and some external bits to create the mill’s drum. Plywood was used for a quick frame to support rollers and to turn a couple of pulleys for the running gear. The fan motor proved barely capable of performing, though, even with the mechanical advantage of the pulleys and an improvised drive belt. The motor just didn’t have the oomph to turn the drum when loaded with ceramic balls, but a quick adjustment to the drive train did the trick. The video below shows the whole build process, which couldn’t have taken much more than a couple of hours.

It looks like a sand casting project may be on deck for [TCME]’s milled bentonite, so we’ll look forward to that. Perhaps his other recent fire extinguisher build will make an appearance in that video too.

Continue reading “Fire Extinguisher Ball Mill Destined To Grind Kitty Litter”

Monitor Power Consumption Of Low-Power Devices

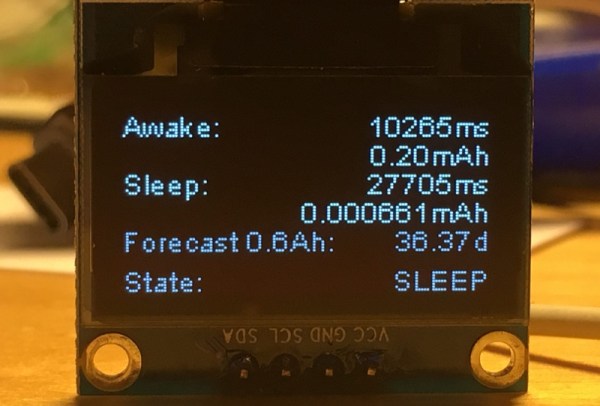
Perhaps the most important consideration to make when designing a battery-operated device of any kind is the power consumption. Keeping it running for longer between battery changes is often a key design point. To that end, if you need to know how small programming changes will impact the power consumption of your device then [Daniel] has a great tool that you might find helpful: an ESP8266-based live power meter.

The power meter itself is battery-powered via a 600 mAh battery and monitors an e-paper module, which also displays information about power consumption. It runs using a NodeMCU and measures voltage and current across a 100-ohm resistor to calculate the power use, although the resolution does start to get noisy when the device is in standby/sleep mode. One presumes this could be solved by changing the value of the resistor in order to get more accurate measurements at the expense of losing accuracy during moments of high power consumption.

While this power monitor was built specifically to monitor power consumption on this particular e-paper display project, it should be easily portable into other battery-based systems that need fine tuning in order to maximize battery life. As a bonus, the display is already included in the project. There are ways of getting even more information about your battery usage, although if power consumption is important than you may want to stick with a more straightforward tool like this one.

Fail Of The Week: The Little Ultrasonic Knife That Couldn’t

We all know the feeling of an idea that sounded great when it was rattling around in our head, only to disappoint when we actually build the thing. It’s a natural consequence of trying new stuff, and when it happens, we salvage what we can and move on, hopefully in wisdom.

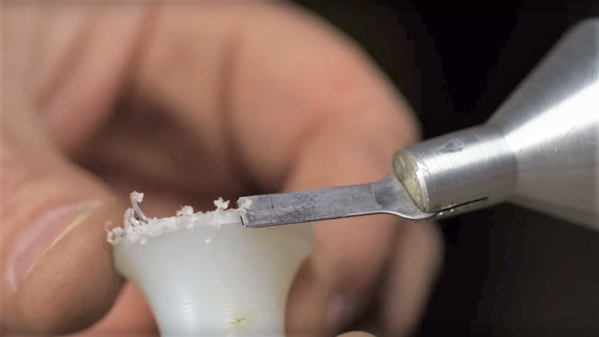
The thing that at least semi-defeated [This Old Tony] was an attempt to build an ultrasonic cutter, and it didn’t go well. Not that any blood was shed in the video below, although there seemed like there would be the way [Old Tony] was handling those X-Acto blades. His basic approach was to harvest the transducer and driver from a cheap ultrasonic cleaner and retask the lot into a tool to vibrate a knife rapidly enough to power it through tough materials with ease.

Spoiler alert: it didn’t work very well. We think the primary issue was using a transducer that was vastly underpowered compared to commercial (and expensive) ultrasonic cutters, but we suspect the horn he machined was probably not optimized either. To be fair, modeling the acoustic performance of something like that isn’t easy, so we can’t expect much. But still, it seems like the cutter could have worked better. Share your thoughts on how to make version 2.0 better in the comments.

The video is longish, but it’s as entertaining as any of [Old Tony]’s videos, and packed full of incidental gems, like the details of cavitation. We enjoyed it, even if the results were suboptimal. If you want to see a [This Old Tony] project that really delivers, check out his beautiful boring head build.

Continue reading “Fail Of The Week: The Little Ultrasonic Knife That Couldn’t”

Reverse Engineering Opens Up The Samsung Gear VR Controller

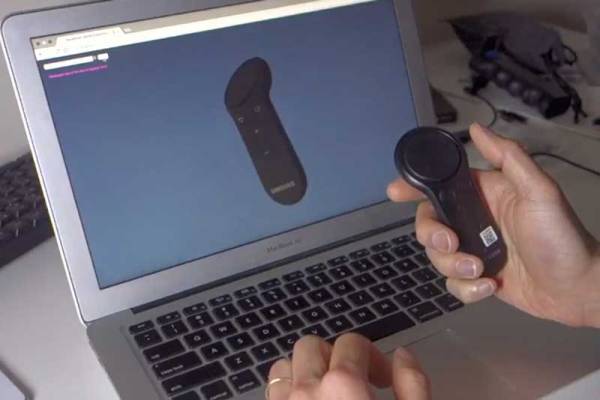
We love a bit of reverse engineering here at Hackaday, figuring out how a device works from the way it communicates with the world. This project from [Jim Yang] is a great example of this: he reverse-engineered the Samsung Gear VR controller that accompanies the Gear VR add-on for their phones. By digging into the APK that links the device to the phone, he was able to figure out the details of the Bluetooth connection that the app uses to connect to the device. Specifically, he was able to find the commands that were used to get the device to send data, and was able to read this data to determine the state of the device. He was then able to use this to create his own web app to use this data.

Continue reading “Reverse Engineering Opens Up The Samsung Gear VR Controller”

Tachometer Uses Light, Arduinos

To measure how fast something spins, most of us will reach for a tachometer without thinking much about how it works. Tachometers are often found in cars to measure engine RPM, but handheld units can be used for measuring the speed of rotation for other things as well. While some have mechanical shafts that must make physical contact with whatever you’re trying to measure, [electronoobs] has created a contactless tachometer that uses infrared light to take RPM measurements instead.

The tool uses an infrared emitter/detector pair along with an op amp to sense revolution speed. The signal from the IR detector is passed through an op amp in order to improve the quality of the signal and then that is fed into an Arduino. The device also features an OLED screen and a fine-tuning potentiometer all within its own self-contained, 3D-printed case and is powered by a 9 V battery, and can measure up to 10,000 RPM.

The only downside to this design is that a piece of white tape needs to be applied to the subject in order to get the IR detector to work properly, but this is an acceptable tradeoff for not having to make physical contact with a high-speed rotating shaft. All of the schematics and G code are available on the project site too if you want to build your own, and if you’re curious as to what other tools Arduinos have been used in be sure to check out the Arduino-based precision jig.

Continue reading “Tachometer Uses Light, Arduinos”