The Linux Throwie: A Non-Spacefaring Satellite

Throwies occupy a special place in hardware culture — a coin cell battery, LED, and a magnet that can be thrown into an inaccessible place and stick there as a little beacon of colored light. Many of us will fondly remember this as a first project. Alas, time marches inevitably on, and launching cheerful lights no longer teaches me new skills. With a nod to those simpler times, I’ve been working on the unusual idea of building a fully functional server that can be left in remote places and remain functional, like a throwie (please don’t actually throw it). It’s a little kooky, yet should still deliver a few years of occasional remote access if you leave it somewhere with sunlight.
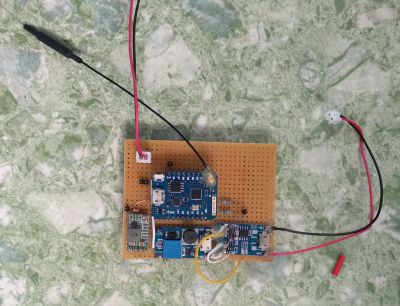
A short while ago, I described the power stages for this solar-powered, cloud accessible Linux server. It only activates on demand, so a small solar cell and modest battery are sufficient to keep the whole show running.

Where we left off, I had a solar cell that could charge a battery, and provide regulated 12 V and 5 V output. For it to be a functional device, there are three high level problems to solve:

  1. It must be possible to set up the device without direct physical access
  2. You must be able to remotely turn it on and off as needed.
  3. It needs to be accessible from the Internet.

The funny thing is, this hardware reminds me of a satellite. Of course it’s not meant to go into space, but I do plan to put it somewhere not easy to get to again, it runs off of solar power, and there’s a special subsystem (ESP8266) to tend the power, check for remote activation, and turn the main computer (Raspberry Pi 3) on and off as necessary. This sounds a lot like space race tech, right?

As I have a bit more code than usual to share with you today, I’ll discuss the most interesting parts, and provide links to the full firmware files at the end of the article.

Continue reading “The Linux Throwie: A Non-Spacefaring Satellite”

DIY Mini Helical Antennas From Salvaged Co-ax Cable

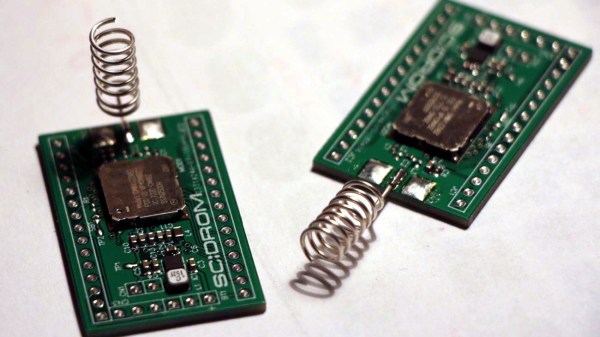
[Mare] has a visual guide and simple instructions for making DIY mini helical 868 MHz antennas for LoRa applications. 868 MHz is a license-free band in Europe, and this method yields a perfectly serviceable antenna that’s useful where space is constrained.

A metric 5 mm drill bit makes a convenient core.

The process is simple and well-documented, but as usual with antenna design it requires attention to detail. Wire for the antenna is silver-plated copper, salvaged from the core of RG214U coaxial cable. After straightening, the wire is wound tightly around a 5 mm core. 7 turns are each carefully spaced 2 mm apart. After that, it’s just a matter of measuring and bending the end for soldering to the wireless device in question. [Mare] has used this method for wireless LoRa sensors in space-constrained designs, and it also has the benefit of lowering part costs since it can be made and tested in-house.

Antennas have of course been made from far stranger things than salvaged wire; one of our favorites is this Yagi antenna made from segments of measuring tape.

Choosing Cell Modems: The Drama Queen Of Hardware Design

So you went to a tradeshow and heard about this cool new idea called the Internet Of Things; now it’s time to build an IoT product of your own. You know that to be IoT, your Widget D’lux® has to have a network connection but which to choose?

You could use WiFi or Bluetooth but that would be gauche. Maybe LoRaWAN? All the cool kids are using LoRa for medium or long range wireless these days, but that still requires a base station and Widget D’lux® will be a worldwide phenomenon. Or at least a phenomenon past your bedroom walls. And you know how much user’s hate setting things up. So a cell modem it is! But what do you have to do to legally include one in your product? Well that’s a little complicated.

Continue reading “Choosing Cell Modems: The Drama Queen Of Hardware Design”

Fixing A Crazy Expensive Spectrum Analyser, With Solder

It used to be a spectrum analyzer was an exotic piece of gear. However, these days it is pretty common for a scope to have some ability to do the job — that is, plot amplitude versus frequency. However, a dedicated commercial product will usually have a lot more bandwidth and other features. [Signal Path] picked up an Anrtitsu 7.1 GHz portable spectrum analyzer. An expensive bit of kit — anywhere from around $4,000 to $8,000 on eBay — if it is working, but this one was not. It needed power, but it was also missing the internal flash card that the device uses to boot.

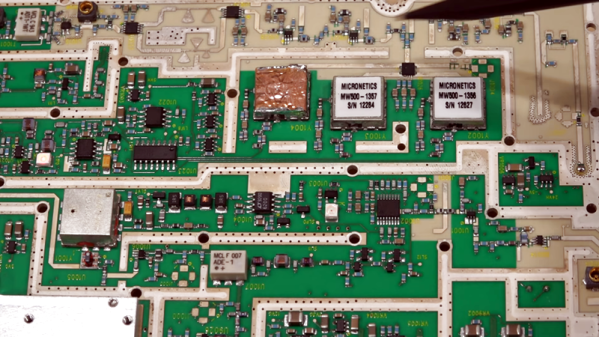
Being portable, there’s a lot of digital and RF electronics crammed into a very small space. The initial tear down didn’t look very interesting because it was mostly an RF shield. However, many tiny screws later, you can finally see the actual electronics.

Continue reading “Fixing A Crazy Expensive Spectrum Analyser, With Solder”

Revive That Old Analog Cell Phone With SDR

With the latest and greatest 5G cellular networks right around the corner, it can be difficult to believe that it wasn’t so long ago that cell phones relied on analog networks. They aren’t used anymore, but it might only take a visit to a swap meet or flea market to get your hands on some of this vintage hardware. Of course these phones of a bygone era aren’t just impractical due to their monstrous size compared to modern gear, but because analog cell networks have long since gone the way of the floppy disk.

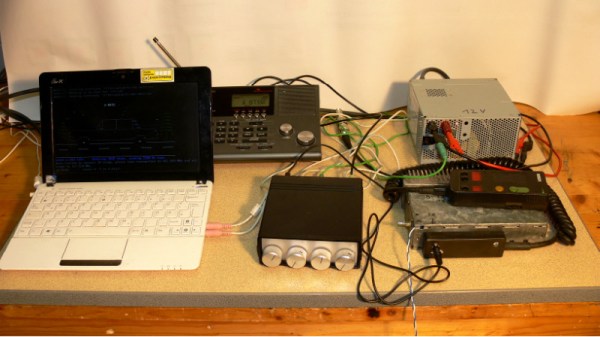
But thanks to the efforts of [Andreas Eversberg] those antique cell phones may live again, even if it’s only within the radius of your local hackerspace. His software allows the user to create a functioning analog base station for several retro phone networks used in Europe and the United States, such as AMPS, TACS, NMT, Radiocom, and C450. You can go the old school route and do it with sound cards and physical radios, or you can fully embrace the 21st century and do it all through a Software Defined Radio (SDR); in either event, calls to the base station and even between multiple mobile devices is possible with relatively inexpensive hardware.

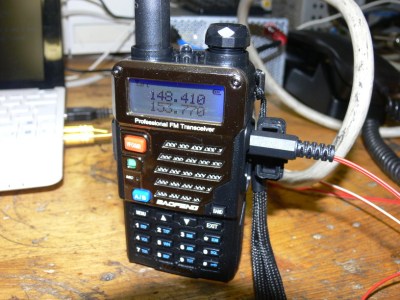
[Andreas] has put together exceptional documentation for this project, which starts with a walk through on how you can setup your DIY cell “tower” with traditional radios. He explains that amateur radios are a viable option for most of the frequencies used, and that he had early success with modifying second-hand taxi radios. He even mentions that the popular BaoFeng handheld radios can be used in a pinch, though not all the protocols will work due to distortion in the radio.

If you want to take the easy way out, [Andreas] also explains how to replace the radios with a single SDR device. This greatly simplifies the installation, and turns a whole bench full of radios and wires into something you can carry around in your pack if you were so inclined. His software has specific options to use the LimeSDR and LimeSDR-Mini, but you should be able to use other devices with a bit of experimentation.

We’ve previously reviewed the LimeSDR-Mini hardware, as well as covered its use in setting up DIY GSM networks.

Oliver Heaviside: Rags To Recognition, To Madness

Like any complex topic, electromagnetic theory has its own vocabulary. When speaking about dielectrics we may refer to their permittivity, and discussions on magnetic circuits might find terms like reluctance and inductance bandied about. At a more practical level, a ham radio operator might discuss the impedance of the coaxial cable used to send signals to an antenna that will then be bounced off the ionosphere for long-range communications.

It’s everyday stuff to most of us, but none of this vocabulary would exist if it hadn’t been for Oliver Heaviside, the brilliant but challenging self-taught British electrical engineer and researcher. He coined all these terms and many more in his life-long quest to understand the mysteries of the electromagnetic world, and gave us much of the theoretical basis for telecommunications.

Continue reading “Oliver Heaviside: Rags To Recognition, To Madness”

New AVR-IOT Board Connects To Google

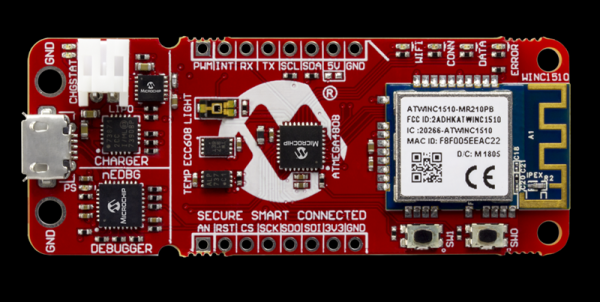
Readers of Hackaday are no strangers to using a microcontroller to push data to WiFi. Even before the ESP8266 there were a variety of ways to do that. Now Microchip is joining the fray with a $29 board called the AVR-IOT WG that contains an 8-bit ATmega4808, a WiFi controller, and hardware-based crypto chip for authenticating with Google Cloud.

The board has a section with a USB port for charging a battery and debugging that looks like it is made to cut away. There are a number of LEDs and buttons along with a light sensor and a temperature sensor. It feels like the goal here was to pack as many Microchip parts onto a single dev board as possible. You’ll find the ATmega4808 as the main controller, an ATWINC1510 WiFi controller (a castellated module reminiscent of the ESP8266), the ATECC608A cryptographic co-processor, MCP73871 LiPo charger, MIC33050 voltage regulator, and an MCP9808 temperature sensor. We can’t find much info about the “nEDBG Programmer/Debugger” chip. If you’ve used it on one of a handful of other dev board, let us know in the comments about off-board programming and other possible hacks.

Naturally, the board works with AVR Studio or MPLAB X IDE (Microchip bought Atmel, remember?). Of course, Atmel START or MPLAB Code Configurator can configure the devices, too. There’s also an AVR-IoT-branded website that lets you use Google cloud to connect your device for development. The headers along the top and bottom edges are compatible with MicroElektronika Click boards which will make anyone with a parts bin full of those happy.

Looks like you can pick up the Microchip boards now from the usual places. From reading what Microchip is saying, they would like to position this as the “IoT Arduino” — something someone without a lot of experience could pick up and use to pipe data into Google cloud. While that’s probably good, it isn’t that hard to use an ESP-device to do the same thing using the Arduino IDE and then you have a 32-bit processor and you can use whatever cloud vendor you want. Sure, it would be a little more work, so maybe that’s where this offering will appeal.

On the plus side, we really liked that there was a battery option with a charger already on board — it seems like that’s something we always have to add anyway. It may be buried in the documentation, but the user’s guide and the technical guide didn’t appear to have an average and maximum current draw specified, so battery life is an open question, although the video says “low power.”

Although it isn’t quite the same thing, we’ve seen ESP8266’s talk to Google servers for interfacing with Google Home. And while it is on the Amazon cloud, we’ve even seen a 6502 up there.

Continue reading “New AVR-IOT Board Connects To Google”