Replace Legacy CNC PCs With A Gerbil

There are lots of laser cutters and other CNC machines available for a decent price online, but the major hurdle to getting these machines running won’t be the price or the parts. It’s usually the controller PC, which might be running Windows XP or NT if you’re lucky, but some of them are still using IBM XT computers from the ’80s. Even if the hardware in these machines is working, it might be impossible to get the software, and even then it will be dated and lacking features of modern computers. Enter the Super Gerbil.

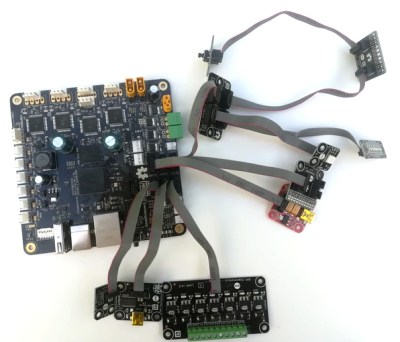
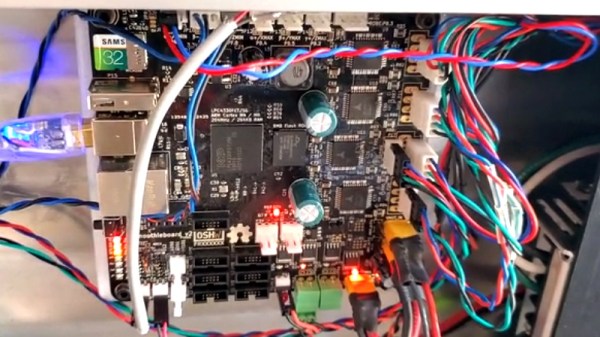
[Paul] was able to find a laser cutter with one of these obsolete controllers, but figured there was a better way to getting it running again. As the name suggests, it uses GRBL, a G-Code parser and CNC controller software package that was originally made to run on an 8-bit AVR microcontroller, but [Paul] designed the Super Gerbil to run on a 32 bit ARM platform. He also added Z-axis control to it, so it now sports more degrees of freedom than the original software.

By way of a proof of concept, once he was finished building the Super Gerbil he ordered a CNC machine from China with an obsolete controller and was able to get it running within a day. As an added bonus, he made everything open so there are no license fees or cloud storage requirements if you want to use his controller. [Paul] also has a Kickstarter page for this project as well. Hopefully controllers haven’t been the only thing stopping you from getting a CNC machine for your lab, though, but if they have you now have a great solution for a 3040 or 3020 CNC machine’s controller, or any other CNC machine you might want to have. Continue reading “Replace Legacy CNC PCs With A Gerbil”

Final Fantasy Exploit Teaches 32-bit Integer Math

One of the fun things about old video games, besides their obvious nostalgia, is that some of the more popular games have been pried apart and tinkered with for years, leading to a lot of new “development” within the games. This often uncovers some hidden gems that gamers might not have had any knowledge of during the game’s heyday, like this coding oddity found in Final Fantasy 7 that illustrates a lot about how 32-bit processors do math.

The original PlayStation used a 32-bit RISC processor, but the most significant bit could be used for integer signing. This means that if you have an integer that has a value of 2,147,483,647 (01111111111111111111111111111111 in binary) and you add one, the value is suddenly negative 2147483648 because the most significant digit is also an indicator of the integer’s sign. In this situation, the integer is said to “overflow”. In Final Fantasy 7, if you can somehow get a character to deal 262,144 damage in one hit (much less than two billion, due to the way the game does damage calculations), the game has a little bit of a meltdown.

[4-8Productions] had to do a lot of work to show how this glitch can be exploited in the game as well. Usually damage in this game is limited to 9,999 but under certain configurations (admittedly obtained by using other exploits and tools available for FF7 like a savegame editor) two of the characters can deal more damage than this critical value, exposing the 32-bit processor’s weak spot.

Even though integer signing is a pretty basic concept for most of us, the video is definitely worth a watch especially if you’re fans of the classic game. Of course, Final Fantasy 7 isn’t the only classic that has been exploited and reverse-engineered to the extreme. You can use a Super Mario World level to implement a calculator now, too.

Continue reading “Final Fantasy Exploit Teaches 32-bit Integer Math”

Mike Szczys Ends 8-Bit Vs 32-Bit Holy War!

If you’ve read through the comments on Hackaday, you’ve doubtless felt the fires of one of our classic flame-wars. Any project done with a 32-bit chip could have been done on something smaller and cheaper, if only the developer weren’t so lazy. And any project that’s squeezes the last cycles of performance out of an 8-bit processor could have been done faster and more appropriately with a 32-bit chip.

bits_argument

Of course, the reality for any given project is between these two comic-book extremes. There’s a range of capabilities in both camps. (And of course, there are 16-bit chips…) The 32-bit chips tend to have richer peripherals and run at higher speeds — anything you can do with an 8-bitter can be done with its fancier cousin. Conversely, comparatively few microcontroller applications outgrow even the cheapest 8-bitters out there. So, which to choose, and when?

Eight Bits are Great Bits

The case that [Mike] makes for an 8-bit microcontroller is that it’s masterable because it’s a limited playground. It’s a lot easier to get through the whole toolchain because it’s a lot shorter. In terms of debugging, there’s (often) a lot less that can go wrong, letting you learn the easy debugging lessons first before moving on to the truly devilish. You can understand the hardware peripherals because they’re limited.

And then there’s the datasheets. The datasheet for a chip like the Atmel ATMega168 is not something you’d want to print out, at around 660 pages long. But it’s complete. [Mike] contrasts with the STM32F405 which has a datasheet that’s only 200 pages long, but that’s just going over the functions in principle. To actually get down to the registers, you need to look at the programming manual, which is 1,731 pages long. (And that doesn’t even cover the various support libraries that you might want to use, which add even more to the documentation burden.) The point is, simpler is simpler. And if you’re getting started, simpler is better.

Continue reading “Mike Szczys Ends 8-Bit Vs 32-Bit Holy War!”

Getting Started With ARM Using Mbed

Even though the Arduino was hardly the first 8 bit microcontroller board to support a bootloader and the C/C++ language, it quickly became the de facto standard for hobby-level microcontrollers as well as a common choice for one-off or prototype projects. I’m sure there are a lot of reasons why this occurred, but in my mind there were three major reasons: price, availability of lots of library and sample code, and the existence of a simplified GUI IDE that you could install in a few minutes. The build process is simple, too, even though if you ever have to actually figure it out, it is quite ugly. For most people, it works, and that makes it not ugly.

I like the ATMega chips. In fact, I had boards based around the ATMega8 and a bootloader way before there was an Arduino. However, they are fairly small parts. It is true that the Arduino infrastructure has grown to support more ATMega chips, many with more memory and I/O and clock speeds. However, 32-bit processors are getting inexpensive enough that for all but the simplest or highest volume projects, you should be thinking about using 32-bit.

If you’ve tried to go that route before, you’ve probably been daunted by the price, especially the price of development tools. Your alternative is to roll your own tool chain which is very doable (and there are some nice scripts out there that will help you). You also need to worry about libraries and how to integrate them. Not to mention, many of the advanced processors require a lot of setup to get, say, an A/D converter turned on. Most processors keep things they aren’t using turned off, and each pin requires setup to select the 4 or 5 things shared on that pin.

All of this has been a barrier to entry. The vendors have all figured this out, though, and many have tried to build tools aimed at breaking up the Arduino market ranging from inexpensive development boards to code-generating wizards, to full blown IDEs. I want to tell you (and show you, in the video below) how you can make the jump from 8-bit to 32-bit much easier than you might think.

Continue reading “Getting Started With ARM Using Mbed”

Using A TeensyLC To Emulate The XBOX 360 Controller

After the release of Mortal Kombat X, [Zachery’s] gaming group wanted to branch out into the fighter genre. They quickly learned that in order to maximize their experience, they would need a better controller than a standard gamepad. A keyboard wasn’t going to cut it either. They wanted a fight stick. These are large controllers that look very much like arcade fighting controls and include a joystick and large buttons. [Zachery’s] group decided to build their own fight stick for use with a PC.

[Zachery] based his build around the TeensyLC, which is a 32 bit development board with an ARM processor. It’s also compatible with Arduino. The original version of his project setup the controller as a HID, essentially emulating a keyboard. This worked for a while until they ran into compatibility issues with some games. [Zachery] learned that his controller was compatible with DirectInput, which has been deprecated. The new thing is Xinput, and it was going to require more work.

Using Xinput meant that [Zachery] could no longer use the generic Microsoft HID driver. Rather than write his own drivers, he decided to emulate the XBOX 360 controller. When the fight stick is plugged into the computer, it shows up as an XBOX 360 controller and Windows easily installs the pre-built driver. To perform the emulation, [Zachery] first had to set the VID and PID of the device to be identical to the XBOX controller. This is what allows the Microsoft driver to recognize the device.

Next, the device descriptor and configuration descriptor had to be added to the Teensy’s firmware. The device descriptor includes information such as USB version, device class, protocol, etc. The configuration descriptor includes additional information about the device configuration. [Zachery] used Microsoft Message Analyzer to pull the configuration descriptor from a real XBOX 360 controller, then used the same data in his own custom controller.

[Zachery] programmed the TeensyLC using the Arduino IDE. He ran into some trouble here because the IDE did not include the correct device type for an Xinput device. [Zachery] had to edit the boards.txt file and add three lines of code in order to add a new hardware device to the IDE’s menu. Several other files also had to be modified to make sure the compiler knew what an Xinput device type was.  With all of that out of the way, [Zachery] was finally able to write the code for his controller.

The Coming Age Of ARM Chips For The Hobbyist

The days of the 8 bit Arduino may be quickly coming to a close. Sure, there will always be a place for AVRs in blinking LEDs and turning on relays, but for doing anything cool – playing MP3s, driving LCD displays, or running a CNC machine – you need the power of a 32 bit chip. [Brian Carrigan] put up a great tutorial on getting started with these bigger, more powerful micros and moving beyond what is possible with an 8 bit PIC or AVR.

These new 32 bit chips are much more powerful, but aren’t exactly hobbyist friendly. Most of the ARM chips we’ve found are stuffed into very fine pitch QFN or QFP packages that require a reflow oven to solder to a board. In fact, we can only find one through-hole Cortex M0 chip that is suited for breadboard development. This doesn’t make it easy to whip up a circuit in a few hours, so builders needing a very powerful microcontroller will be more dependent on dev boards.

Already there are a good number of ARM-based 32 bit dev boards available including the offerings from Leaf Labs, the extremely inexpensive STM Discovery boardKinetis KL25Z Freedom Board, the outrageously powerful BeagleBone, and the perpetually delayed Arduino (over) Due.

None of these boards are particularly new developments; they’ve all been around the block once or twice. However, there are many more options for 32 bit development than the current 8 bit PIC and AVR holy war. We’re going to turn the comments over to Hackaday readers with the following questions: what supersized dev board are you rolling with? What’s good for a beginner, and what should they watch out for?

ChipKIT Uno32: First Impressions And Benchmarks

Following Maker Faire, we’ve had a few days to poke around with Digilent’s 32-bit Arduino-compatible chipKIT boards and compiler. We have some initial performance figures to report, along with impressions of the hardware and software.

Continue reading “ChipKIT Uno32: First Impressions And Benchmarks”