3D Printed Mini MacBook With A Raspberry Pi Heart

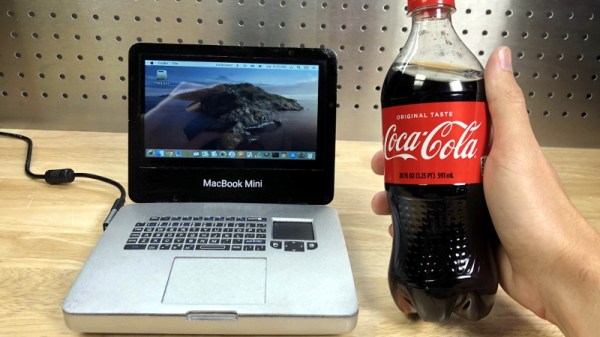
Do you like the sleek look of Apple’s laptops? Are you a fan of the Raspberry Pi? Have a particular affinity for hot glue and 3D printed plastic? Then you’re in luck, because this tiny “MacBook” built by serial miniaturizer [Michael Pick] features all of the above (and a good bit more) in one palm-sized package. (Video link, embedded below.)

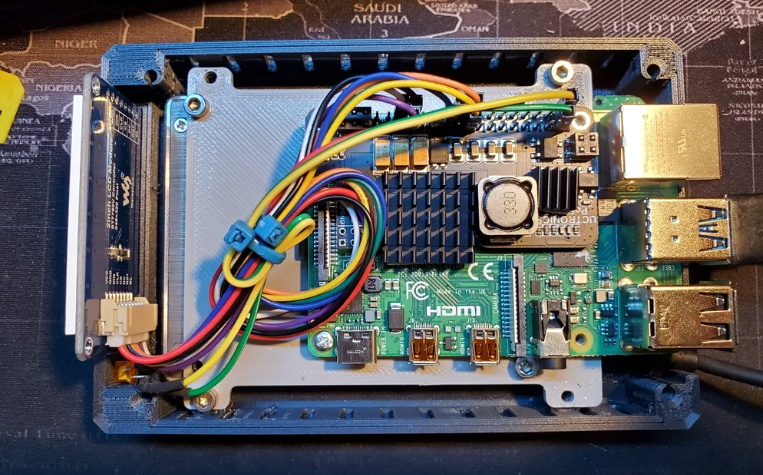
Getting the LCD panel and Raspberry Pi 4 to fit into the slim 3D printed case took considerable coaxing. In the video after the break, you can see [Michael] strip off any unnecessary components that would stand in his way. The LCD panel had to lose its speakers and buttons, and the Pi has had its Ethernet and USB ports removed. While space was limited, he did manage to squeeze an illuminated resin-printed Apple logo into the lid of the laptop to help sell the overall look.

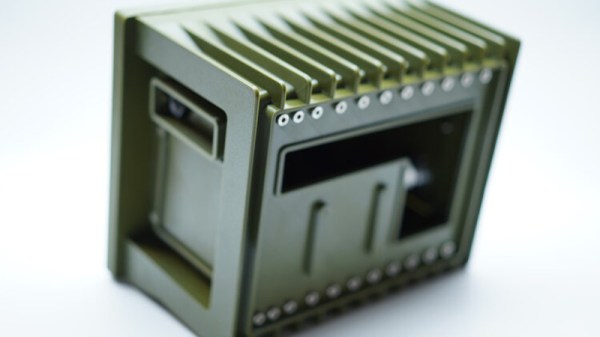
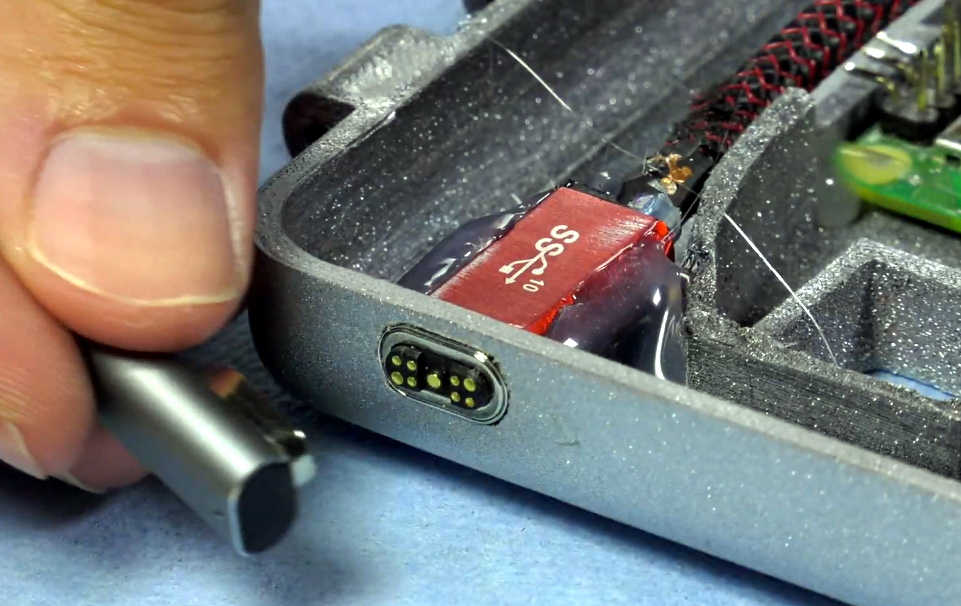
The bottom half of the machine has a number of really nice details, like the fan grill cut from metal hardware cloth and a functional “MagSafe” connector made from a magnetic USB cable. The keyboard PCB and membrane was liberated from a commercially available unit, all [Michael] needed to do was model in the openings for the keys. Since the keyboard already came with its own little trackpad, the lower one is just there for looks.

Speaking of which, to really drive home the Apple aesthetic, [Michael] made the bold move of covering up all the screws with body filler after assembly. It’s not a technique we’d necessarily recommend, but gluing it shut would probably have made it even harder to get back into down the line.

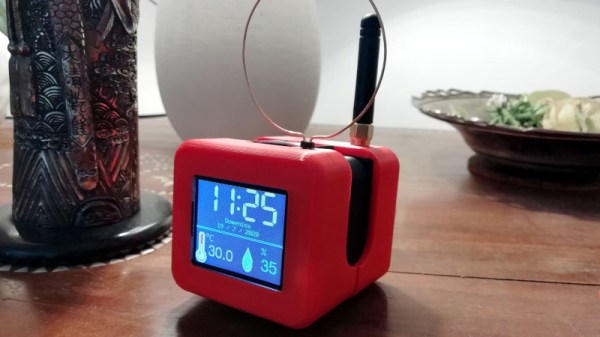
We’ve previously seen [Michael] create a miniature rendition of the iMac and an RGB LED equipped “gaming” computer using many of the same parts and techniques. He’ll have to start branching off into less common machines to replicate soon, which reminds us that we’re about due for another tiny Cray X-MP.

Continue reading “3D Printed Mini MacBook With A Raspberry Pi Heart”

3D Printed Video Terminal Dials C For Cyberpunk

Created for the Disobey 2020 hacker conference in Finland, this Blade Runner inspired communications terminal isn’t just for decoration. It was part of an interactive game that required attendees to physically connect their conference badges up and “call” different characters with the functional keypad on the front of the unit.

[Purkkaviritys] was in charge of designing the 3D printed enclosure for the device, which he says takes an entire 2 kg roll of filament to print out. Unfortunately he wasn’t as involved in the electronics side of things, so we don’t have a whole lot of information about the internals beyond the fact that its powered by a Raspberry Pi 4, features a HyperPixel 4.0 display, and uses power over Ethernet so it could be easily set up at the con with just a single cable run.

A look at the custom keypad PCB.

The keypad is a custom input device using the Arduino Micro and Cherry MX Blue switches with 3D printed keycaps to get that chunky payphone look and feel. [Purkkaviritys] mentions that the keypad is also responsible for controlling the RGB LED strips built into the sides of the terminal, and that the Raspberry Pi toggles the status of the Caps, Scroll Lock, and Num Lock keys to select the different lighting patterns.

Naturally we’d like to see more info on how this beauty was put together, but given that it was built for such a specific purpose, it’s not like you’d really need to duplicate the original configuration anyway. Thanks to [Purkkaviritys] you have the STL files to print off our own copy of the gloriously cyberpunk enclosure, all you’ve got to do now is figure out how to make video calls with it.

Continue reading “3D Printed Video Terminal Dials C For Cyberpunk”

Radon Monitor Recreates Steam Gauge With E-Ink

While the full steampunk aesthetic might be a bit much for most people, those antique gauges do have a certain charm about them. Unfortunately, implementing them on a modern project can be somewhat tricky. Even if you’ve got a stock of old gauges laying around, you’ve still got to modify the scale markings and figure out how to drive them with digital electronics. While we’ve seen plenty of people do it over the years, there’s no debating it’s a lot harder than just wiring up an I2C display.

But maybe it doesn’t have to be. With his Rad-O-Matic, [Hans Jørgen Grimstad] created a pretty convincing “analog” gauge using a small e-ink panel. Of course it won’t fool anyone who gives it a close look, but at a glance, you could certainly be forgiven for thinking it was some kind of vintage indicator. Especially with the cracked and stained Fresnel lens he put in front of it.

For this project [Hans] used a LilyGo T5, which combines an ESP32 with a 2.13 inch electronic paper display. These are presumably meant to be development boards for digital signage applications, but they occasionally show up in hacker projects since they’re so easy to work with. The board pulls data from a RD200M radon sensor over a simple UART connection, and the current reading is indicated by a “needle” that moves across a horizontal scale on the display.

On its own, it wouldn’t look very vintage. In fact, quite the opposite. But [Hans] really helped sell the look on this project by designing and 3D printing a chunky enclosure and then weathering it to make it look like it’s been kicking around since the Cold War.

If you don’t feel like faking it, we’ve seen some very impressive projects based on authentic vintage gauges. As long as you don’t mind tearing up hardware that’s likely older than you are, putting in the extra effort necessary for a convincing modification can really pay off.

[Thanks to Tarjei for the tip.]

A Cyclopic LCD Case For Your Raspberry Pi Server

If you’ve got a personal website that needs hosting or a few hundred gigabytes of files that could use a centralized storage location, the Raspberry Pi’s small size and extreme energy efficiency make it a compelling server choice compared to that curbside Pentium 4 box you’ve been trying to find a home for. All you need is something to put in.

Of course there’s no shortage of Pi case designs ready to be extruded from your 3D printer, but we recently found ourselves particularly taken with this unique one designed by [Ken Segler]. It’s not only small and sleek with a dash of futuristic flair, but it includes a front-mounted two inch 240 x 320 IPS display that connects to the Pi over SPI. At the minimum that gives you a way to see all those beautiful boot messages on startup, but with a little code, it could provide you with various system statics and status messages at a glance.

While the LCD is clearly the star of the show here, the case also has a few other nice features that make it worthy of your consideration. The magnetically attached fan filter on the the top, for one. The stacked layout that puts the Pi directly above the SSD also makes for a relatively compact final product.

One thing to note though is that [Ken] is using Power-over-Ethernet, meaning there’s no spot for a dedicated power jack on the case. It’s an easy enough feature to add into your own build, but naturally not everyone’s network is suitably equipped. In that case, beyond the normal annoyances of editing STL files, it shouldn’t be too much trouble to add one in without having to literally hack your way through the printed plastic.

Mil-Spec Looks Without Defense Department Budget

While hackers and makers have a tendency to focus on functionality above all else, that doesn’t mean there isn’t room for some visual flair. A device that works well and looks good will always be more impressive than the bare bones approach, but the extra time and money it usually takes to polish up the visual component of a build means it’s often overlooked. Which is exactly what [Jay Doscher] wanted to address with his Mil-Plastic project.

On the surface, the Mil-Plastic is yet another entry in the rapidly growing and often ill-defined world of cyberdecks: custom computing devices that forgo the standard laptop and desktop dichotomy and instead explore the road not taken by mainstream consumer electronics. To that end, it’s a solid build more than worthy of praise. But more than that, it’s also a lesson on how 3D printing and some clever design can create a truly impressive visual for little more than the cost of a spool of PLA.

The modular design allows parts to be printed in parallel.

The Mil-Plastic, as the name implies, looks like it was pulled from a Humvee or an Abrams tank. While the gorgeous olive green PETG filament that [Jay] has stumbled upon certainly helps, his eye for detail and design chops aren’t to be underestimated. He’s given the case a rugged and armored look that simply screams “Your Tax Dollars At Work”, complete with faux cooling fins running along the back and a generous application of low-profile stainless steel fasteners. We’ve taken a close look at the decadence of military engineering in the past, and the Mil-Plastic could hang with the best of them.

Most importantly, [Jay] has given us all the tools and information we need to recreate the look on our own terms. You don’t have to be in the market for yet another Raspberry Pi gadget to appreciate the Mil-Plastic; the design can serve as the backbone for whatever you happen to be building. The printed case not only looks impressive, but can easily be modified and expanded as needed.

[Jay] kicked off a minor revolution late last year with his Raspberry Pi Recovery Kit, and has continued to produce well-documented designs that illustrate the incredible power of desktop 3D printing. If you can look through his portfolio and not get inspired, you may want to speak with a doctor.

3D Printed ESP8266 TV Is A Blast From The Past

We’ve often said that one of the best applications for desktop 3D printing is the production of custom enclosures, but you certainly aren’t limited to an extruded version of the classic Radio Shack project box. As [Marcello Milone] shows with this very clever retro TV enclosure for the Wemos D1 Mini, 3D printing means your imagination is the only limit when it comes to how you want to package up your latest creation.

As nice as the printed parts are, it’s the little details that really sell the look. [Marcello] has bent a piece of copper wire into a circle to make a faux antenna with vintage flair, and while the ESP is connecting to the WiFi network, it even shows an old school TV test pattern on its 1.8″ TFT display.

In the video after the break you can see the device go through its startup routine, and while displaying the Hackaday Wrencher at boot might not be strictly on theme…we’ll allow it.

While you could certainly use this little enclosure for whatever ESP project you had in mind, [Marcello] says he’s building a distributed environmental monitoring network using HTU21D temperature and humidity sensors. It sounds like he’s still working on the software side of things though, so hopefully he posts an update when the functionality is fully realized.

Continue reading “3D Printed ESP8266 TV Is A Blast From The Past”

Designing 3D Printed Enclosures For KiCad PCBs

If you’ve used KiCad before, you’re certainly familiar with the handy 3D view that shows you a rendered view of what your assembled board would look like. But as [Vadim Panov] explains, you can take this capability a step further. With a few extra tools and a little bit of know-how, you can leverage KiCad’s PCB renderings to make custom 3D printable enclosures.

The first step is to design the PCB as you normally would in KiCad. This could be an original PCB of your own invention, or a digital representation of an off-the-shelf model you want to build an enclosure for. If the latter, then the PCB doesn’t need to be 100% accurate; the goal is really just to get the big components into roughly the right areas so you can get the clearances right. Though obviously you’ll want to make sure the board’s outer dimensions and mounting hole locations are recreated as accurately as possible.

From there, [Vadim] recommends a tool called StepUp. This will take your PCB KiCad PCB files and create either a STEP or STL file of the assembled board which can be imported into your CAD package of choice. For the purposes of this demonstration he’s sticking with FreeCAD, as he likes the idea of it being a completely FOSS toolchain from start to finish.

Now that you have a model of the PCB in your CAD software, the rest is up to you. Naturally, there are existing enclosure models you can use such as the ones produced by the “Ultimate Box Maker” that we covered previously, but you could just as easily start building a new enclosure around the digital PCB.

Looking for a bit more guidance? As it so happens, our very own [Anool Mahidharia] will be presenting a class on how you can develop a KiCad + FreeCAD workflow as part of our recently launched HackadayU initiative.