Watch Video On A Oscilloscope With An ESP32

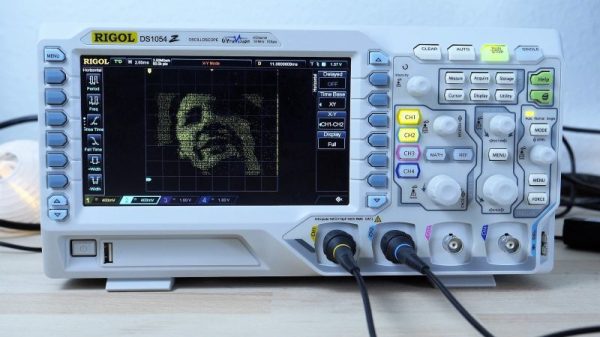
[bitluni] got a brand new scope, and he couldn’t be happier. No, really — check the video below; he’s really happy. And to celebrate, he turned his scope into a vector display using an ESP32.

Using a scope in X-Y mode is nothing new, of course. The technique is used to display everything from Lissajous patterns from an SDR to bouncing balls from an analog computer. Taken on as more of an exercise to learn how to use his new tool than a practical project, [bitluni]’s project starts by using two DACs on an ESP32 to create simple Lissajous patterns to learn about the scope’s controls. Next he built some code to display 3D point clouds, but learned that the native DAC code wasn’t up to the job. A little hacking improved the speed 27-fold, which was enough for great 3D images and live video from an I²S camera module. The latter was accomplished by grabbing frames from the camera and rendering them pixel by pixel, CRT style. The results are pretty clean, and there’s a lot to be learned about both using scopes as X-Y displays and tweaking the ESP32 for maximum performance.

Need more background on the ESP32? Start by checking out these ESP32 tutorials.


Continue reading “Watch Video On A Oscilloscope With An ESP32”

Add Intuitiveness To OpenSCAD With Encoders

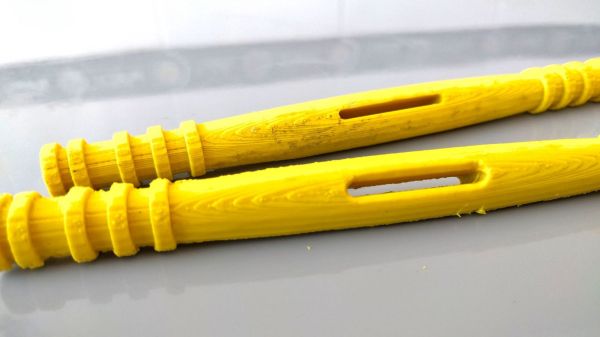
The first time I saw 3D modeling and 3D printing used practically was at a hack day event. We printed simple plastic struts to hold a couple of spring-loaded wires apart. Nothing revolutionary as far as parts go but it was the moment I realized the value of a printer.

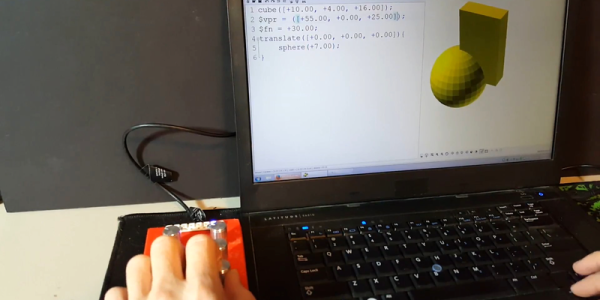
Since then, I have used OpenSCAD because that is what I saw the first time but the intuitiveness of other programs led me to develop the OpenVectorKB which allowed the ubiquitous vectors in OpenSCAD to be changed at will while keeping the parametric qualities of the program, and even leveraging them.

All three values in a vector, X, Y, and Z, are modified by twisting encoder knobs. The device acts as a keyboard to

  1. select the relevant value
  2. replace it with an updated value
  3. refresh the display
  4. move the cursor back to the starting point

There is no software to install and it runs off a Teensy-LC so reprogramming it for other programs is possible in any program where rotary encoders may be useful. Additional modes include a mouse, arrow keys, Audacity editing controls, and VLC time searching.

Here’s an article in favor of OpenSCAD and here’s one against it. This article does a good job of explaining OpenSCAD.

Continue reading “Add Intuitiveness To OpenSCAD With Encoders”

Interference Scanner With Clear Instructions

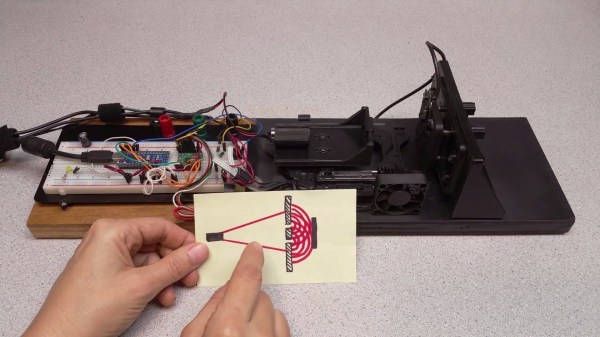
Meticulous. Thorough. Exacting. These are all words we’d use to describe this video by [BrendaEM] about her Homemade 3D Optical Interference Scanner which can be seen after the break. The scanner uses 3D-printed parts and repurposed materials you might find lying around in your spare parts bin. An old optical drive tray acts to move the laser-wielding sled while a stripped-out webcam is an optical sensor. Links to relevant files such as 3D models and Arduino sketches will be found in the video’s author section.

The principle of operation is demonstrated with a water analog in the video at 2:00 with waves in a plastic container. By creating two small apertures between a light source and a sensor, it’s possible to measure the light waves which make it through. [BrendaEM] uses some powerful visualization software to convert her samples into 3D models which look really cool and simultaneously demonstrate the wave nature of light.

On the left side of her device are the control electronics which don’t need any special coatings since light won’t pass over this area. For the right side, where coherent light is measured, to borrow a Rolling Stones lyric: no colors anymore, I want them to turn black. Even the brass strips with apertures are chemically darkened.

Most of the laser hacks here use lasers rather than measure them, like this Laser Clock and a Laser Projector.

Continue reading “Interference Scanner With Clear Instructions”

Hacked Headset Brings VR To The Commodore 64

The venerable Commodore 64 got a lot of people started in computers, and a hard core of aficionados keeps the platform very much alive to this day. But a C64 just doesn’t have the horsepower to do anything more than some retro 8-bit graphics games, right?

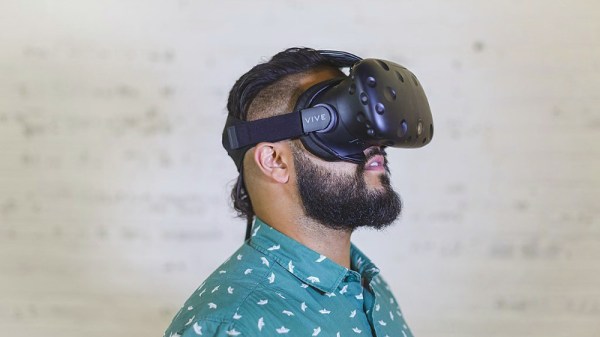
Not if [jim_64] has anything to say about it. He’s created a pair of virtual-reality goggles for the C64, and the results are pretty neat. Calling them VR is a bit of a stretch, since that would imply the headset is capable of sensing the wearer’s movements, which it’s not. With just a small LCD screen tucked into the slot normally occupied by a smartphone in the cheap VR goggles [jim64] used as a foundation for his build, this is really more of a 3D wearable display — so far. The display brings 3D-graphics to the C64, at least for the “Street Defender” game that [jim64] authored, a demo of which can be seen below. We’ll bet position sensing could be built into the goggles to control the game too. Even then it won’t be quite the immersive (and oft-times nauseating) experience that VR has become, but for a 35-year old platform, it’s not too shabby.

Looking for more C64 love? We’ve got a million of ’em — case mods, C64 laptops, tablets, even CPU upgrades.

Continue reading “Hacked Headset Brings VR To The Commodore 64”

ATMega328 3D!

Small OLED displays are inexpensive these days–cheap enough that pairing them with an 8-bit micro is economically feasible. But what can you do with a tiny display and not-entirely-powerful processor? If you are [ttsiodras] you can do a real time 3D rendering. You can see the results in the video below. Not bad for an 8-bit, 8 MHz processor.

The code is a “points-only” renderer. The design drives the OLED over the SPI pins and also outputs frame per second information via the serial port.

Continue reading “ATMega328 3D!”

Fake Your ID Photos – The 3D Way

Photographs for identification purposes have strict requirements. Lighting, expression, and framing are all controlled to enable authorities to quickly and effectively use them to identify individuals reliably. But what if you created an entirely fake photograph from scratch? That’s exactly what [Raphael Fabre] set out to do.

With today’s 3D modelling tools, human faces can be created in extreme detail. Using these, [Raphael] set out to create a 3D model of himself, which was then used to render images simulating a passport photograph. Not content to end the project there, [Raphael] put his digital doppelgänger to the test – applying for a French identification card. He succeeded.

While the technology to create and render high-quality human faces has existed for a while, it’s impressive that [Raphael]’s work passed for genuine human. Obviously there’s something to be said for the likelihood of an overworked civil servant catching this sort of ruse, but the simple fact is, the images made it through the process, and [Raphael] has his ID. Theoretically, this leaves open the possibility of creating entirely fictitious characters and registering them as real citizens with the state, for all manner of nefarious purposes. If you do this, particularly on a grand scale, be sure to submit it to the tip line.

We’ve seen other concerning ID hacks before, such as this attempt at hacking RFIDs in Passport Cards.

Helix Display Brings Snake Into Three Dimensions

Any time anyone finds a cool way to display in 3D — is there an uncool way? — we’re on board. Instructables user [Gelstronic]’s method involves an array of spinning props to play the game Snake in 3D.

The helix display consists of twelve props, precisely spaced and angled using 3D-printed parts, each with twelve individually addressable LEDs. Four control groups of 36 LEDs are controlled by the P8XBlade2 propeller microcontroller, and the resultant 17280 voxels per rotation are plenty to produce an identifiable image.

In order to power the LEDs, [Gelstronic] used wireless charging coils normally used for cell phones, transferring 10 W of power to the helix array.  A brushless motor keeps things spinning, while an Arduino controls speed and position via an encoder. All the links to the code used are found on the project page, but we have the video of the display in action is after the break.

Continue reading “Helix Display Brings Snake Into Three Dimensions”