Rainy Day Fun By Calculating Pi

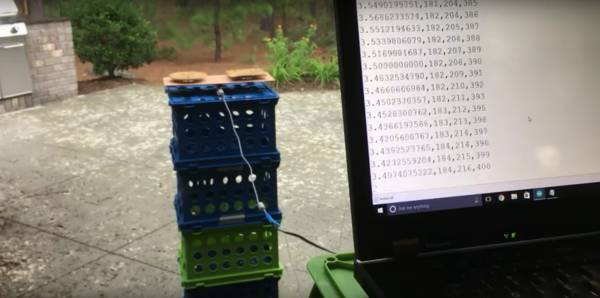
If you need a truly random event generator, just wait till your next rainstorm. Whether any given spot on the ground is hit by a drop at a particular time is anyone’s guess, and such randomness is key to this simple rig that estimates the value of pi using raindrop sensors.

You may recall [AlphaPhoenix]’s recent electroshock Settlers of Catan expeditor. The idea with this less shocking build is to estimate the value of pi using the ratio of the area of a square sensor to a circular one. Simple piezo transducers serve as impact sensors that feed an Arduino and count the relative number of raindrops hitting the sensors. In the first video below, we see that as more data accumulates, the Arduino’s estimate of pi eventually converges on the well-known 3.14159 value. The second video has details of the math behind the method, plus a discussion of the real-world problems that cropped up during testing — turns out that waterproofing and grounding were both key to noise-free data from the sensor pads.

In the end, [AlphaPhoenix] isn’t proving anything new, but we like the method here and can see applications for it. What about using such sensors to detect individual popcorn kernels popping to demonstrate the Gaussian distribution? We also can’t help but think of other ways to measure raindrops; how about strain gauges that weigh the rainwater as it accumulates differentially in square and circular containers? Share your ideas in the comments below.

Continue reading “Rainy Day Fun By Calculating Pi”

VFD Clock Only Speaks Romanian

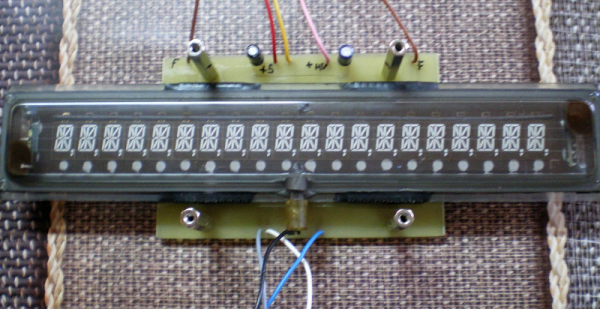
There’s no shortage of clock projects, but [niq_ro] has his own take using a vacuum fluorescent display (VFD), and Arduino, and a pair of MAX6921 ICs. Those chips are made to drive a VFD, and the use of two of the ICs required a bit of work. The Arduino is not a great time keeper, so the clock also uses a DS3231 clock module and a humidity and temperature sensor.

The clock is in Romanian, although there are some options for different text. You can find the code on GitHub and can see the result in the video below.

Continue reading “VFD Clock Only Speaks Romanian”

DIY Coil Gun Redux: Life Really Is Easier With Arduino

A common complaint in the comments of many a Hackaday project is: Why did they use a microcontroller? It’s easy to Monday morning quarterback someone else’s design, but it’s rare to see the OP come back and actually prove that a microcontroller was the best choice. So when [GreatScott] rebuilt his recent DIY coil gun with discrete logic, we just had to get the word out.

You’ll recall from the original build that [GreatScott] was not attempting to build a brick-wall blasting electromagnetic rifle. His build was more about exploring the concepts and working up a viable control mechanism for a small coil gun, and as such he chose an Arduino to rapidly prototype his control circuit. But when taken to task for that design choice, he rose to the challenge and designed a controller using discrete NAND and NOR gates, some RS latches, and a couple of comparators. The basic control circuit was simple, but too simple for safety — a projectile stuck in the barrel could leave a coil energized indefinitely, leading to damage. What took a line of code in the Arduino sketch to fix required an additional comparator stage and an RC network to build a timer to deenergize the coil automatically. In the end the breadboarded circuit did the job, but implementing it would have required twice the space of the Arduino while offering none of the flexibility.

Not every project deserves an Arduino, and sometimes it’s pretty clear the builder either took the easy way out or was using the only trick in his or her book. Hats off to [GreatScott] for not only having the guts to justify his design, but also proving that he has the discrete logic chops to pull it off.

Continue reading “DIY Coil Gun Redux: Life Really Is Easier With Arduino”

Hacked Furby Knows When You’re Near

One of the classics of circuit bending is to mess around with the clock chip that drives the CPU in simple noise-making toys. [Goran] took this a step further with his Furby hack. Skip down to the video embedded below if you just want to see the results.

After first experiments modifying the Furby’s clock with a string of resistors (YouTube), [Goran] decided to opt for more control, overriding the clock entirely with a square wave coming out of an Arduino. And then, the world became his oyster.

The Furby’s eyes were replaced with ultrasonic distance sensors, and what looks like a speaker was hot-glued into its mouth. Since this particular Furby only “talks” when you pull its tail, he naturally wired in tail-switch control to boot. As [Goran] suggests, a light show is the obvious next step.

If you haven’t pulled apart an electronic toy and played around with glitching it, you don’t know what you’re missing. We’ve got a classic intro to circuit bending, as well as projects that range from the simple to the ridiculously elaborate. It’s a fun introduction to electronics for the young ones as well. Grab a toy noisemaker and get hacking.

Continue reading “Hacked Furby Knows When You’re Near”

Add Robotic Farming To Your Backyard With Farmbot Genesis

Growing your own food is a fun hobby and generally as rewarding as people say it is. However, it does have its quirks and it definitely equires quite the time input. That’s why it was so satisfying to watch Farmbot push a weed underground. Take that!

Farmbot is a project that has been going on for a few years now, it was a semifinalist in the Hackaday Prize 2014, and that development time shows in the project documented on their website. The robot can plant, water, analyze, and weed a garden filled with arbitrarily chosen plant life. It’s low power and low maintenance. On top of that, every single bit is documented on their website. It’s really well done and thorough. They are gearing up to sell kits, but if you want it now; just do it yourself.

The bot itself is exactly what you’d expect if you were to pick out the cheapest most accessible way to build a robot: aluminum extrusions, plate metal, and 3D printer parts make up the frame. The brain is a Raspberry Pi hooked to its regular companion, an Arduino. On top of all this is a fairly comprehensive software stack.

The user can lay out the garden graphically. They can get as macro or micro as they’d like about the routines the robot uses. The robot will happily come to life in intervals and manage a garden. They hope that by selling kits they’ll interest a whole slew of hackers who can contribute back to the problem of small scale robotic farming.

Arduino + Software Defined Radio = Millions Of Vulnerable Volkswagens

As we’ve mentioned previously, the integrity of your vehicle in an era where even your car can have a data connection could be a dubious bet at best. Speaking to these concerns, a soon-to-be published paper (PDF) out of the University of Birmingham in the UK, states that virtually every Volkswagen sold since 1995 can be hacked and unlocked by cloning the vehicle’s keyfob via an Arduino and software defined radio (SDR).

The research team, led by [Flavio Garcia], have described two main vulnerabilities: the first requires combining a cyrptographic key from the vehicle with the signal from the owner’s fob to grant access, while the second takes advantage of the virtually ancient HiTag2 security system that was implemented in the 1990s. The former affects up to 100 million vehicles across the Volkswagen line, while the latter will work on models from Citroen, Peugeot, Opel, Nissan, Alfa Romero, Fiat, Mitsubishi and Ford.

Continue reading “Arduino + Software Defined Radio = Millions Of Vulnerable Volkswagens”

HardWino Takes The Effort Out Of Happy Hour

A personal bartender is hard to come by these days. What has the world come to when a maker has to build their own? [Pierre Charlier] can lend you a helping hand vis-à-vis with HardWino, an open-source cocktail maker.

The auto-bar is housed on a six-slot, rotating beverage holder, controlled by an Arduino Mega and accepts drink orders via a TFT screen. Stepper motors and L298 driver boards are supported on 3D printed parts and powered by a standard 12V DC jack. Assembling HardWino is a little involved, so [Charlier]  has provided a thorough step-by-step process in the video after the break.

Continue reading “HardWino Takes The Effort Out Of Happy Hour”