Smooth Servo Motion For Lifelike Animatronics

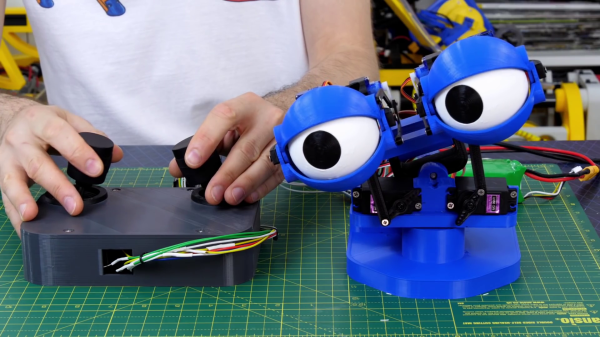
Building an animatronic robot is one thing, but animating it in a lifelike fashion is a completely different challenge. Hobby servos are cheap and popular for animatronics, but just letting it move at max speed isn’t particularly lifelike. In the video after the break, [James Bruton] demonstrates how to achieve natural motion with a simple animatronic head and a few extra lines of code.

Very little natural body movement happens at a constant speed, it’s always accelerating or decelerating. When we move our heads to look at something around us, our neck muscles accelerate our head sharply in the chosen direction and then slows down gradually as it reaches its endpoint. To do this in Arduino/C code, a new intermediate position for the servo is specified for each main loop until it reaches the final position. The intermediate value is the sum of 95% of the current position, and 5% of the target position. This gives the effect of the natural motion described above. The ratios can be changed to suit the desired speed.

The delay function is usually one of the first timing mechanisms that new Arduino programmers learn about, but it’s not suited for this application, especially when you’re controlling multiple servos simultaneously. Instead, the millis function is used to keep track of the system clock in the main loop, which fires the position update commands at the specified intervals. Adafruit wrote an excellent tutorial on this method of multitasking, which [James] based his code on. Of course, this should be old news to anyone who has been doing embedded programming for a while, but it’s an excellent introduction for newcomers.

Like most of [James]’s projects, all the code and CAD files are open source and available on GitHub. His projects make regular appearances here on Hackaday, like his mono-wheel balancing robot and mechanically multiplexed flip-dot display.

Continue reading “Smooth Servo Motion For Lifelike Animatronics”
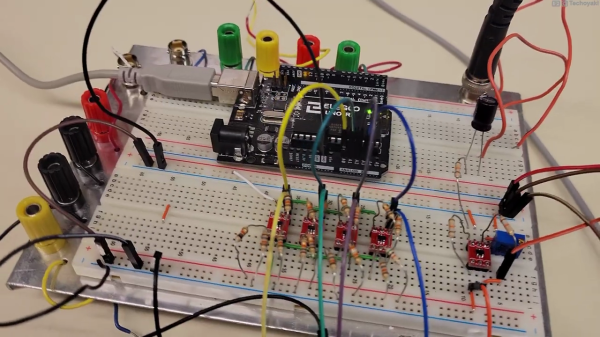
Photo of a prototyping breadboard with an Arduino, whose analog inputs are connected to an array of four small op-amp circuits which perform the voltage slicing function of the Quantizer circuit described in this article.

Arduino Measures 20V Signals Using Quantizer

Canadian electronics geek and nascent YouTuber [Technoyaki] wanted to measure 20 volt signals on his Arduino. One might typically use a voltage divider to knock them down to the 5 volt range of the Arduino’s 10-bit A/Ds. But he isn’t one to take the conventional approach. Instead of using two resistors, [Technoyaki] decides to build an analog circuit out of sixteen resistors, four op amps and a separate 6 VDC supply.

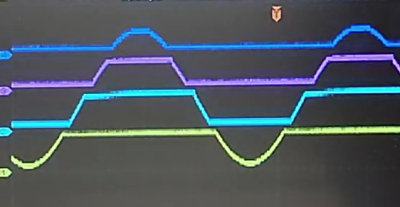
Oscilloscope photo showing the output signals from each of the quantizer's four op amps. They are positioned staggered on the screen so that you can see the original sinusoidal signal clearly.

What is a quantizer? In the usual sense, a quantizer transforms an analog signal (with an infinity of possible values) to a smaller (and finite) set of digital values. An A/D converter is a perfect example of a quantizer. [Technoyaki], stretching the definition slightly, and uses the term to describe his circuit, which is basically a voltage slicer. It breaks up the 20 V signal into four separate 5 V bands. Of course, one could almost  accomplish this by just using an Arduino Due, which has a 12-bit A/D converter (almost, because it has a lower reference voltage of 3.3 V). But that wouldn’t be as much fun.

Why use all these extra components? Clearly, reducing parts count and circuit complexity was not one of [Technoyaki]’s goals. As he describes it, the reason is to avoid the loss of A/D resolution inherent with the traditional voltage divider. As a matter of semantics, we’d like to point out that no bits of resolution are lost when using a divider — it’s more accurate to say that you gain bits of resolution when using a circuit like the quantizer.  And not surprising for precision analog circuitry, [Technoyaki] notes that there are yet a few issues yet to be solved. Even if this circuit ultimately proves impractical, it’s a neat concept to explore. Check out the video below the break, where he does a great job explaining the design and his experiments.

Even though this isn’t quite a cut-and-paste circuit solution at present, it does show another way to handle large signals and pick up some bits of resolution at the same time. We wrote before about similar methods for doubling the A/D resolution of the Arduino. Let us know if you have any techniques for measuring higher voltages and/or increasing the resolution of your A/D converters.

Continue reading “Arduino Measures 20V Signals Using Quantizer”

Detect Lightning Strikes With An Arduino

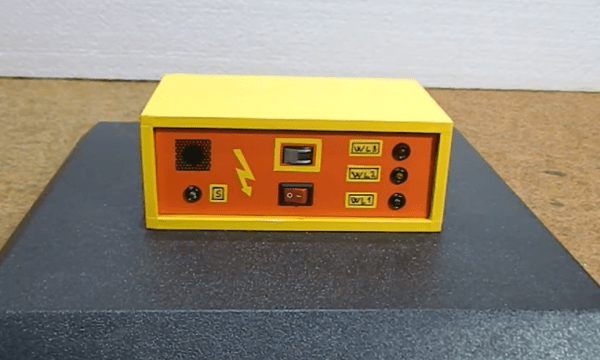
Lightning is a powerful and seemingly mysterious force of nature, capable of releasing huge amounts of energy over relatively short times and striking almost at random. Lightning obeys the laws of physics just like anything else, though, and with a little bit of technology some of its mysteries can be unraveled. For one, it only takes a small radio receiver to detect lightning strikes, and [mircemk] shows us exactly how to do that.

When lightning flashes, it also lights up an incredibly wide spectrum of radio spectrum as well. This build uses an AM radio built into a small integrated circuit to detect some of those radio waves. An Arduino Nano receives the signal from the TA7642 IC and lights up a series of LEDs as it detects strikes in closer and closer proximity to the detector. A white LED flashes when a strike is detected, and some analog circuitry supports an analog galvanometer which moves during lightning strikes as well.

While this project isn’t the first lightning detector we’ve ever seen, it does have significantly more sensitivity than most other homemade offerings. Something like this would be a helpful tool to have for lifeguards at a pool or for a work crew that is often outside, but we also think it’s pretty cool just to have around for its own sake, and three of them networked together would make triangulation of strikes possible too.

Continue reading “Detect Lightning Strikes With An Arduino”

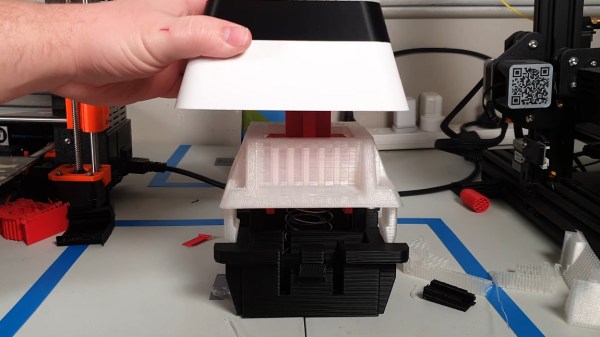
A giant, 3D-printed key switch that sends F to pay respects.

Big ‘F’ Key To Pay Big Respects

So your ally was slain. Your comrade has fallen. And somehow, that capital F coming from that tiny key is supposed to convey your respect? Please. What you need is a giant, dedicated F key that matches the size of your respect. And [Jaryd_Giesen] is gonna teach you how to build your own. Well, kind of. Between the Thingiverse build guide and the hilarious build video below, you’ll get the gist.

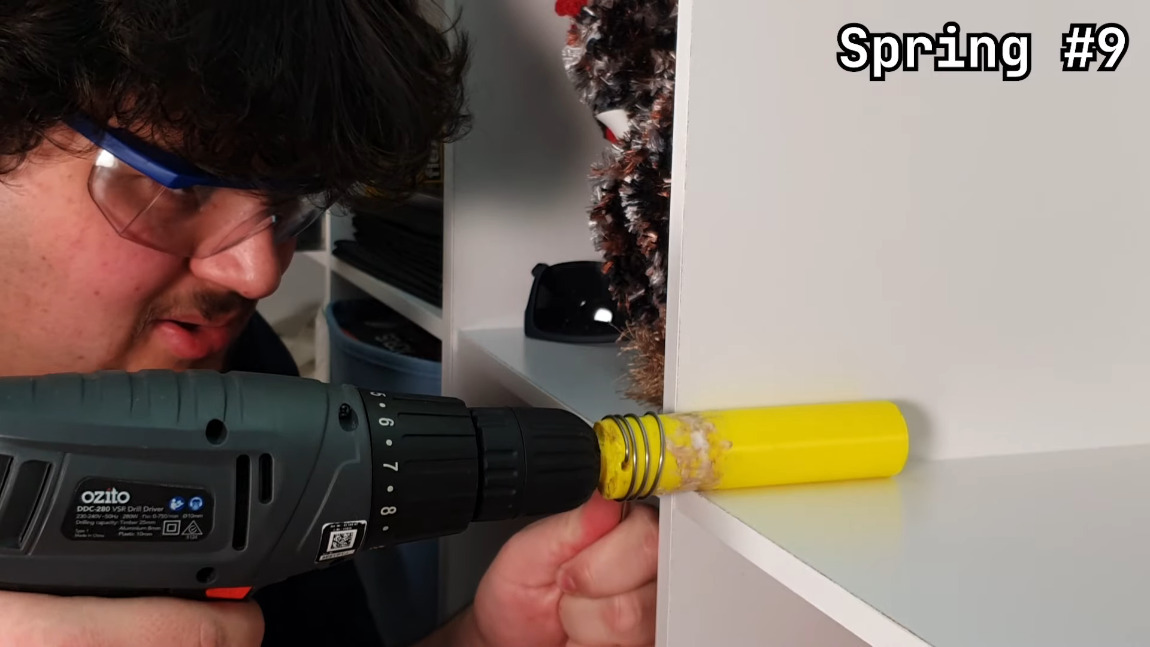
Making a custom spring using a drill and a 3D printed dowel.One of the coolest things about this build is the custom spring. Between a birthday time crunch and lockdown, there was just no way to source a giant spring in two days, so [Jaryd] printed a cylinder with a hole in it to chuck into a drill and stand in for a lathe. Ten attempts later, and the perfect spring was in there somewhere.

We love the level of detail here — making a pudding-style keycap to match the main keyboard is the icing on this clacky cake. But the best part is hidden away inside: the stem of the giant switch actuates a regular-sized key switch because it’s funnier that way. Since it’s a giant Gateron red, it doesn’t exactly clack, but it doesn’t sound linear, either, mostly because you can hear the printed pieces rubbing together. Check out the build video after the break, and hit up the second video if you just want to hear the thing.

Seeing things embiggened is one of our favorite things around here. Some things are just for looks, but other times they’re useful tools.
Continue reading “Big ‘F’ Key To Pay Big Respects”

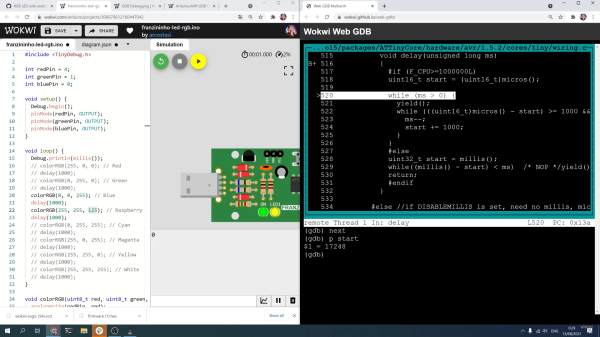
Screenshot of debugging the Wokwi Arduino simulator

Digging Into An ATtiny Simulator Bug With GDB

Being able to track down a bug in a mountain of source code is a skill in its own right, and it’s a hard skill to learn from a book or online tutorial. Besides the trial-by-fire of learning while debugging your own project, the next best thing is to observe someone else’s process. [Uri Shaked] has given us a great opportunity to brush up on our debugging skills, as he demonstrates how to track down and squish a bug in the Wokwi Arduino simulator.

A user was kind enough to report the bug and include the offending Arduino sketch. [Uri]’s first step was to reduce the sketch to the smallest possible program that would still produce the bug.

Once a minimal program had been produced, it was time to check whether the problem was in one of the Arduino libraries or in the Wokwi simulator. [Uri] compiled the sketch, loaded it onto a ATtiny85, and compared the behavior of the simulator and the real thing. It turns out the code ran just fine on a physical ATtiny, so the problem must have been in the Arduino simulator itself.

To track down the bug in the simulator, [Uri] decided to break out the big gun—GDB. What follows is an excellent demonstration of how to use GDB to isolate a problem by examining the source code and using breakpoints and print statements. In the end, [Uri] managed to isolate the problem to a mis-placed bit in the simulation of the timer/counter interrupt flag register.

If you’d like to see more of [Uri]’s debugging prowess, check out his dive into an ATtiny’s write protection and configuration fuses. If you’ve been wowed by the power of GDB and want to learn more, check out this quick tutorial!

Continue reading “Digging Into An ATtiny Simulator Bug With GDB”

Sparkpad Sparks Joy For Streamers

The best streamers keep their audience constantly engaged. They might be making quips and doing the funny voices that everyone expects them to do, but they’re also busy reading chat messages aloud and responding, managing different scenes and transitions, and so on. Many streamers use a type of macro keyboard called a stream deck to greatly improve the experience of juggling all those broadcasting balls.

Sure, there are dedicated commercial versions, but they’re kind of expensive. And what’s the fun in that, anyway? A stream deck is a great candidate for DIY because you can highly personalize the one you make yourself. Give it clicky switches, if that’s what your ears and fingers want. Or don’t. It’s your macro keyboard, after all.

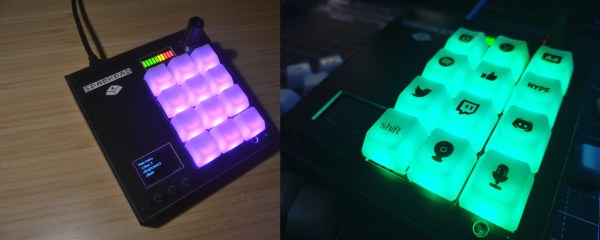
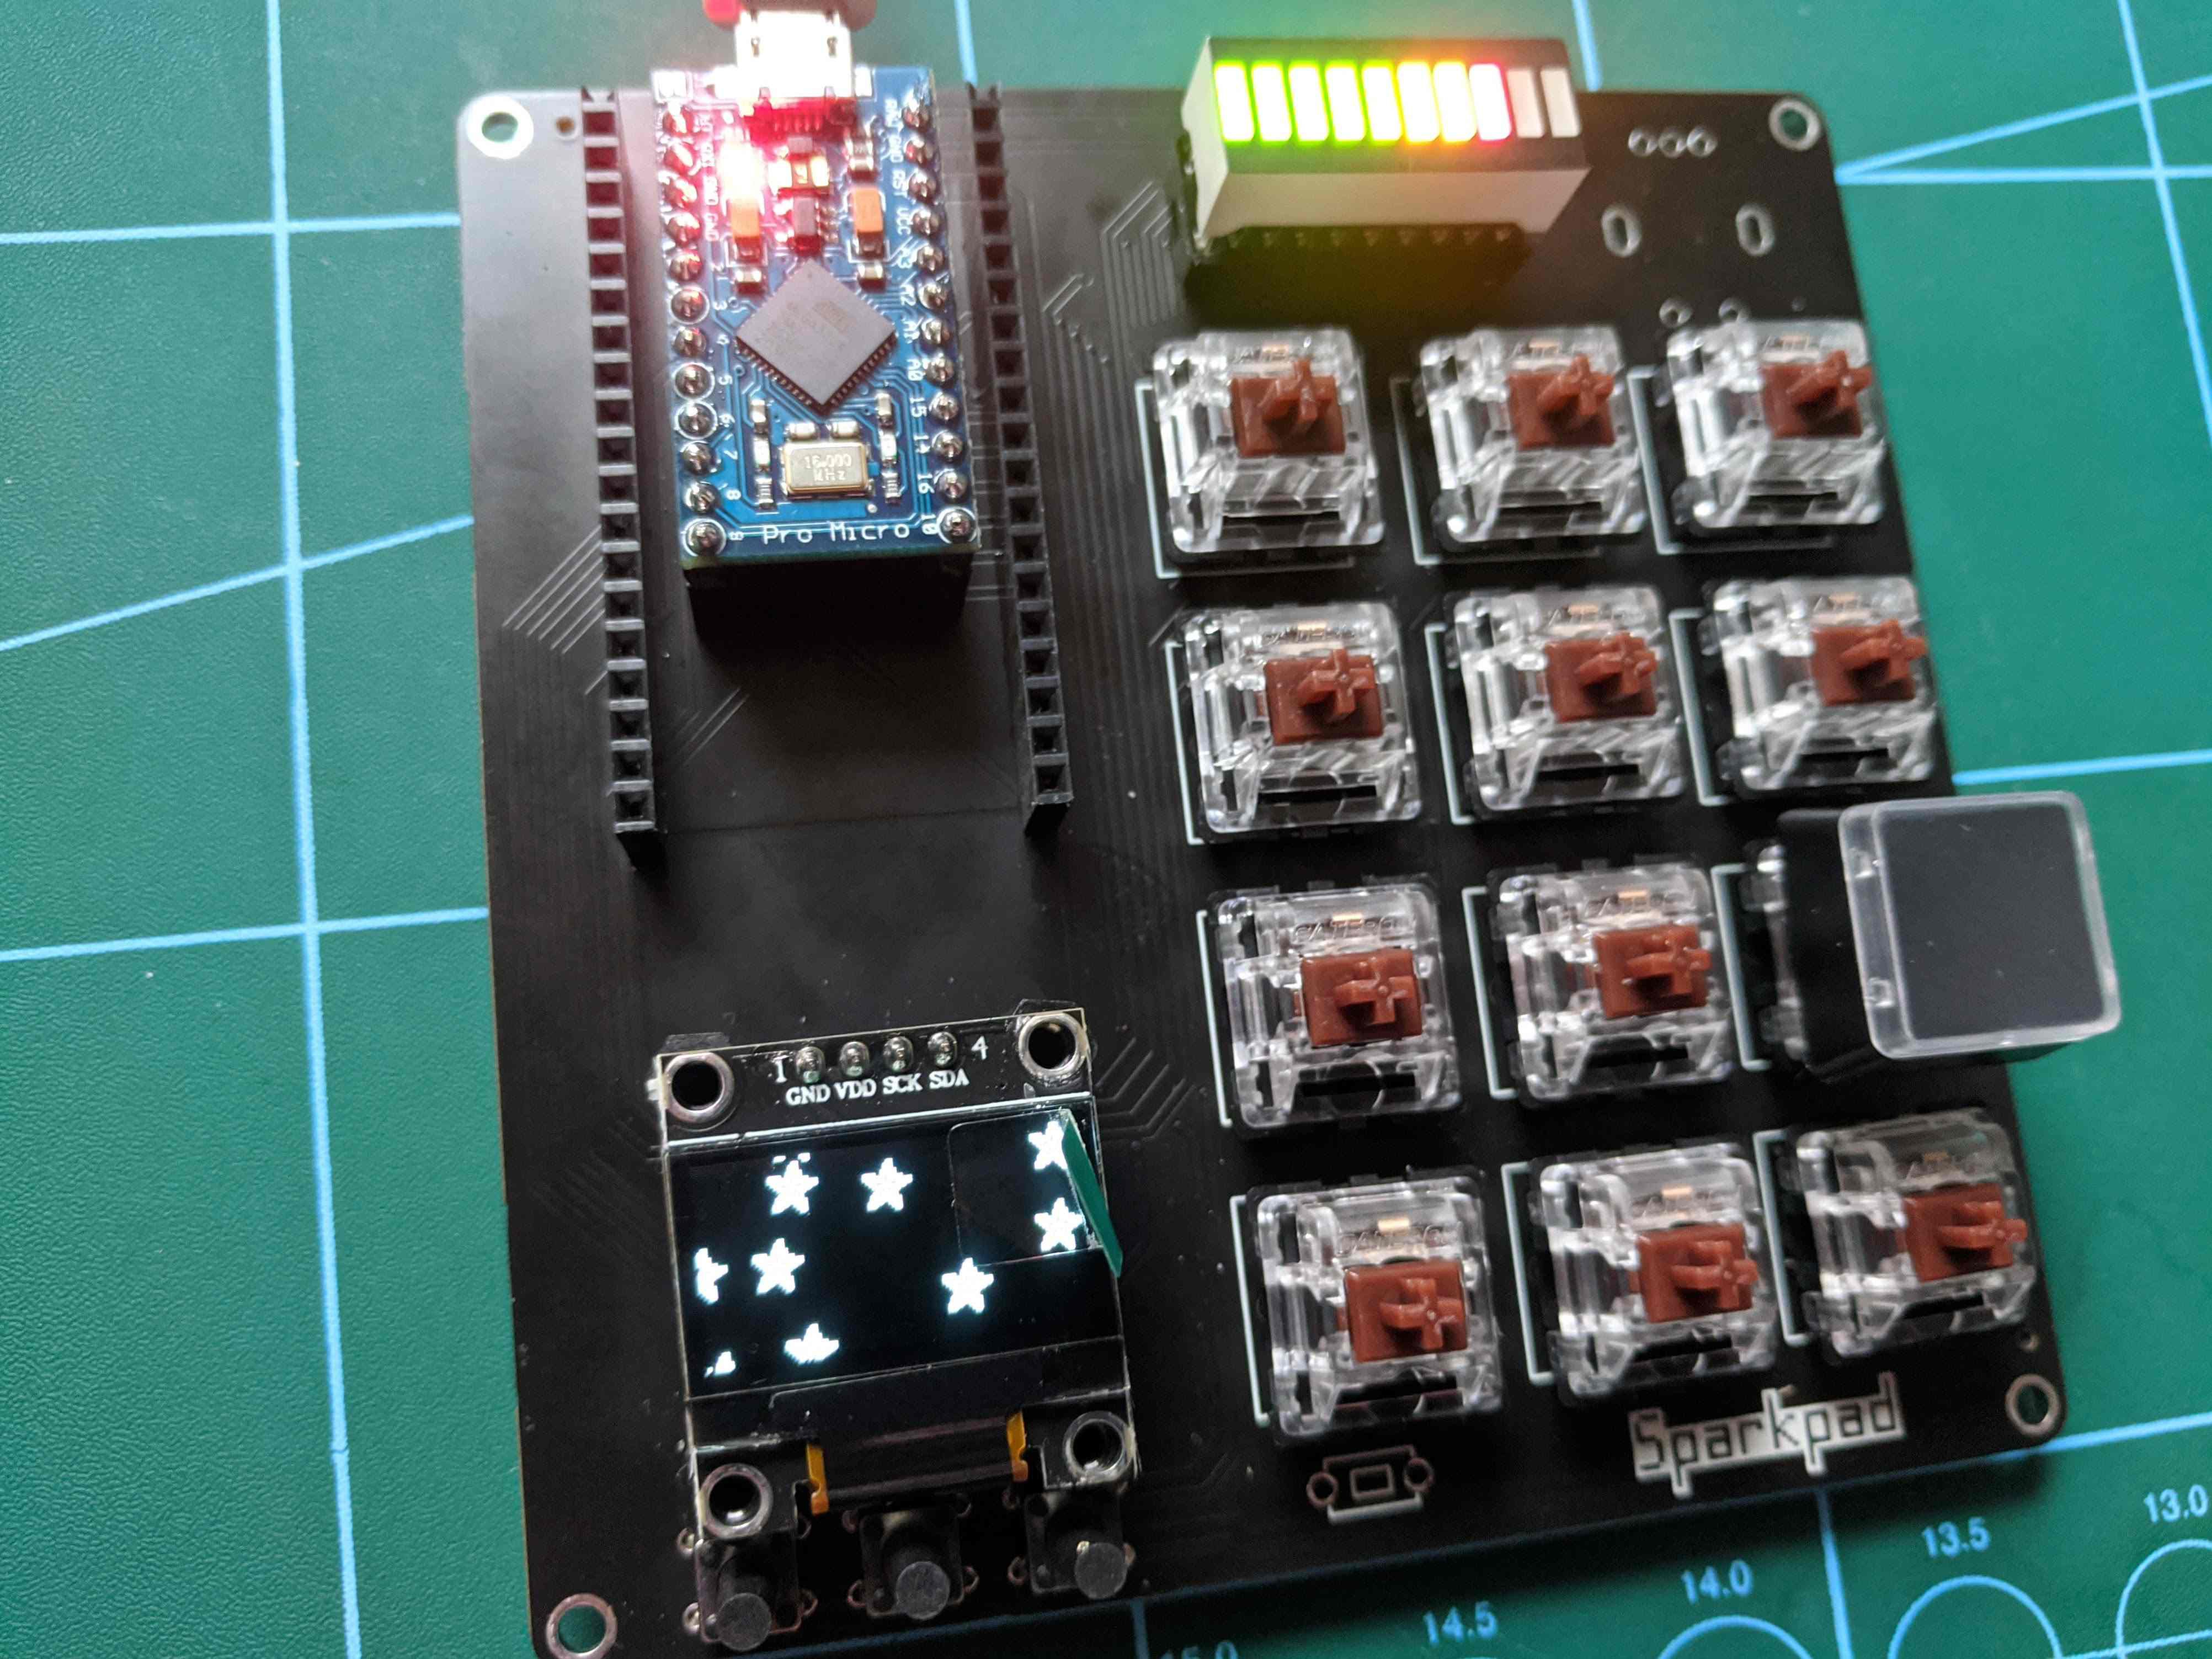
[Patrick Thomas] and [James Wood] teamed up to build the perfect stream deck for [James]’ Twitch channel. We like the way they went about it, which was to start by assessing a macro pad kit and use what they learned from building and testing it to design their ideal stream deck. The current version supports both the Arduino Pro Micro and the ESP32. It has twelve key switches, a rotary encoder, an LED bar graph, and an OLED screen for choosing between the eight different color schemes.

If you’d rather have dynamic screens instead of cool keycaps, you can do it cheaper by making non-touch screens actuate momentaries.

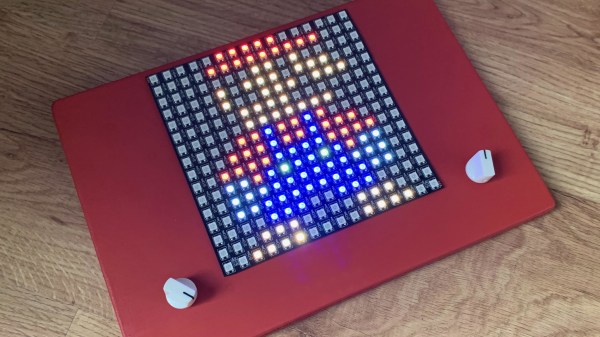
Etch-a-sketch made with LEDs

RGB LED Matrix Helps Etch-a-Sketch Scratch Out A 21st Century Existence

We never did crack open our Etch-a-Sketch, but we did scrape out a window large enough to really check out the mechanism inside. [MrLangford] is bringing the Etch-a-Sketch into the 21st century while at the same time, bringing an even bigger air of mystery, at least for the normies.

Instead of scraping aluminum powder off of plastic by driving a stylus on an x-y gantry with a pair of knobs, this bad boy uses rotary encoders to move the cursor around and put down squares of colored light. The familiar movements are there — the left knob moves the cursor left and right, and the right knob moves it up and down. But this wouldn’t be a 21st century toy without newfangled features. Push the left encoder down and it cycles through eight color choices, or push the right one down to go through them backwards. We hope one of the colors is setting it back to darkness in case you screw up. And while we’re dreaming up improvements, it would be awesome to add an accelerometer so you could shake it clear like a standard Etch-a-Sketch.

Inside the requisite red enclosure with white knobs are an Arduino Nano and a 16×16 RGB LED matrix. The enclosure is four sheets of 6mm MDF glued together, and we like the use of protoboard to distribute GND and 5 V in the name of keeping the thing slim.

If you’re not much of an artist, here’s a TV-sized Etch-a-Sketch build that can draw by itself.