Cool WS2811 Trick Makes LED Art Installation Smooth

Normally, when a project calls for addressable LEDs, we just throw a strip of WS2812s and an Arduino together, cobble together some code from the examples in the FastLED library, and call it a day. We don’t put much thought into what’s going on under the hood, unless and until we run into an LED project that’s a little more challenging.

Inventor [Leo Fernekes] found himself in such a situation recently, when he pitched in on an LED art installation. The project called for rings of LED bars around the trunks of trees on a private estate. The physical size of the project and the aesthetic requirements created significant challenges, though. One of these was finding a way to control the LED bars, each of which draws about 100 mA and needs to be very smoothly dimmed. [Leo] looked at the WS2811 LED driver, but found that the low drive current and the 8-bit PWM output failed to tick either of those boxes.

[Leo] solved both problems by using two of the three PWM channels on the chip in concert — one to control the current and one to PWM the LED. The circuit he came up with is deceptively simple — just four transistors, a Schottky diode, and a bunch of passives. The other clever bit is the data interface between LED bars, which can be configured as either single-ended or differential. This allows the same interface to be used for the short distance between bars on a tree, and the longer runs between trees.

As usual, [Leo] does a great job of explaining his design and how it works, which we find very instructional. He did something similar when he managed to dim a non-dimmable LED fixture.

Continue reading “Cool WS2811 Trick Makes LED Art Installation Smooth”

Responsive Paintings Do It With Heat And Light

Art is a conversation, yes. But normally, it’s a short one: the artist makes a statement and the audience responds, each bringing their own interpretations. The hard thing about being an artist is that once you release a piece into the world, it’s sort of bound and gagged in that it can’t defend itself from comments and misinterpretation.

On the other hand, interactive art allows for a longer discussion. Pieces are responsive and no longer mute. But so much of the interactive art out there is purely digital, and lacks a certain analog warmth that comes from physicality. For this year’s Hackaday Prize, [Laura] sought to put a digital interface on an analog visual piece and make paintings that change based on data inputs.

For now, [Laura] is focusing on adding two dynamic elements to her paintings: shifting color and light patterns in response to a viewer’s presence and/or actions using an Arduino and TinyML. For the color changes, [Laura] ended up mixing thermochromic pigment powder with a transparent gel medium.

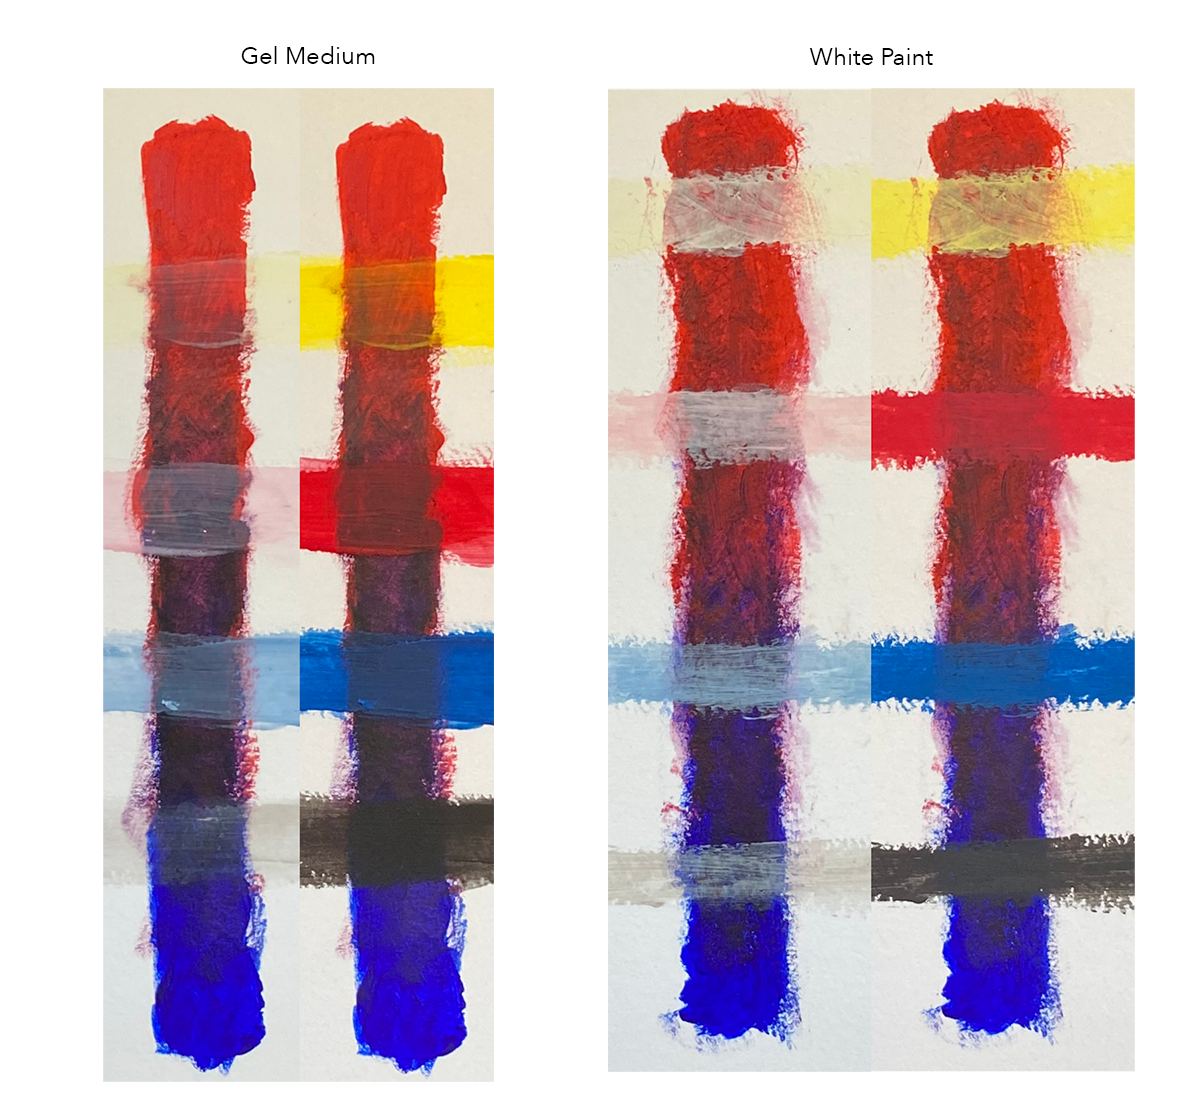
This was a bit of a journey, because the regular kind of transparent medium came out too runny, and mixing the pigments with white paint made the colors come out lighter than [Laura] wanted and left white behind when heated. But transparent gel medium was just right. You can see the difference in this picture — the colors come out darker with the gel medium, and disappear almost completely with heat.

[Laura] didn’t want to just poke LEDs through the canvas, which in this case is a 1/8″ birch panel. Instead, there’s an RGB matrix shining behind a pair of thin, diffused cutouts filled with thermoplastic.

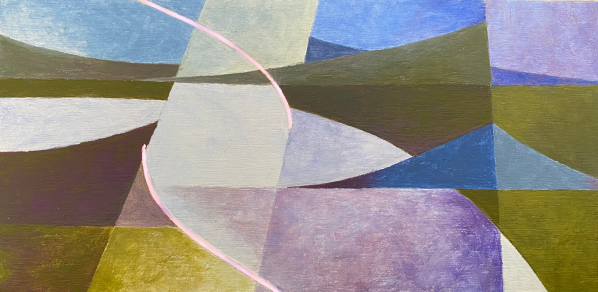
Check out the video after the break of a painting sketch that uses both techniques. Keep your eye on the purple triangles on the right side, and watch them slowly turn blue in real time as light patterns dance behind the diffused cutouts. Stick around for the second brief video that shows an updated light animation.

We’ve seen many ways of making interactive art, like this Rube Goldberg fairy tale ball maze that you control with your phone.

Continue reading “Responsive Paintings Do It With Heat And Light”

Robotic Ball-Bouncing Platform Learns New Tricks

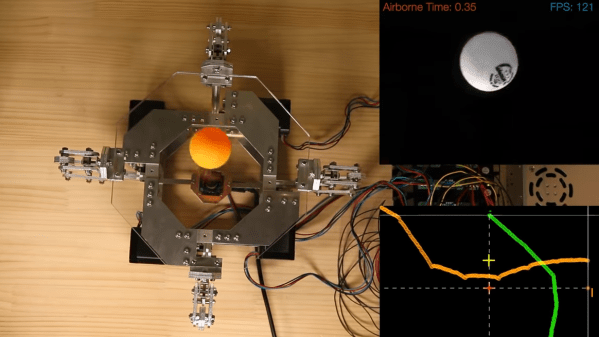
[T-Kuhn]’s Octo-Bouncer platform has learned some new tricks since we saw it last. If you haven’t seen it before, this device uses computer vision from a camera mounted underneath its thick, clear acrylic platform to track a ball in 3D space, and make the necessary (and minute) adjustments needed to control the ball’s movements with a robotic platform in real time.

We loved the Octo-Bouncer’s mesmerizing action when we saw it last, and it’s only gotten better. Not only is there a whole new custom ball detection algorithm that [T-Kuhn] explains in detail, there are also now visualizations of both the ball’s position as well as the plate movements. There’s still one small mystery, however. Every now and again, [T-Kuhn] says that the ball will bounce in an unexpected direction. It doesn’t seem to be a bug related to the platform itself, but [T-Kuhn] has a suspicion. Since contact between the ball and platform is where all the control comes from, and the ball and platform touch only very little during a bounce, it’s possible that bits of dust (or perhaps even tiny imperfections on the ball’s surface itself) might be to blame. Regardless, it doesn’t detract from the device’s mesmerizing performance.

Design files and source code are available on the project’s GitHub repository for those who’d like a closer look. It’s pretty trippy watching the demonstration video because there is so much going on at once; you can check it out just below the page break.

Continue reading “Robotic Ball-Bouncing Platform Learns New Tricks”

Art With Technology Hack Chat

Join us on Wednesday, June 16 at noon Pacific for the Art with Technology Hack Chat with Cory Collins!

As hackers, we naturally see the beauty of technology. We often talk in terms of the aesthetics of a particular hack, or the elegance of one solution over another, and we can marvel at the craftsmanship involved in everything from a well-designed PCB to a particularly clever reverse-engineering effort. Actually using technology to create art is something that’s often harder for us to appreciate, though, and looking at technological art from the artist’s side can be pretty instructive.

Cory Collins is an animator and artist with a long history of not only putting tech to work to create art, but also using it as the subject of his pieces. Cory’s work has brought life to video games, movies, and TV shows for years; more recently, he has turned his animation skills to developing interactive educational material for medical training. He has worked in just about every physical and digital medium imaginable, and the characters and scenes he has created are sometimes whimsical, sometimes terrifying, but always engaging.

Cory will stop by the Hack Chat to talk about what he has learned about technology from the artist’s perspective. Join us as we dive into the creative process, look at how art influences technology and vice versa, and learn how artistic considerations can help us address the technical problems every project eventually faces.

join-hack-chatOur Hack Chats are live community events in the Hackaday.io Hack Chat group messaging. This week we’ll be sitting down on Wednesday, June 16 at 12:00 PM Pacific time. If time zones have you tied up, we have a handy time zone converter.

Click that speech bubble to the right, and you’ll be taken directly to the Hack Chat group on Hackaday.io. You don’t have to wait until Wednesday; join whenever you want and you can see what the community is talking about.

Triangle Tiles Form Blinky Networks Using Clever Interconnects

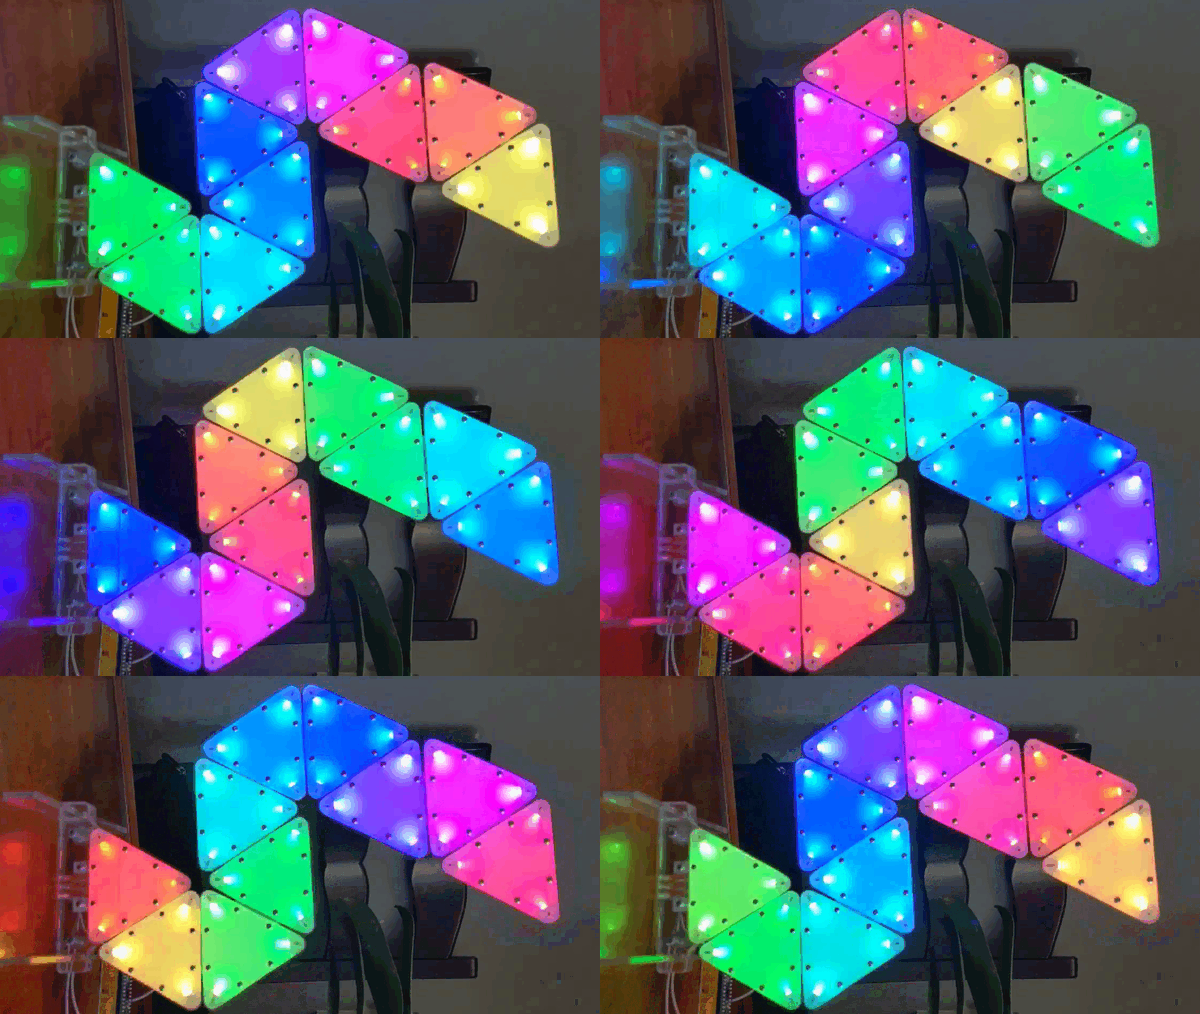
We love to see LEDs combined in all shapes and sizes, so we were especially ticked when we caught a glimpse of [Debra Ansell]’s (also known as [GeekMomProjects]) interlocking triangular TriangleLightPanel system glowing on our screen. This unusually shaped array seemed to be self supporting and brightly glowing, so we had to know more.

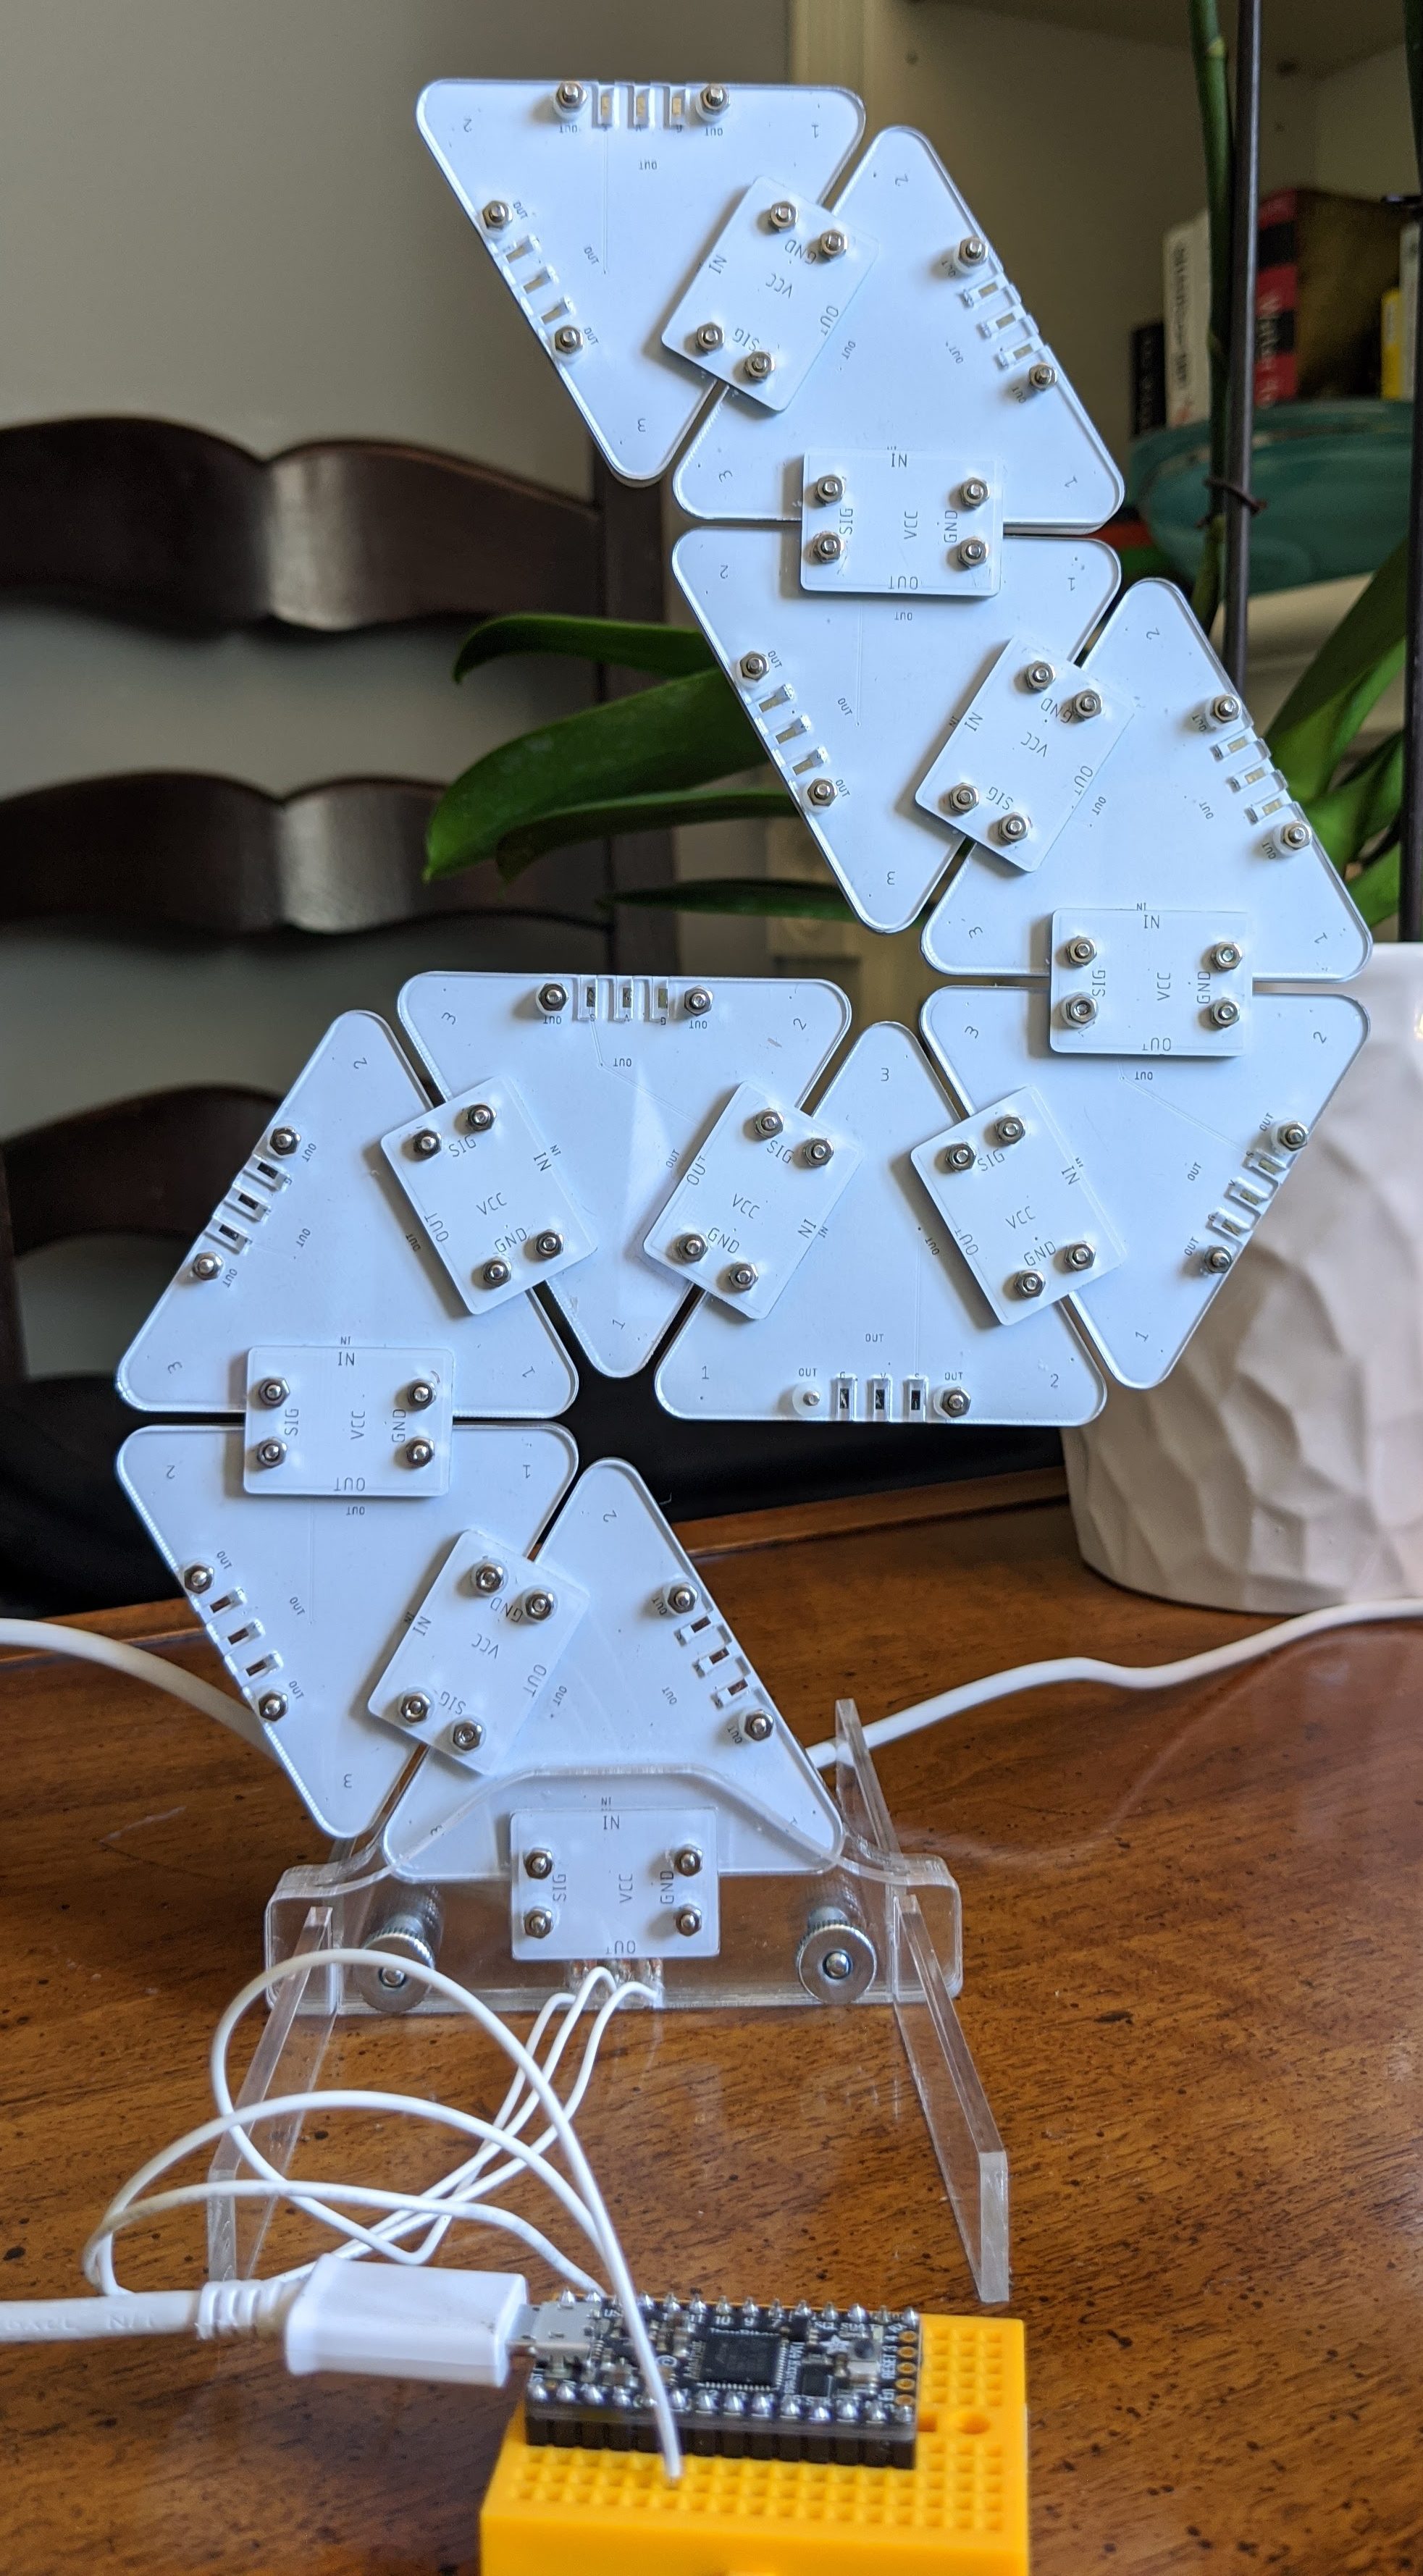
The TriangleLightPanel is a single, triangular, light panel (refreshing when everything is in the name, isn’t it?).  Each panel consists of a single white PCBA holding three side-firing SK6812 LEDs aimed inward, covered by transparent acrylic. When the LEDs are doing their thing, the three-position arrangement and reflective PCB surface does diffuses the light sufficiently to illuminate each pane — if not perfectly evenly — very effectively. Given the simple construction it’s difficult to imagine how they could be significantly improved.

The real trick is the mechanical arrangement. Instead of being connected with classic Dupont jumper wires and 0.1″ headers or some sort of edge connector, [Debra] used spring contacts. But if you’re confused by the lack of edge-plated fingers think again; the connectors are simple plated strips on the back. There is a second PCBA which effectively acts as wires and a surface to mount the spring contacts on, which is bolted onto the back of the connected leaves to bridge between each node. The tiles need to be mechanically connected in any case, so it’s a brilliantly simple way to integrate the electrical connection with the necessary mechanical one.

All the requisite source files are available on the project’s GitHub page and the original Tweets announcing the project are here for reference. We can’t wait to see what this would look like with another 30 or 40 nodes! Enterprising hackers are already building their own setup; see [arturo182]’s 24 tile array glowing after the break.

Continue reading “Triangle Tiles Form Blinky Networks Using Clever Interconnects”

Radio Build Goes Outside The Box

It’s easy to get caught up in a build and forget that the final version usually needs some sort of enclosure, especially things with sensitive electronics in them. The [Director of Legal Evil] at the LVL1 Louisville Hackerspace notes as much in his recent radio build. It seems as though the case was indeed an afterthought, but rather than throwing it in a nondescript black project enclosure it was decided to turn the idea of a project enclosure itself inside-out.

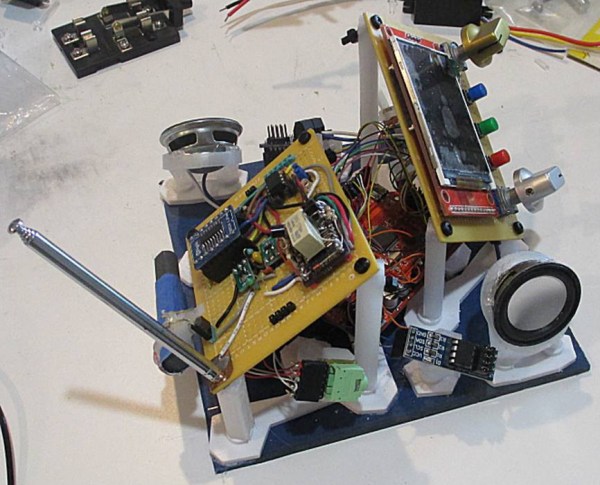
The radio build is based on an SI4732 radio receiver which is a fairly common radio module and is easily adaptable. It needs a microcontroller to run though, so a Maple STM32 platform was chosen to do all of the heavy lifting. The build includes a screen, some custom analog controls, and a small class D audio amplifier, but this is the point it begins to earn its name: the Chaos Radio. While playing around with the project design in CAD, a normal design seemed too bland so one was chosen which makes the radio look like the parts are exploding outward from what would have been a more traditional-style enclosure.

While the project includes a functioning radio receiver, we have to complement the creator for the interesting display style for this particular set of hardware. It can get boring designing the same project enclosures time after time, so anything to shake things up is often welcomed especially when it puts all of the radio components on display like this. In fact, it’s reminiscent of some of [Dmitry]’s projects, an artist known for deconstructing various common household appliances like this CD Player.

Thanks to [Jose] for the tip!

Random Robot Makes Random Art

For the price of a toothbrush and a small motor with an offset weight, a bristlebot is essentially the cheapest robot that can be built. The motor shakes the toothbrush and the bristle pattern allows the robot to move, albeit in a completely random pattern. While this might not seem like a true robot that can interact with its environment in any meaningful way, [scanlime] shows just how versatile this robot – which appears to only move randomly – can actually be used to make art in non-random ways.

Instead of using a single bristlebot for the project, three of them are built into one 3D printed flexible case where each are offset by 120°, and which can hold a pen in the opening in the center. This allows them to have some control on the robot’s direction of movement. From there, custom software attempts to wrangle the randomness of the bristlebot to produce a given image. Of course, as a bristlebot it is easily subjected to the whims of its external environment such as the leveling of the table and even the small force exerted by the power/communications tether.

With some iterations of the design such as modifying the arms and control systems, she has an interesting art-producing robot that is fairly reliable for its inherently random movements. For those who want to give something like this a try, the code for running the robot and CAD files for 3D printing the parts are all available on the project’s GitHub page. If you’re looking for other bristlebot-style robots that do more than wander around a desktop, be sure to take a look at this line-following bristlebot too.

Thanks to [johnowhitaker] for the tip!

Continue reading “Random Robot Makes Random Art”