Monoprice Mini Converted To Pick And Place (Kinda)

Would you believe that you can take a cheap 3D printer and easily convert it into a full function pick and place machine to help assemble your PCBs? No? Well good, because you can’t. A real pick and place needs all kinds of sensors and logic to identify parts, rotate them, make sure everything is aligned, etc, etc. There’s no way you could just bolt all that onto a cheap 3D printer, and let’s not even talk about the lack of closed loop control.

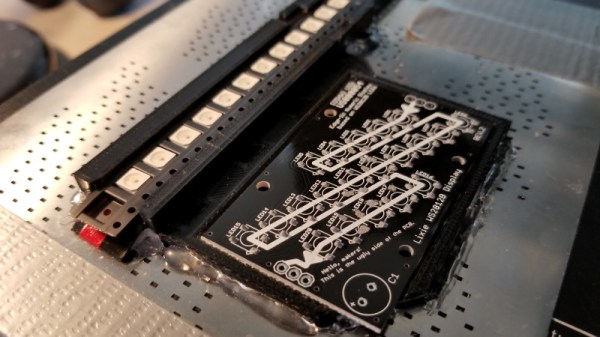
But if you have a very specific use case, namely a PCB that only has a relatively large single part that doesn’t need to be rotated, [Connor Nishijima] might have a solution for you. He bought a $150 USD Monoprice Mini, and with the addition of a few printed parts, was able to build a machine that drastically cuts down the time it takes for him to build his LED boards. Best of all the modification doesn’t involve any permanent changes to the printer, he can just pop off the vacuum attachment when he wants to print something.

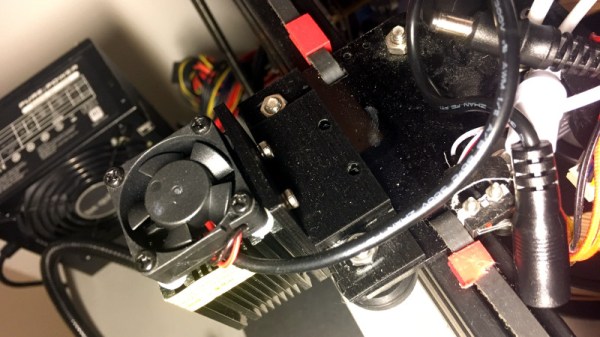
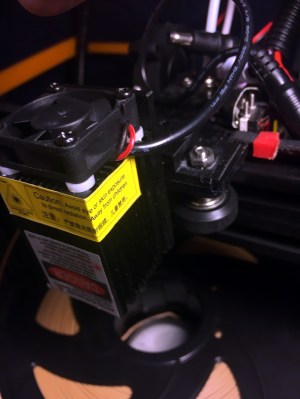
Beyond the 3D printed parts (which were made on the printer itself), the only thing you need to make the modification is the vacuum pump. [Connor] is using a hot air station that includes a vacuum pump for picking up SMD components, but he mentions that you’d probably better off just modifying an aquarium pump and using that. A printed holder snaps over the cooling fan of the Monoprice Mini to hold the vacuum pickup tool, and another printed piece holds the strip of LEDs and the PCB. It’s worth noting that the machine has no ability to control the vacuum pump, and doesn’t need to. The pickup tool is so weak that when the LED lands in the solder paste it sticks to the board well enough that the tool can’t lift it back off.

The real genius in this build comes from the manually written G-Code. You load it from the printer’s built in menu system as if it was a normal 3D print, and it instructs the printer to move the vacuum tool over the line of LEDs, pick one up, and drop it in place on the PCB. It then uses a small peg built into the vacuum tool holder to advance the line of LEDs before starting the cycle all over again. Incredibly, it does this whole complex dance 20 times for each PCB without ever having any kind of feedback or alignment check. It only works because [Connor] was willing to go through the trial and error of getting the calibration and G-Code down as close to perfect as can be expected for such a cheap machine.

This isn’t the first time we’ve seen the Monoprice Mini converted into something a bit more impressive than a cheapo 3D printer. Seems that for whatever the machine lacks in the printing department, it more than makes up for in hackability.

Continue reading “Monoprice Mini Converted To Pick And Place (Kinda)”

Supersize DIY R/C Servos From Windscreen Wipers

We’re all familiar with the experience of buying hobby servos. The market is awash with cheap clones which have inflated specs and poor performance. Even branded servos often fail to deliver, and sometimes you just can’t get the required torque or speed from the small form factor of the typical hobby servo.

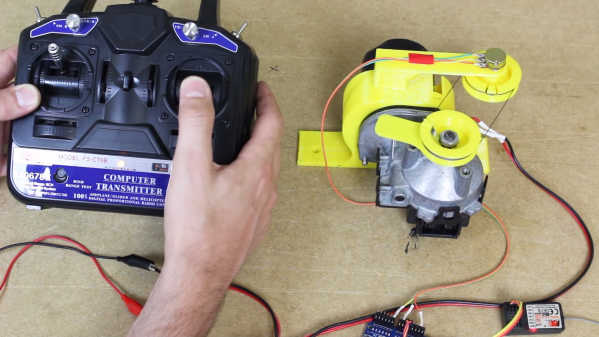
Enter [James Bruton] and his DIY RC servo from a windscreen wiper motor. Windscreen wiper motors are cheap as chips, and a classic salvage. The motor shaft is connected to a potentiometer via a pulley and some string, providing the necessary closed-loop feedback. Instead of using the traditional analog circuitry found inside a servo, an Arduino provides the brains. This means PID control can be implemented on the ‘duino, and tuned to get the best response from different load characteristics. There’s also the choice of different interfacing options: though [James]’ Arduino code accepts PWM signals for a drop-in R/C servo replacement, the addition of a microcontroller means many other input signal types and protocols are available. In fact, we recently wrote about serial bus servos and their numerous advantages.

We particularly love this because of the price barrier of industrial servomotors; sure, this kind of solution doesn’t have the precision or torque that off-the-shelf products provide, but would be sufficient for many hacks. Incidentally, this is what inspired one of our favourite open source projects: ODrive, which focuses on harnessing the power of cheap brushless motors for industrial use.

Continue reading “Supersize DIY R/C Servos From Windscreen Wipers”

Vintage Sewing Machine To Computerized Embroidery Machine

It is February of 2018. Do you remember what you were doing in December of 2012? If you’re [juppiter], you were starting your CNC Embroidery Machine which would not be completed for more than half of a decade. Results speak for themselves, but this may be the last time we see a first-generation Raspberry Pi without calling it retro.

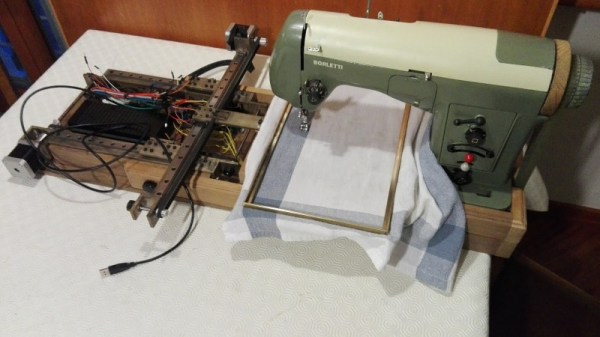
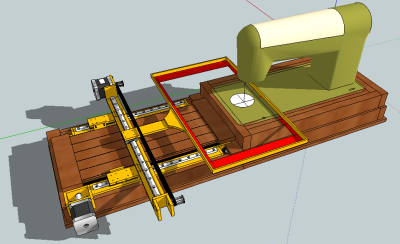
The heart of the build is a vintage Borletti sewing machine, and if you like machinery porn, you’re going to enjoy the video after the break. The brains of the machine are an Arduino UNO filled with GRBL goodness and the Pi which is running CherryPy. For muscles, there are three Postep25 stepper drivers and corresponding NEMA 17 stepper motors.

The first two axes are for an X-Y table responsible for moving the fabric through the machine. The third axis is the flywheel. The rigidity of the fabric frame comes from its brass construction which may have been soldered at the kitchen table and supervised by a big orange cat. A rigid frame is the first ingredient in reliable results, but belt tension can’t be understated. His belt tensioning trick may not be new to you, but it was new to some of us. Italian translation may be necessary.

The skills brought together for this build were vast. There was structural soldering, part machining, a microcontroller, and motion control. The first time we heard from [juppiter] was December 2012, and it was the result of a Portable CNC Mill which likely had some influence on this creation. Between then, he also shared his quarter-gobbling arcade cabinet with us.

Continue reading “Vintage Sewing Machine To Computerized Embroidery Machine”

Camping In A…. Corolla?

A weekend away camping in the wilds can do wonders for one’s sanity, and the joy of spending it in a recently converted camping vehicle adds to the delight. In a twist on the conventional camper, redditor [Gongfucius] and his wife have converted their 2005 Toyota Corolla into the perfect getaway vehicle for two.

To make enough room, the rear seating had to go, and removing it was deceptively easy. [Gongfucius] was able to build and fit a platform peppered with storage hatches that could snap into place and cover the trunk and backseat — covering it with felt for added comfort. A mattress was cut to size out of five inch memory foam and his wife sewed fitted coverings to them. More storage nooks in the trunk keep necessities at hand.

Continue reading “Camping In A…. Corolla?”

Amphibious Houseboat Hits The Open Road

What’s better than having your own houseboat? How about an amphibious houseboat? That’s exactly what [Theon Parseghian] is building in his driveway. It all started with a derelict 32-foot long houseboat. A 1967 model with a rusted steel hull, [Theon] originally bought it as a guest house.

[Theon] couldn’t let the boat rust away in his back yard though. Quickly decided to get it back on the open water…. and on the road. An amphibious houseboat. While looking for large tractor tires, [Theon] found an entire crop sprayer which hadn’t been used in years. This crop sprayer was a giant tricycle wheeled monster, with huge spray arms.

The original plan was to carve out a hole for the sprayer, and essentially drop the boat on the sprayer chassis. Things never quite work out as planned though. The sprayer was a bit too short, so it’s chassis was replaced with one from a school bus. The axle wasn’t quite long enough to clear the boat’s draft, so it was extended with custom steel wheel spacers.

The build is documented in a 7 part series on YouTube. The latest episode details the boat’s first drive under its own power. We’re not sure how street legal an amphibious houseboat would be, but [Theon] doesn’t have too far to drive, as there is a large lake just behind his shop in Upstate New York. The houseboat launches on August 23. Good luck [Theon]!

If a houseboat is too big for you, how about a barrel boat. If you’re into tiny boats, you could cross the Atlantic with a 42-inch vessel.

Continue reading “Amphibious Houseboat Hits The Open Road”

Convert Temperatures The Analog Way

Everyone knows how to convert from Celsius to Fahrenheit, right? On a digital thermometer you just flick the little switch, on a weather app you change the settings, or if worse comes to worse, you let Google do the math for you. But what if you want to solve the problem the old-fashioned way? Then you pull out a few op amps and do your conversions analog style.

We’ve seen before how simple op amp circuits can do basic math, and the equation that [Kerry Wong] wants to solve is even simpler. Recalling the old T= 9/5·Tc + 32 formula (and putting aside the relative merits of metric versus traditional units; we’ve had enough of that argument already), [Kerry] walks us through a simple dual op amp circuit to convert the 1 mV/°C output of a thermocouple module to 1 mV/°F. The scaling is taken care of by a non-inverting amplifier with resistors chosen to provide a gain of 1.8, while the offset is handled by a differential amplifier that adds 32 mV to the scaled input. Strategically placed trimmers allow [Kerry] to tweak the circuit to give just the right conversion.

For jobs like this, it’s tempting to just use an analog input on an Arduino and take care of conversions in code. But it’s nice to know how to do it old school, too, and hats off to [Kerry] for showing us the details.

Continue reading “Convert Temperatures The Analog Way”

Simple Electric Bike Conversion From 3D-Printed Parts

Challenge: Perform an electric conversion on a bicycle. Problem: No significant metal working skills or equipment. Solution: 3D print everything needed to electrify the bike.

At least that’s the approach that [Tom Stanton] took to his electric bike build. Having caught the electric locomotion bug on a recent longboard build, [Tom] undertook the upgrade of a cheap “fixie,” or fixed-gear bike. His delta printer was big enough for the motor mount and weather-resistant ESC enclosure, but he needed to print the drive pulley in four quadrants that were later glued together. We can’t say we hold much faith in the zip ties that transmit all the torque through the rear wheel’s spokes, but as a proof of concept it seems sturdy enough. With a throttle from an electric scooter and a battery in a saddle bag, the bike turns in pretty decent performance — at least after a minor gearing change. And everything blends in or accents the black frame of the bike, so it’s a good-looking build to boot.

Want to catch the cheap electric personal transportation bug too? Check out this electric longboard, or this all-terrain hoverboard.

Continue reading “Simple Electric Bike Conversion From 3D-Printed Parts”