We’re not allowed to have TV here in the Hackaday Wonder Bunker, but occasionally we’ll pool together the bandwidth credits they pay us in and gather ’round the old 3.5 inch TFT LCD to watch whatever Netflix assures us is 93% to our liking. That’s how we found out they’ve made a show based on, of all things, one of the Castlevania games for the NES. We wanted to play the game to understand the backstory, but since it hails from the era of gaming where primitive graphics had to be supplemented with soul-crushing difficulty, we didn’t get very far.
 But thanks to a very impressive project developed by [Michael Birken] maybe we’ll have it all figured out by the time we’ve saved enough credits to watch Season 2 (no spoilers, please). The software, which he’s quick to point out is not an example of machine learning, is an attempt to condense his personal knowledge of how to play Castlevania into a plugin for the Nintaco NES emulator. The end result is CastlevaniaBot, which is capable of playing through the original Castlevania from start to finish without human intervention. You can even stop and start it at will, so it can play through the parts you don’t want to do yourself.
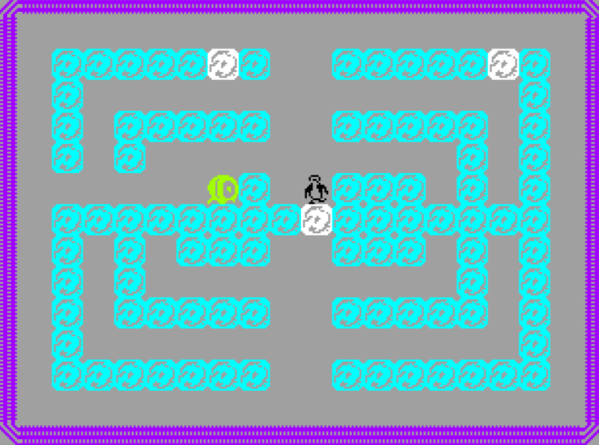
[Michael] started this project with a simple premise: if he could make a bot successfully navigate the many levels of Dracula’s castle, then getting it to kill a few monsters along the way should be easy enough. Accordingly, he spent a lot of time perfecting the path-finding for CastlevaniaBot, which included manually playing through the entire game in order to get an accurate map of the background images. These images were then analyzed to identify things like walls and stairs, so the bot would know where it could and couldn’t move protagonist Simon Belmont. No matter what the bot is doing during the game it always considers where it is and where it needs to be going, as there’s a time limit for each stage to contend with. Continue reading “AI Bot Plays Castlevania So You Don’t Have To”