GateBoy Is A Game Boy Emulated At Gate Level

Old game systems are typically the most popular targets for emulation. With huge communities of fans wanting to recreate the good times of yesteryear, most old systems have all been brought back to life in this manner. However, some simply dive into emulation for the technical challenge, and [Austin Appleby] has done just that with GateBoy.

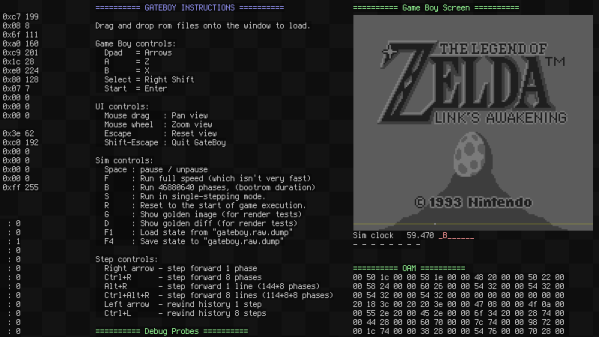
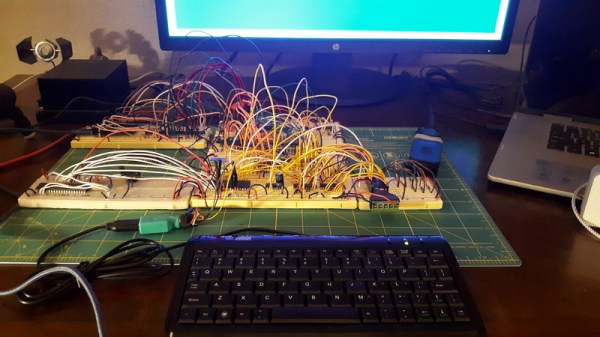
GateBoy is a project to emulate the Game Boy logic gate by logic gate. It’s a lower level approach that builds upon earlier work [Austin] did on a project called MetroBoy, which we featured previously.

The emulator was created by painstakingly reverse-engineering the logic of the Game Boy. This was done by poring over die shots of the actual DMG-01 CPU silicon. GateBoy emulates most of the chip, though avoids the audio hardware at this stage.

Presently, GateBoy runs at roughly 6-8 frames per second on a modern 4GHz CPU. As it turns out, emulating all those gates and the various clock phases at play in the DMG-01 takes plenty of processing power. However, compilation optimizations do a lot of heavy lifting, so in some regards, GateBoy runs impressively quickly for what it is.

[Austin] still has plenty of work to do before GateBoy is completely operational, and there are some strange quirks of the Game Boy hardware that still need to be figured out. Regardless, it’s a fantastic academic exercise and a noble effort indeed. Meanwhile, you might like to check out the Game Boy emulator that runs just one single game.

Pi Pico Emulates ROM For Speedy Retro Hacking

If you’ve ever worked on a system that loads its software from a ROM or EPROM, you know how much of a hassle it can be to make frequent changes to the code. Pulling the chip, flashing it, and sticking it back into the socket each time you change a line isn’t anyone’s idea of a good time. Which is why [Nick Bild] has come up with the PicoROM, a way to emulate a ROM chip using the Raspberry Pi Pico.

With the Pi Pico standing in for the original ROM, updating firmware takes a fraction of the time and doesn’t require you to actually disconnect any of the hardware. [Nick] had done something similar with FPGAs in the past, but the far cheaper and easier to work with Pi Pico makes this version particularly appealing. The secret to getting it to work is the overclocking potential of the Pico, which he says has been pushed to 400 MHz for this particular application.

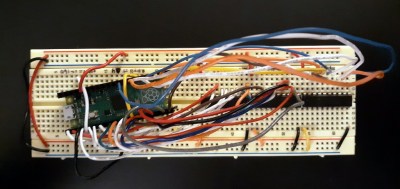
PicoROM on a breadboard.

The downside is that you can’t access the Pico’s onboard flash when the chip is running that fast. To get around that limitation, all of the code is loaded into the microcontroller’s RAM. With a healthy 264 KB of memory this isn’t really a problem when emulating 32 KB chips, but [Nick] says his method would quickly fall apart for larger ROMs.

Beyond the Pi Pico itself, [Nick] is using a trio of 74LVC245AN 8-bit logic level shifters so the chip can talk to the 5 V logic of his homebrew 6502 computer. With everything wired up on a simple breadboard, PicoROM has no trouble serving up the operating system as it hums along at 2 MHz.

Of course, a modern high-performance microcontroller isn’t strictly necessary. In the past we’ve covered devices that could emulate an EPROM using 1990s era silicon.

An HP15-C emulator PCB

Calculate Like It’s 1989 With This HP15C Emulator

Back in the day, your choice of calculator said a lot about your chops, and nothing made a stronger statement than the legendary Hewlett-Packard Voyager series of programmable calculators. From the landscape layout to the cryptic keycaps to the Reverse Polish Notation, everything about these calculators spoke to a seriousness of purpose.

Sadly, these calculators are hard to come by at any price these days. So if you covet their unique look and feel, your best bet might be to do like [alxgarza] and build your own Voyager-series emulator. This particular build emulates the HP15C and runs on an ATMega328. Purists may object to the 192×64 LCD matrix display rather than the ten-digit seven-segment display of the original, but we don’t mind the update at all. The PCB that the emulator is built on is just about the right size, and the keyboard is built up from discrete switches that are as satisfyingly clicky as the originals. We also appreciate the use of nothing but through-hole components — it seems suitably retro. The video below shows that the calculator is perfectly usable without a case; a 3D-printed case is available, though, as is an overlay that replicates the keypad of the original.

We’ve seen emulators for other classic calculators of yore, including Sinclair, Texas Instruments, and even other HP lines. But this one has a really nice design that gets us going.

Continue reading “Calculate Like It’s 1989 With This HP15C Emulator”

Yo Dawg, We Heard You Like Retrocomputers

The idea of having software translation programs around to do things like emulate a Super Nintendo on your $3000 gaming computer or, more practically, run x86 software on a new M1 Mac, seems pretty modern since it is so prevalent in the computer world today. The idea of using software like this is in fact much older and easily traces back into the 80s during the era of Commodore and Atari personal computers. Their hardware was actually not too dissimilar, and with a little bit of patience and know-how it’s possible to compile the Commodore 64 kernel on an Atari, with some limitations.

This project comes to us from [unbibium] and was inspired by a recent video he saw where the original Apple computer was emulated on Commodore 64. He took it in a different direction for this build though. The first step was to reformat the C64 code so it would compile on the Atari, which was largely accomplished with a Python script and some manual tweaking. From there he started working on making sure the ROMs would actually run. The memory setups of these two machines are remarkably similar which made this slightly easier, but he needed a few workarounds for a few speed bumps. Finally the cursor and HMIs were configured, and once a few other things were straightened out he has a working system running C64 software on an 8-bit Atari.

Unsurprisingly, there are a few things that aren’t working. There’s no IO besides the keyboard and mouse, and saving and loading programs is not yet possible. However, [unbibium] has made all of his code available on his GitHub page if anyone wants to expand on his work and may also improve upon this project in future builds. If you’re looking for a much easier point-of-entry for emulating Commodore software in the modern era, though, there is a project available to run a C64 from a Raspberry Pi.

Thanks to [Cprossu] for the tip!

Raspberry Pi Pico Used As A Transputer

You can’t fake that feeling when a $4 microcontroller dev board can stand in as cutting-edge 1980s technology. Such is the case with the working transputer that [Amen] has built using a Raspberry Pi Pico.

For a thorough overview of the transputer you should check out [Jenny List’s] longer article on the topic but boiled down we’re talking about a chip architecture mostly forgotten in time. Targetting parallel computing, each transputer chip has four serial communication links for connecting to other transputers. [Amen] has wanted to play with the architecture since its inception. It was expensive back then and today, finding multiple transputers is both difficult and costly. However, the RP2040 chip found on the Raspberry Pi Pico struck him as the perfect way to emulate the transputer design.

The RP2040 chip on the Pico board has two programmable input/output blocks (PIOs), each with four state machines in them. That matches up perfectly with the four transputer links (each is bi-directional so you need eight state machines). Furthermore, the link speed is spec’d at 10 MHz which is well within the Pico’s capabilities, and since the RP2040 runs at 133 MHz, it’s conceivable that an emulated core can get close to the 20 MHz top speed of the original transputers.

Bringing up the hardware has been a success. To see what’s actually going on, [Amen] sourced some link adapter chips (IMSC011), interfacing them through an Arduino Mega to a computer to use the keyboard and display. The transputer architecture allows code to be loaded via a ROM, or through the links. The latter is what’s running now. Future plans are to figure out a better system to compile code, as right now the only way is by running the original INMOS compiler on DOS in a VM.

Listen to [Amen] explain the project in the first of a (so far) six video series. You can find the links to the rest of those videos on his YouTube channel.

Continue reading “Raspberry Pi Pico Used As A Transputer”

Control An IRL Home From Minecraft

Minecraft seems to be a game in which anything is possible, both in the virtual world and in the real one. As a sandbox-style game, we’ve seen all kinds of things implemented in it including arithmetic logic units and microcontroller emulators. On the other end of reality we’ve also seen a lot of projects in which real-world interfaces impact the virtual world in some way. As a game, the lines between these two worlds often seem to blur, and that’s no different for this project that allows for control of a smart home from within the game itself.

The project is called HomeAssistantMC and is built with Forge. The mod interfaces directly with a Minecraft game. From within the game, players can create a model of their home complete with light switches and other control interfaces. A WebSocket API listens to the game for changes to these devices, and interfaces with real-world controllers which control the home in real life. The game uses special state blocks to handle the control, and the entire control system can be configured in-game once all of the appropriate software has been installed.

For anyone willing to experiment with this software, all of the code for this project is available on its GitHub page. One of the other interesting things about this project is the ability to use other creations within Minecraft for home automation. For example, building logic gates allows for nuanced control of the home automation setup with creations we’ve already seen in Minecraft before. And, if you really want to go deep into the weeds, you could even build a complete 6502 processor from within the game as well.

Modifying A SNES Rom To Be Widescreen

Turning a game like Super Mario World for SNES into a widescreen game is not a small task, but [Vitor Vilela] accomplished just that. [Vitor] has a long list of incredible patches such as optimizing code for better frame rates and adding code to take advantage of the SA-1 accelerator chip, so out of anyone he has the know-how to pull a widescreen mod off. This patch represents a true labor of love as many levels were designed with a specific screen width in mind. [Vitor] went through each of these single-screen width levels and expanded them by writing the extra assembly needed.

On a technical level, this hack was achieved by using the panning feature built into the game. The left and right shoulder buttons allowed a player to pan the camera to the left and right. The viewport is considered to be two times the screen resolution and so items will be rendered within the widescreen resolution. By taking away the panning feature and render a larger section of the viewport to the screen, you get a widescreen view. However, to save cycles, enemies and items don’t start moving until they get close to the screen edge. So how do you make a game widescreen without ruining the timing of every enemy that spawns? Suddenly the hours of muscle memory that fans have drilled in over the years is a disadvantage rather than a strength. The answer is a significant time investment and an eye for detail.

All the code is available on GitHub. A video of a playthrough of the mod is after the break.

Continue reading “Modifying A SNES Rom To Be Widescreen”