Serial Telemetry To Wi-Fi With An ESP8266

Hackaday.io user [J. M. Hopkins] had a problem with his rocketry. Telemetry from the rockets came down to Earth via a 433MHz serial link, but picking just the bits he needed from a sea of data for later analysis on a laptop screen on bright sunny days was getting a little difficult.

His solution was to bring the serial data from his transceiver module to an ESP8266, and from that both share it over WiFi and display pertinent information via I2C to an LCD for easy reference. And he’s put the whole lot with a power supply in a rather splendid wooden case with an SMA socket on the back to attach his Yagi.

All information received from the telemetry is passed to a client connecting via Telnet over the WiFi, but pertinent information for the LCD is selected by sending it from the rocket enclosed in square brackets. We hope that the source code will be forthcoming in time.

This isn’t the first time we’ve featured rocket telemetry here at Hackaday. And we’d be missing a trick if we didn’t point out that this project is using our own Hackaday-branded Huzzah ESP8266 breakout board from the Hackaday Store.

Color TV Broadcasts Are ESP8266’s Newest Trick

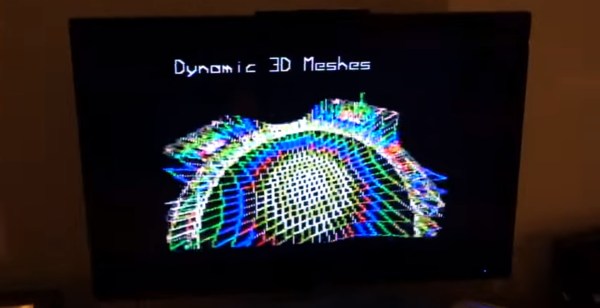
The ESP8266 is well known as an incredibly small and cheap WiFi module. But the silicon behind that functionality is very powerful, far beyond its intended purpose. I’ve been hacking different uses for the board and my most recent adventure involves generating color video from the chip. This generated video may be wired to your TV, or you can broadcast it over the air!

I’ve been tinkering with NTSC, the North American video standard that has fairly recently been superseded by digital standards like ATSC. Originally I explored pumping out NTSC with AVRs, which lead to an entire let’s learn, let’s code series. But for a while, this was on the back-burner, until I decided to see how fast I could run the ESP8266’s I2S bus (a glorified shift register) and the answer was 80 MHz. This is much faster than I expected. Faster than the 1.41 MHz used for audio (its intended purpose), 2.35 MHz used for controlling WS2812B LEDs or 4 MHz used to hopefully operate a reprap. It occasionally glitches at 80 MHz, however, it still works surprisingly well!

The coolest part of using the chip’s I2S bus is the versatile DMA engine connected to it. Data blocks can be chained together to seamlessly shift the data out, and interrupts can be generated upon a block’s completion to fill it in with new data. This allows the creation of a software defined bitstream in an interrupt.

Why NTSC? If I lived in Europe, it would have been PAL. The question you’re probably thinking is: “Why a dead standard?” And there’s really three reasons.

Continue reading “Color TV Broadcasts Are ESP8266’s Newest Trick”

Quickie WiFi Scanner

File this project under “Getting Stuff Done” rather than “Shiniest Things”. [filid] works with a local free-WiFi access group, and wanted to map out the signal strength (RSSI) and coverage of their installations. This is a trivial task for an ESP8266, and it was even easier for [filid] because he had already written some WiFi scanner code for the same hardware.

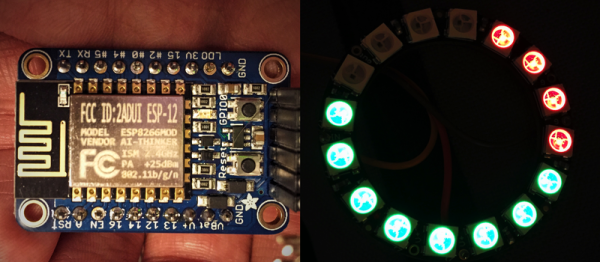
Basically, the device is a Neopixel ring connected to an ESP8266. If it detects a router that’s part of the Freifunk München network, it displays the RSSI on the ring in an attractive circular “bargraph”. When it doesn’t detect a Freifunk node, it displays the number of WiFi routers that it finds. It dumps a lot more detail over the serial port.

The code is short and sweet. Take a look if you’re just getting started with networking using the Arduino firmware on an ESP. Even if you don’t live in Munich, you’ll be able to tweak it to your own situation in a few seconds.

We want to see a GPS and an SD card added to this one, for a standalone wardriving-with-purpose setup. And while we admit that the small form-factor is probably appropriate for this project, how much cooler would it be if it glowed blue like Bilbo’s “Sting”?

$3 Smartphone From India

The release of the Ringing Bells Freedom 251 means exciting things for India, and if it goes well possibly the hacker community, too. This $3 device comes with all the things you’d expect from your standard smartphone. Considering any of the individual components alone (4″ IPS screen, cell modem, 1450 mAh battery, 1.3 GHz quad-core processor, 3.2 MP front and 0.3 MP rear cameras) could cost more than the whole thing put together, some skepticism is warranted.

There is speculation about how this is possible given Ringing Bells’ claims of no government subsidies. Considering the prototype presented to the media was from Chinese company Adcom, this may be a big scam in the making. The BBC does an examination of the many ways this seems sketchy, including the lack of appropriate government approvals (like the Indian equivalent of the FCC), and the experience of the company selling it (established in 2015).

Still, consider us curious and hopeful that we may have a new tool as useful and cheap as the ESP8266 has been. That said, it will be interesting to see if the company can maintain stock and limit hardware sales to their intended market or will a curious world electronics ecosystem make them a scarce stock item.

[via BBC]

Cheap WiFi Outlets Reflashed; Found To Use ESP8266

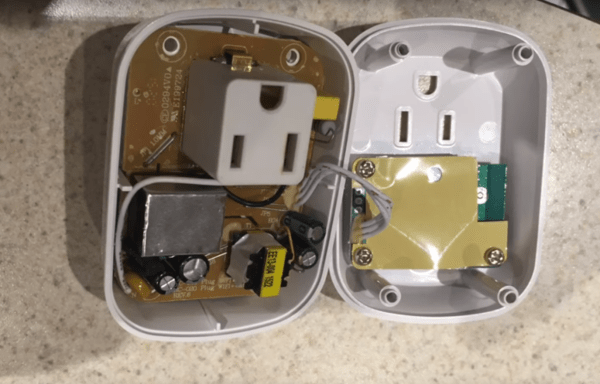
There’s a bunch of simple WiFi-enabled outlets on the market today, and all of these blister-pack goodies seem to have something in common – crappy software. At least from the hacker’s point of view; there always seems to be something that you want to do that the app just doesn’t support. Stuck in this position, [scootermcgoober] did the smart thing and reflashed his cheap IoT outlets.

Although [scooter]’s video is very recent, and he says he got his plugs at Home Depot, we were unable to find them listed for sale at any store near us. Walmart lists the same device for a paltry $15, though, so the price is right for repeating his experiment. The video after the break shows his teardown, which locates all the major components, including a mystery module that was revealed to be an ESP8266 upon decapping. Pins were traced, leads were tacked to his serial-to-USB adapter, and soon new firmware was flashing. [scooter]’s new app is simple, but there’s plenty of room for improvement once you’ve got the keys. All the code is up on GitHub.

WiFi outlets like this and the WeMo have proved to be fertile ground for hacking. Of course, if you’re not into the whole blister-pack thing, you could always roll your own WiFi outlet.

Continue reading “Cheap WiFi Outlets Reflashed; Found To Use ESP8266”

ESP8266 Transmits Television On Channel 3

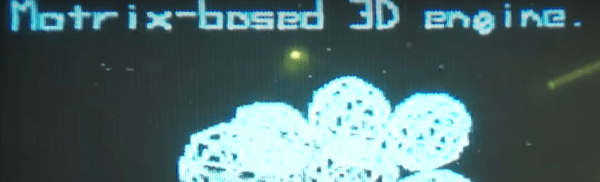
We’ve seen a lot of ESP8266 projects in the past, but this one most definitely qualifies as a hack. [Cnlohr] noticed that the ESP8266, when overclocked, could operate the I2S port at around 80MHz and still not lose DMA data. He worked out how to create bit patterns that generate RF around 60MHz. Why is that interesting? Analog TVs can receive signals around that frequency on channel 3.

As you can see in the video below, the output is monochrome only and is a little snowy. It also will lose frames on some WiFi events, but this is all forgivable when you consider this very inexpensive module isn’t meant to do video output at all.

Continue reading “ESP8266 Transmits Television On Channel 3”

Hacklet 93 – Robotics Toolkit And ESP8266 Packet Injection

You never know where a hack will take you. Sometimes a simple project will take on a life of its own and become a huge software framework. Other times, a reading blog can turn into a weekend project. Hackaday.io is the place to upload every project, big, small, or somewhere in between. This week on the Hacklet, we’re taking a look at two projects – one big, one small.

wifi1[Rand Druid] recently spent a Weekend on the Dark Side, creating an ESP8266 packet injector. The project started when [Rand] read about [Kripthor’s] deauth packet injection attacks right here on Hackaday. He initially created the WiFi denial of service throwie mentioned in the article. The basic Bill of Materials (BOM) for this device is an ESP8266 module, a DC/DC converter, a 9V battery, connectors, and a few resistors. This worked well, but some devices (most notably [Rand’s] son’s Android Phone) would disconnect and reconnect so quickly the attack had no practical impact.


double-wifi[Rand] fixed the problem by adding a second ESP8266 module. The first is the listener. It listens for WiFi access points. Once an AP is found, it sends this information to the second jammer” module via a unidirectional single line serial link. The jammer module pumps out deauth packets at full speed. He even managed to create a single executable which performs as both listener and jammer. At boot, the software sends out a series 0xFF bytes through the serial port. The listener has its serial transmit pin directly connected to the jammer’s serial receive line. When the jammer receives the 0xFF bytes, it jumps into the correct function. This was more than enough to kick that pesky Android phone off the network. As with the original article, we have to stress that you should only use modules like these for testing on your own equipment. Be careful out there folks!


bowler[Kevin Harrington] loves robots, but hates reinventing the wheel every time he creates a new machine. He’s built BowlerStudio: A robotics development platform to combat this problem. BowlerStudio was a semifinalist in the 2015 Hackaday Prize. BowlerStudio is a soup-to-nuts platform for creating all sorts of robots. [Kevin] has integrated Computer Aided Design (CAD), 3D modeling, kinematics, machine vision, and a simulation engine complete with physics modeling into one whopper of a software package. To prove how versatile the system is, he designed a hexapod robot in the CAD portion of the program. The robot then taught itself to walk in the simulation. Once the design was 3D printed, the real robot walked right off the bread board. [Kevin] linked the hardware and software with DyIO, another of his projects.

BowlerStudio is a huge boon for just about any robotics hacker, as well as educators. An entire curriculum could be created around the system. Thanks to its Java roots, BowlerStudio is also a multi-platform. [Kevin] has binaries ready to go for Windows, Mac, and Ubuntu.

The newest feature in BowlerStudio is JBullet. JBullet is a Java port of the Bullet physics library. Physics means that important real world effects like gravity and surface friction can now be added to simulations. In [Kevin’s] own words “This project is starting to feel more and more like a game engine targeted towards designing robotics and engineering tools.”

 That’s it for this week’s Hacklet. As always, see you next week. Same hack time, same hack channel, bringing you the best of Hackaday.io!