This could be the start of a new thing. [HarpDude] showed off his String Car Racers over on the Adafruit forum. It’s like a small model cable car on caffeine. String up enough of them and go head to head racing with others.
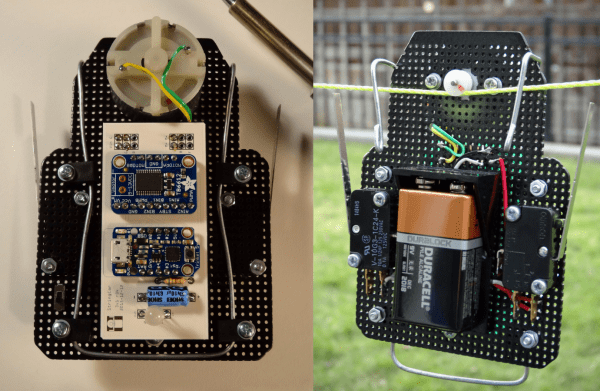
A motor with a small pulley runs over a length of string stretched between 2 posts. Below the pulley, acting as a counterweight balance, is the rest of the racer. A Trinket board, motor driver, 9V battery and a pair of long lever micro switches to detect end of travel. The switches also help reverse the motor. A piece of galvanized wire acts as a guide preventing the String Car from jumping off the string. And discovering the benefits of a micro-controller design, as against discrete TTL/CMOS, old timer [HarpDude] added two operational modes via software. “Pong”, where the String Car keeps going back and forth over the string until it stops of (battery) exhaustion. The other mode is “Boomerang” – a single return trip back and forth.
We are guessing the next upgrade would be to add some kind of radio on the car (ESP8266 perhaps) and build an app to control the String Car. That’s when gaming could become fun as it opens up possibilities. One way to improve performance would be to add two “idler” pulleys in line with the main drive pulley, and then snake the string through the three of them. Now you know what to do with all of those old motors you’ve scavenged from tape drives, CD drives and printers. Let the Games begin!
Thanks [Mike Stone] for tipping us off on this.