Unicycle Given A Hand Crafted Gear Box

Being able to coast on a bicycle is a feature that is often taken for granted. The use of a freewheel was an improvement made early in the bicycle’s history, for obvious reasons. This also unlocked the ability to build bikes with multiple gears, allowing higher speeds to be easily reached. On a unicycle, however, there’s no chain and the pedals are permanently fixed to the wheel’s axle, meaning that there is (usually) no freewheel and no gearing. [johnybondo] wanted to get some more speed out of his unicycle, though, and realized he could do this with his own homemade internal geared hub for his unicycle.

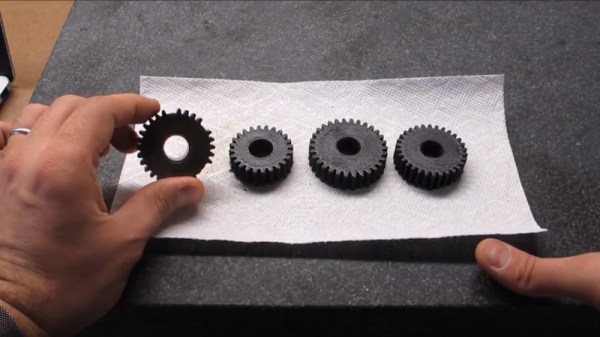
The internal hub gear was machined and welded by hand as a one-off prototype. There are commercial offerings, but at $1700 it’s almost best to fund your own machine shop. It uses a planet gearset which is more compact than a standard gear, allowing it to fit in the axle. Once all the machining was done, it was time to assemble all of the gears into the hub, lace it to the wheel with spokes, and start pedaling away. Since it was so successful, he plans to build another and lace it to a larger wheel which will allow him to reach even higher speeds. If this isn’t fast enough for you, personally, there are other options available for ludicrous speed.

Now, this gear is still “fixed” in the sense that it’s a permanent gear ratio for his unicycle and it doesn’t allow him to shift gears or coast. There’s no freewheel mechanism so the unicycle can still be pedaled forward and backwards like a traditional unicycle. The advantage of this setup is that the wheel spins 1.5 times for every one revolution of the pedals, allowing him to more easily reach higher speeds.

Adding Upgrades To A Stock Motorcycle

In today’s world of over-the-air firmware upgrades in everything from cars to phones to refrigerators, it’s common for manufacturers of various things to lock out features in software and force you to pay for the upgrades. Even if the hardware is the same across all the models, you can still be on the hook if you want to unlock anything extra. And, it seems as though Suzuki might be following this trend as well, as [Sebastian] found out when he opened up his 2011 Vstrom motorcycle.

The main feature that was lacking on this bike was a gear indicator. Even though all the hardware was available in the gearbox, and the ECU was able to know the current gear in use, there was no indicator on the gauge cluster. By using an Arduino paired with an OBD reading tool (even motorcycles make use of OBD these days), [Sebastian] was able to wire an LED ring into the gauge cluster to show the current gear while he’s riding.

The build is very professionally done and is so well blended into the gauge cluster that even we had a hard time spotting it at first. While this feature might require some additional lighting on the gauge cluster for Suzuki to be able to offer this feature, we have seen other “missing” features in devices that could be unlocked with a laughably small amount of effort.

Continue reading “Adding Upgrades To A Stock Motorcycle”

Couch Potato Refined: Self-Rotating TV Uses Plywood Gears

When we first saw [Mikeasaurus’] project to rotate his TV 90 degrees in case he wanted to lay down and channel surf we were ready to be unimpressed. But it grew on us as we read about how he fabricated his own gearing system to make a car seat motor rotate the TV.

The gearing system is made from plywood and the design was from geargenerator.com, a freebie design tool we’ve covered before. You’d think you’d need a laser cutter, but in this case, the gear forms were printed out, glued on the plywood and then cut out manually. Each gear is made of several laminated together.

Continue reading “Couch Potato Refined: Self-Rotating TV Uses Plywood Gears”

Firing Bullets Through Propellers

Early airborne combat was more like a drive-by shooting as pilot used handheld firearms to fire upon other aircraft. Whomever could boost firepower and accuracy would have the upper hand and so machine guns were added to planes. But it certainly wasn’t as simple as just bolting one to the chassis.

This was during World War I which spanned 1914 to 1918 and the controllable airplane had been invented a mere eleven years before. Most airplanes still used wooden frames, fabric-covered wings, and external cable bracing. The engineers became pretty inventive, even finding ways to fire bullets through the path of the wooden propeller blades while somehow not tearing them to splinters.

Continue reading “Firing Bullets Through Propellers”

Vintage Logan Lathe Gets 3D Printed Gears

In December 2016, [Bruno M.] was lucky enough to score a 70+ year old Logan 825 lathe for free from Craigslist. But as you might expect for a piece of machinery older than 95% of the people reading this page, it wasn’t in the best of condition. He’s made plenty of progress so far, and recently started tackling some broken gears in the machine’s transmission. There’s only one problem: the broken gears have a retail price of about $80 USD each. Ouch.

On his blog, [Bruno] documents his attempts at replacing these expensive gears with 3D printed versions, which so far looks very promising. He notes that usually 3D printed gears wouldn’t survive in this sort of application, but the gears in question are actually in a relatively low-stress portion of the transmission. He does mention that he’s still considering repairing the broken gears by filling the gaps left by the missing teeth and filing new ones in, but the 3D printed gears should at least buy him some time.

As it turns out, there’s a plugin available for Fusion 360 that helpfully does all the work of creating gears for you. You just need to enter in basic details like the number of teeth, diametral pitch, pressure angle, thickness, etc. He loaded up the generated STL in Cura, and ran off a test gear on his delta printer.

Of course, it didn’t work. Desktop 3D printing is still a finicky endeavour, and [Bruno] found with a pair of digital calipers that the printed gear was about 10% larger than the desired dimensions. It would have been interesting to find out if the issue was something in the printer (such as over-extrusion) or in the Fusion 360 plugin. In any event, a quick tweak to the slicer scale factor was all it took to get a workable gear printed on the third try.

This isn’t the first time we’ve seen 3D printed gears stand in for more suitable replacement parts, nor the first time we’ve seen them in situations that would appear beyond their capability. As 3D printer hardware and software improves, it seems fewer and fewer of the old caveats apply.

Continue reading “Vintage Logan Lathe Gets 3D Printed Gears”

Man-in-the-Middle Jog Pendant: Two Parts Make Easier Dev Work

In a project, repetitive tasks that break the flow of development work are incredibly tiresome and even simple automation can make a world of difference. [Simon Merrett] ran into exactly this while testing different stepper motors in a strain-wave gear project. The system that drives the motor accepts G-Code, but he got fed up with the overhead needed just to make a stepper rotate for a bit on demand. His solution? A grbl man-in-the-middle jog pendant that consists of not much more than a rotary encoder and an Arduino Nano. The unit dutifully passes through any commands received from a host controller, but if the encoder knob is turned it sends custom G-Code allowing [Simon] to dial in a bit acceleration-controlled motor rotation on demand. A brief demo video is below, which gives an idea of how much easier it is to focus on the nuts-and-bolts end of hardware when some simple motor movement is just a knob twist away.

Continue reading “Man-in-the-Middle Jog Pendant: Two Parts Make Easier Dev Work”

Edgytokei

Edgytokei’s Incredible Mechanism Shows Time Without A Face

Taking inspiration from Japanese nunchucks, [ekaggrat singh kalsi] came up with a brilliant clock that tells time using only hour and minute hands, and of course a base for them to sit on. The hands at certain parts of the hour seem to float in the air, or as he puts it, to sit on their edges, hence the name, the Edgytokei, translating as “edge clock”.

The time is a little difficult to read at first unless you’ve drawn in a clock face with numbers as we’ve done here. 9:02 and 9:54 are simple enough, but 9:20 and 9:33 can be difficult to translate into a time at first glance. Since both hands have to be the same length for the mechanism to work, how do you tell the two hands apart? [ekaggrat] included a ring of LEDs in the hub at the base and another at the end of one of the hands. Whichever ring of LEDs is turned on, indicates the tip of the minute hand. But the best way to get an idea of how it works is to watch it action in the video below.

We have to admire the simplicity and cleanliness of his implementation. The elbow and the hub at the base each hide a stepper motor with attached gear. Gear tracks lining the interior of the hands’ interact with the motor gears to move the hands. And to keep things clean, power is transferred using copper tape lining the exteriors.

On the Hackaday.io page [ekaggrat] talks about how difficult it was to come up with the algorithms and especially the code for homing the hands to the 12:00 position, given that homing can be initiated while the hands can be in any orientation. The hand positions are encoded in G-code, and a borrowed G-code parser running on an Arduino Nano in the base controls it all.

Continue reading “Edgytokei’s Incredible Mechanism Shows Time Without A Face”