Building A Pocket Sized Python Playground

Like many of us, [Ramin Assadollahi] has a certain fondness for the computers of yesteryear. Finding his itch for nearly instant boot times and bare metal programming weren’t being adequately scratched by any of his modern devices, he decided to build the PortablePy: a pocket-sized device that can drop him directly into a Python prompt wherever and whenever the urge hits him.

The device is powered by the Adafruit PyPortal Titano, which combines a ATSAMD51J20, ESP32, an array of sensors, and a 3.5″ diagonal 320 x 480 color TFT into one turn-key unit. The PyPortal is designed to run CircuitPython, but the scripts are usually dropped on the device over USB. That’s fine for most applications, but [Ramin] wanted his portable to be usable without the need for a host computer.

For a truly mobile experience, he had to figure out a way to bang out some Python code on the device itself. The answer ended up being the M5Stack CardKB, a tiny QWERTY board that communicates over I2C. Once he verified the concept was sound, he wrote a simple file management application and minimal Python editor that could run right on the PyPortal.

The final step was packaging the whole thing up into something he could actually take off the bench. He designed a 3D printed clamshell case inspired by the classic Game Boy Advance SP, making sure to leave enough room in the bottom half to pack in a charging board and LiPo pouch battery. He did have to remove some of the connectors from the back of the PyPortal to get everything to fit inside the case, but the compact final result seems worth the effort.

While an overall success, [Ramin] notes there are a few lingering issues. For one thing, the keyboard is literally a pain to type on. He’s considering building a custom keyboard with softer buttons, but it’s a long-term goal. More immediately he’s focusing on improving the software side of things so its easier to write code and manage multiple files.

It sounds like [Ramin] isn’t looking to compromise on his goal of making the PortablePy completely standalone, but if your convictions aren’t as strong, you could always connect a device like this up to your mobile to make things a bit easier.

Continue reading “Building A Pocket Sized Python Playground”

New Micro YARH.IO Designed For Skilled Operators

A few months back we brought you word of the YARH.IO, an extremely impressive Raspberry Pi portable that featured rugged good looks and a unique convertible design made possible by a removable keyboard. One of the most appealing aspects of the design was that everything was built from off-the-shelf modules; it only took a couple jumper wires and some scrap perfboard to get everything wired up inside the 3D printed enclosure.

The downside of this construction style was that the finished product was a bit chunkier than was strictly necessary. But that’s not the case with the new YARH.IO Micro. The palm-sized portable looks almost exactly like the original, though it had to ditch the removable keyboard in the shrinking process. Gone as well is the touch pad, though with the touch screen capabilities of the Pimoroni Hyper Pixel four inch IPS display, that’s not much of a problem.

What’s the catch? Well, at a glance we can tell you this one is considerably harder to build. For one thing, you’ll need to remove the Ethernet and USB connectors from the Pi 3B+. The USB ports get relocated, but Ethernet understandably has to be left on the cutting room floor. Nothing to worry about with the GPIO pins, the display takes up all of those, but you’ll probably want to wire the I2C lines to the female header on the side of the case so you can add external hardware and sensors.

You also need to nestle an Arduino Pro Micro in there to communicate status information about the battery to the operating system over I2C. If you wanted to save a little wiring you could probably leave off the DS3231 RTC module, but it depends on how often you’ll be able to sync up with NTP.

While it may be more difficult to assemble than its predecessor, it’s certainly not unapproachable. Once again, no custom PCBs or exotic components are required. You might be doing a lot more soldering (and desoldering) than you would have before, but it’s nothing that the average Hackaday reader isn’t capable of. For your troubles, you’ll get a exceptionally portable Linux machine that’s ripe for hacking and modification.

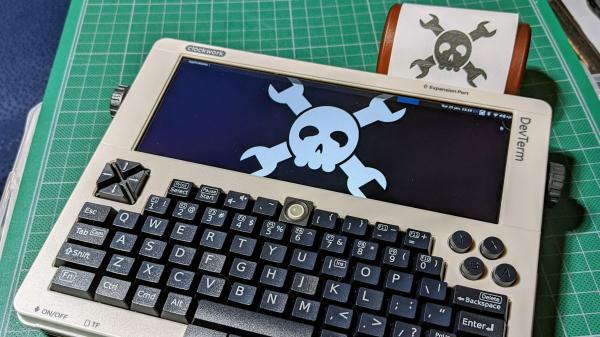
If the time and effort it will take to put together a YARH.IO is a bit more than you’re willing to invest right now, there’s always commercial alternatives like the DevTerm. But whether you go with the original or this new Micro edition, we think the satisfaction of having built the whole thing yourself will be more than worth it.

Handheld Pong On A 6502

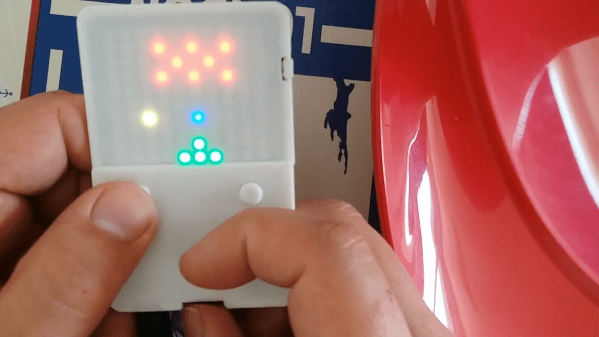
Recreating the arcade smash hit Pong in a device small enough to plug into a home television was a considerable technical challenge back in 1975. Of course, a big part of that was the fact that it needed to be cheap enough that consumers would actually buy it. But had money been no object, the Vectron Handheld by [Nick Bild] shows what a dedicated Pong board based on the 6502 CPU and 7400-series logic could have looked like.

Prototyping the Vectron Handheld

Well, aside from the display anyway. While [Nick] made sure to use components that were contemporaries of the 6502 wherever possible, he did drop in a modern SPI LCD panel. After all, it’s supposed to be a portable game system.

Though as you can see in the video after the break, the massive 273 mm x 221 mm PCB only just meets that description. Incidentally, there’s no technical reason for the board to be this big; [Nick] was just playing it safe as he’s still learning KiCad.

Those with a keen eye towards 6502 projects likely saw the breadboard version of the Vectron that [Nick] put together last year. Compared to the original, the circuit for the handheld has been considerably simplified as it wasn’t designed to be a general purpose 6502 computer. Whether or not you think being able to play Pong on it makes up for those shortcomings is a matter of personal preference.

Continue reading “Handheld Pong On A 6502″

A Fantastic Raspberry Pi Handheld Just Got Better

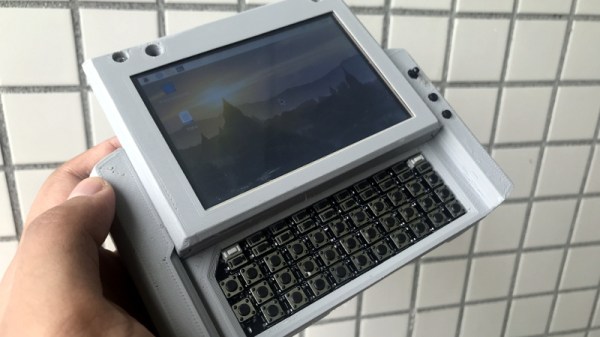
Last year, we brought you word of the MutantC by [rahmanshaber]. The Raspberry Pi handheld was more than a little inspired by the classic T-Mobile Sidekick, with a sliding display and physical QWERTY keyboard. The design was a little rough around the edges and missing a few key features, but it was clear the project had a lot of potential.

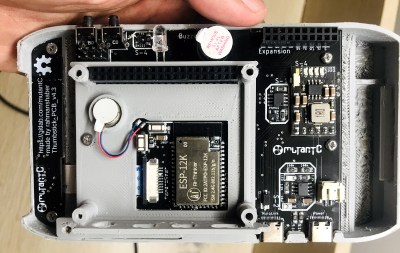
Today, we’re happy to report that [rahmanshaber] has officially released MutantC_v2. It looks like the new version of this handheld, perhaps more properly categorized as a ultra-mobile PC (UMPC), successfully addresses a number of the shortcomings found in the original; so if you held off on building one last year, you might want to start warming up the 3D printer now.

The major improvement over the original is the inclusion of a battery, which makes the device truly mobile. This was something that we mentioned [rahmanshaber] was working on back when he released the first version, as it was easily the most requested feature from the community. We certainly wouldn’t say a miniature handheld computer is completely useless if it has to stay tethered, but there’s no arguing that being able to take it on the go is ideal.

This upgraded version of the design now officially supports the Raspberry Pi 4 as well, which previously [rahmanshaber] was advising against due to overheating concerns. Slotting in the latest-and-greatest edition of every hacker’s favorite Linux single board computer will definitely kick things up a notch, though we imagine the older and less power hungry iterations of the Pi will be plenty for the sort of tasks you’re likely to be doing on a gadget like this.

If you like the idea of having a diminutive Linux computer within arm’s reach of your bench but aren’t necessarily committed enough to build something like the MutantC, there are certainly simpler designs you can get started with.

Continue reading “A Fantastic Raspberry Pi Handheld Just Got Better”

Handheld 3D Scanning, Using Raspberry Pi 4 And Intel RealSense Camera

Raspberry Pi 4 (with USB 3.0) and Intel RealSense D415 depth sensing camera.

When the Raspberry Pi 4 came out, [Frank Zhao] saw the potential to make a realtime 3D scanner that was completely handheld and self-contained. The device has an Intel RealSense D415 depth-sensing camera as the main sensor, which uses two IR cameras and an RGB camera along with the Raspberry Pi 4. The Pi uses a piece of software called RTAB-Map — intended for robotic applications — to take care of using the data from the camera to map the environment in 3D and localize itself within that 3D space. Everything gets recorded in realtime.

This handheld device can act as a 3D scanner because the data gathered by RTAB-Map consists of a point cloud of an area as well as depth information. When combined with the origin of the sensing unit (i.e. the location of the camera within that area) it can export a point cloud into a mesh and even apply a texture derived from the camera footage. An example is shown below the break.
Continue reading “Handheld 3D Scanning, Using Raspberry Pi 4 And Intel RealSense Camera”

A Wireless Controller For The Mostly Printed CNC

The Mostly Printed CNC (MPCNC) is an impressive project in its own right, allowing anyone with a 3D printer and some electrical conduit to build their own fairly heavy-duty CNC platform perfect for routing. Customization is the name of the game with the MPCNC, and few machines will look the same when they’re done. But even fewer will feature a control interface nearly as slick as the wireless handset that [Steve Croot] has put together for his.

On the hardware side, the project is fairly straightforward. Inside the 3D printed enclosure is a 4.3″ Nextion touchscreen, a Mega 2560 PRO microcontroller, a nRF24L01 2.4 GHz transceiver, and a 4000 mAh 3.7 V LiPo battery with appropriate charging circuit. Besides the physical toggle switch to turn the handheld on and off, all of the device’s functions are touch controlled. For the receiver side, [Steve] is using another nRF24L01 radio and microcontroller pair to toggle relays and shuffle the appropriate G-code commands around.

But what really makes this project shine is the software. As you can see in the video after the break, [Steve] has done an absolutely phenomenal job with the user interface on this controller. The themed boot screen and concise iconography give the controller a very professional look, and the ability to jog the machine around using taps on a virtual workspace helps keep the touch interface from being a gimmick.

We’ve seen some impressive custom-built CNC controllers over the years, but between the mostly off-the-shelf hardware used and impressive UI, we think [Steve] has created something unique. It looks like he’s keeping the source code to himself for the time being, but hopefully he sees fit to release it in the future; a project of this caliber deserves to become more than a one-off creation.

Continue reading “A Wireless Controller For The Mostly Printed CNC”

A Miniature Laptop You Can Build Yourself

Over the last couple of years, we’ve seen more and more hackers building their own custom computers. We’re not just talking casemods here; enabled by advancements in desktop 3D printing and increasingly powerful boards such as the Raspberry Pi 4, these are machines designed and built from the ground up to meet the creator’s particular set of needs and desires.

A perfect example of this trend is the Rasptop 2.0, a remarkably practical design for a 3D printed miniature laptop. Despite the name, you don’t even need to use the Raspberry Pi if you don’t want to. Creator [Morgan Lowe] has designed the Rasptop to take other single board computers (SBCs) such as the Asus Tinker Board or even the Intel Atom powered Up Board. So whether you want an energy efficient ARM machine running Linux for development, or a mobile Windows box for on the go gaming, you can use the same printed parts.

At the most basic level, the Rasptop 2.0 is just a hollow box with a hinged compartment for a screen mounted on top. You’re free to equip it with whatever hardware you chose. If you’re after maximum runtime you could fill all the free space with batteries, or maybe install multiple hard drives if you’re a data horder in need of a mobile terminal. Even the various SBCs that [Morgan] has tested are really just suggestions. The choice is yours.

Perhaps also our favorite feature of the Rasptop is how he worked a keyboard into the design. Rather than just leaving a big rectangle in the STL for you to shove a mobile keyboard into, the top surface is designed to mount the PCB and membrane keypad of one of those mini wireless keyboards you see on all the import sites. Aside from the fact it’s a good deal chunkier than what we expect from modern mobile devices, it has a very finished and professional overall look.

Of course if you’d rather use all these powerful tools to build a computer that’s somewhat farther off the beaten track, your design could abandon the traditional computer form factors altogether.