TV Ambient Lighting Built For Awesome Performance

[AndrewMohawk] had seen all kinds of ambient lighting systems for TVs come and go over the years, and the one thing they all had in common was that they didn’t live up to his high standards. Armed with the tools of the hacker trade, he set about building an Ambilight-type system of his own that truly delivered the goods.

The development process was one full of roadblocks and dead ends, but [Andrew] persevered. After solving annoying problems with HDCP and HDMI splitters, he was finally able to get a Raspberry Pi to capture video going to his TV and use OpenCV to determine the colors of segments around the screen. From there, it was simple enough to send out data to a string of addressable RGB LEDs behind the TV to create the desired effect.

For all the hard work, [Andrew] was rewarded with an ambient lighting system that runs at a healthy 20fps and works with any HDMI video feed plugged into the TV. It even autoscales to work with video content shot in different aspect ratios so the ambient display always picks up the edge of the video content.

With 270 LEDs fitted, the result is an incredibly smooth and fluid ambient display we’d love to have at home. You can build one too, since [Andrew] shared all the code on Github. As an added bonus, he also gave the system an audio visualiser, and tested it out with some Streetlight Manifesto, the greatest third-wave ska band ever to roam the Earth. The Fourth Wave still eludes us, but we hold out hope.

We’ve seen plenty of hacks in this vein before; one of the most impressive hacked a smart TV into doing the video processing itself. Video after the break.

Continue reading “TV Ambient Lighting Built For Awesome Performance”

Teaching A Machine To Be Worse At A Video Game Than You Are

Is it really cheating if the aimbot you’ve built plays the game worse than you do?

We vote no, and while we take a dim view on cheating in general, there are still some interesting hacks in this AI-powered bot for Valorant. This is a first-person shooter, team-based game that has a lot of action and a Counter-Strike vibe. As [River] points out, most cheat-bots have direct access to the memory of the computer which is playing the game, which gives it an unfair advantage over human players, who have to visually process the game field and make their moves in meatspace. To make the Valorant-bot more of a challenge, he decided to feed video of the game from one computer to another over an HDMI-to-USB capture device.

The second machine has a YOLOv5 model which was trained against two hours of gameplay, enough to identify friend from foe — most of the time. Navigation around the map was done by analyzing the game’s on-screen minimap with OpenCV and doing some rudimentary path-finding. Actually controlling the player on the game machine was particularly hacky; rather than rely on an API to send keyboard sequences, [River] used a wireless mouse dongle on the game machine and a USB transmitter on the second machine.

The results are — iffy, to say the least. The system tends to get the player stuck in corners, and doesn’t recognize enemies that pop up at close range. The former is a function of the low-res minimap, while the latter has to do with the training data set — most human players engage enemies at distance, so there’s a dearth of “bad breath range” encounters to train to. Still, we’re impressed that it’s possible to train a machine to play a complex FPS game at all, let alone this well.

PS2 Gets Integrated HDMI

It might be difficult to imagine in our modern HDMI Utopia, but there was a time when game consoles required proprietary cables to connect up to your TV. We’re not just talking about early machines like the NES either, turn of the millennium consoles like the PlayStation 2, Gamecube, and the original Xbox all had weirdo A/V ports on the back that were useless without the proper adapter.

But thanks to the efforts of [Taylor Burley], you can now upgrade your Slim PS2 with integrated HDMI capability. It’s not even a terribly difficult modification, as these things go. Sure there’s a lot of soldering involved to run from the console’s A/V connector to the commercially-made HDMI dongle he’s hidden inside the case, but at least it’s straightforward work.

Tapping into the console’s A/V connector.

As [Taylor] shows in the video after the break, all you have to do is remove the proprietary connector from the HDMI adapter dongle, and wire it directly into the console’s A/V port with a bit of ribbon cable. There are only 8 pins in the connector that you need to worry about, and the spacing is generous enough that there’s no problem getting in there with your iron and some standard jumper wires. You’ve also got to pull 5 V from the board to power the adapter, but that’s easy enough thanks to the system’s nearby USB ports.

There’s a perfect spot to mount the adapter board next to the console’s Ethernet connector, and once that’s tacked down with a bit of adhesive, the only thing left to do is cut a hole in the back of the enclosure for the HDMI port and snip away a bit of the metal RF shield. Presumably the same modification could be done on the original “fat” PS2, though you’ll be on your own for finding a suitable place to mount the board.

While modern game consoles can easily emulate their earlier peers, providing enhanced graphical fidelity and introducing modern conveniences like wireless controllers in the process, there’s still something to be said for playing classic games on the original hardware. Even if these projects are fueled by little more than youthful nostalgia, it’s a safe bet we’ll continue to see folks keeping these older machines running far into the future.

Continue reading “PS2 Gets Integrated HDMI”

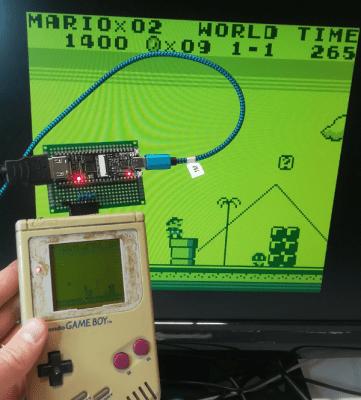
Bitbanged DVI On A Raspberry Pi RP2040 Microcontroller

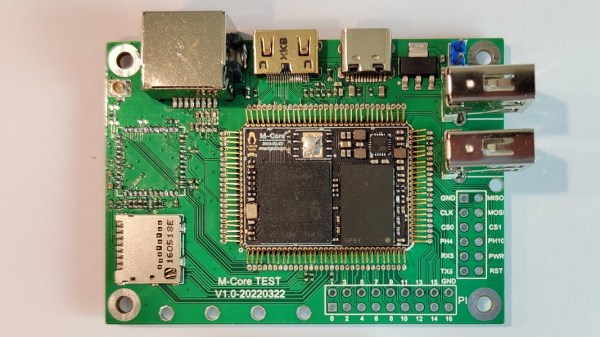
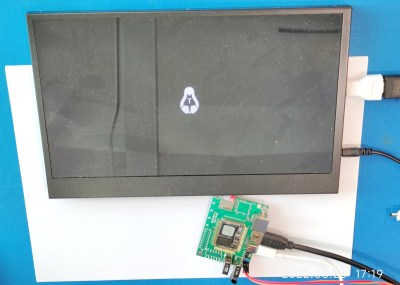
When we first saw the Raspberry Pi Pico and its RP2040 microcontroller last month it was obvious that to be more than just yet another ARM chip it needed something special, and that appeared to be present in the form of its onboard PIO peripherals. We were eagerly awaiting how the community might use them to push the RP2040 capabilities beyond their advertised limits. Now [Luke Wren] provides us with an example, as he pushes an RP2040 to produce a DVI signal suitable to drive an HDMI monitor.

It shouldn’t be a surprise that the chip can be overclocked, however it’s impressive to find that it can reach the 252 MHz necessary to generate the DVI timing. With appropriate terminations it proved possible for the GPIO lines to mimic the differential signalling required by the spec. A PCB with the RP2040 and an HDMI socket was created, also providing a couple of PMOD connectors for expansion. All code and software can be found in a GitHub repository.

The result is a usable DVI output which though it is a relatively low resolution 640×480 pixels at 60 Hz is still a major advance over the usual composite video provided by microcontroller projects. With composite support on monitors becoming a legacy item it’s a welcome sight to see an accessible path to an HDMI or DVI output without using an FPGA.

Thanks [BaldPower] for the tip.

Amiga Now Includes HDMI By Way Of A Raspberry Pi Daughterboard

If you had an Amiga during the 16-bit home computer era it’s possible that alongside the games and a bit of audio sampling you had selected it because of its impressive video capabilities. In its heyday the Amiga produced broadcast-quality graphics that could even be seen on more than a few TV shows from the late 1980s and early 1990s. It’s fair to say though that the world of TV has moved on since the era of Guru Meditation, and an SD video signal just won’t cut it anymore. With HDMI as today’s connectivity standard, [c0pperdragon] is here to help by way of a handy HDMI upgrade that taps into the digital signals direct from the Amiga’s Denise chip.

At first thought one might imagine that an FPGA would be involved, however instead the signals are brought out via a daughterboard to the expansion header of a Raspberry Pi Zero. Just remove the DENISE display encoder chip and pop in the board with uses a long-pinned machined DIP socket to make the connections. The Pi runs software from the RGBtoHDMI project originally created with the BBC Micro in mind, to render pixel-perfect representations of the Amiga graphics on the Pi’s HDMI output. The caveat is that it runs on the original chipset Amigas and only some models with the enhanced chipset, so it seems Amiga 600 owners are left in the cold. A very low latency is claimed, which should compare favourably with some other solutions to the same problem.

This isn’t the first time we’ve seen an HDMI Amiga conversion, but it’s one that’s usable on more than simply the big-box machines.

Continue reading “Amiga Now Includes HDMI By Way Of A Raspberry Pi Daughterboard”

Heavy Raspberry Pi User? Keep An HDMI-to-USB Capture Device Around

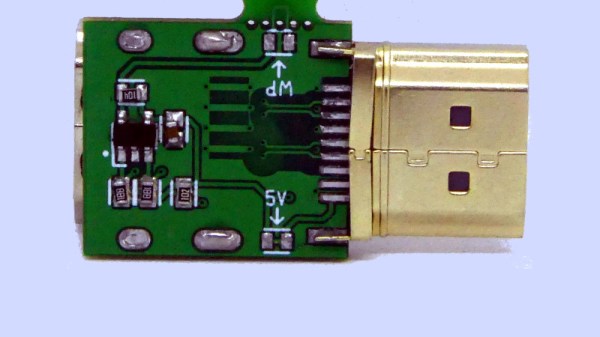
Here’s a simple tip from [Andy], whose Raspberry Pi projects often travel with him outside the workshop: he suggests adding a small HDMI-to-USB video capture device to one’s Raspberry Pi utility belt. As long as there is a computer around, it provides a simple and configuration-free way to view a Raspberry Pi’s display that doesn’t involve the local network, nor does it require carrying around a spare HDMI display and power supply.

Raspberry Pi’s display, viewed on a Mac as if it were a USB webcam. No configuration required.

The usual way to see a Pi’s screen is to either plug in an HDMI display or to connect remotely, but [Andy] found that he didn’t always have details about the network where he was working (assuming a network was even available) and configuring the Pi with a location’s network details was a hassle in any case. Carrying around an HMDI display and power supply was also something he felt he could do without. Throwing a small HDMI-to-USB adapter into his toolkit, on the other hand, has paid off for him big time.

The way it works is simple: the device turns an HDMI video source into something that acts just like a USB webcam’s video stream, which is trivial to view on just about any desktop or laptop. As long as [Andy] has access to some kind of computer, he can be viewing the Pi’s display in no time.

Many of his projects (like this automated cloud camera timelapse) use the Pi camera modules, so a quick way to see the screen is useful to check focus, preview video, and so on. Doing it this way hit a real sweet spot for him. We can’t help but think that one of these little boards could be a tempting thing to embed into a custom cyberdeck build.

An IMac All-In-One’s New Life

There’s a sleek form factor for desktop computers known as an “all-in-one” that enrobes a computer in a monitor. While the convenience of having all your computing in a neat package has some nice benefits, it comes with an unfortunate downside. Someday the computer inside is going to be old and outdated in comparison to newer machines. While a new OS goes a long way towards breathing life into an old machine, [Thomas] has decided to take the path less travelled and converted an old iMac all-in-one into a discrete monitor.

The iMac in question is the 20″ iMac G5 iSight (A1145) with an LG-Philips LM201W01-STB2 LCD panel. Looking back, [Thomas] would recommend just ordering an LCD driver controller kit from your favourite auction house. But for this particular modification, he decided to do things a little bit more manually and we’re quite glad he did.

Luckily for [Thomas], the panel supports TMDS (which both DVI and HDMI are compatible with). So the next step was to figure out the signalling wires and proper voltages. After some trouble caused by a mislabeled power line on the iMac PCB silk-screen (12v instead of 3.3v), he had all the wires identified and a plan starting to form. The first step was a circuit to trick the inverter into turning on with the help of a relay. The female HDMI plug with a breakout board was added and sticks out through the old firewire port. The minuscule wires in the display ribbon cable to the monitor were separated and soldered onto with the help of [Thomas’] daughter’s microscope. Resistances were checked as HDMI relies on impedance matched pairs. To finish it off, an old tactile toggle switch offers a way to turn the monitor on and off with a solid thunk.

We love seeing old hardware being repurposed for new things. This project nicely complements the iMac G4 Reborn With Intel NUC Transplant we saw earlier this year, as they both try to preserve the form factor while allowing a new computer to drive the display.