Dual-Wielding Robot Carves 3D Shapes From Foam With Warped Wire

“Every block of expanded polystyrene foam has a statue inside it and it is the task of the dual-arm hot wire-wielding robot to discover it.” — [Michelangelo], probably.

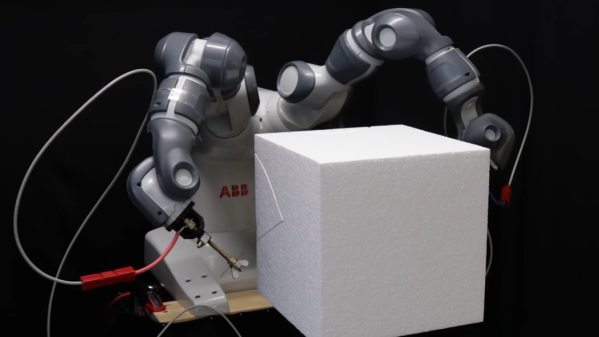
Be prepared to have your mind blown by this dual-wielding hot-wire 3D foam cutter (PDF). We’ve all seen simple hot-wire cutters before, whether they be manual-feed cutters or CNC-controlled like a 3D-printer. The idea is to pass current through a wire to heat it up just enough to melt a path as it’s guided through a block of polystyrene foam. Compared to cutting with a knife or a saw, hot-wire cuts are smooth as silk and produces mercifully little of that styrofoam detritus that gets all over your workspace.

But hot-wire cutters can’t do much other than to make straight cuts, since the wire must be kept taut. “RoboCut”, though, as [Simon Duenser] and his colleagues at ETH Zurich call their creation, suffers from no such limitations. Using an ABB YuMi, a dual-arm collaborative robot, they devised a method of making controlled curved cuts through foam by using a 1-mm thick deformable rod rather than a limp and floppy wire for the cutting tool. The robot has seven degrees of freedom on each arm, and there’s only so much the rod can deform before being permanently damaged, so the kinematics involved are far from trivial. Each pass through the foam is calculated to remove as much material as possible, and multiple passes are needed to creep up on the final design.

The video below shows the mesmerizing sweeps needed to release the Stanford bunny trapped within the foam, as well as other common 3D test models. We’re not sure it’s something easily recreated by the home-gamer, but it sure is fun to watch.

Continue reading “Dual-Wielding Robot Carves 3D Shapes From Foam With Warped Wire”

Unique Clock Finally Unites Hackers And Sequins

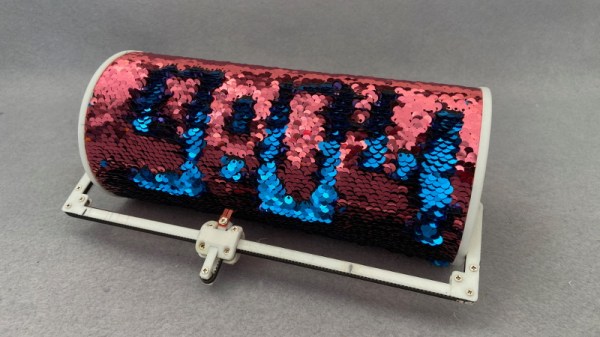
We’ve all seen the two-color sequin fabrics you can “draw” on by dragging your finger over so the pieces flip to the other color. It’s fun stuff to play with, and very popular with the kids right now, but if you asked us if the material had any practical application we’d have said no. But that was before we saw this clever clock created by [Ekaggrat Singh Kalsi] that he calls Sequino.

Since a clock (at least one that only shows hours and minutes) doesn’t need to refresh very quickly, [Ekaggrat] thought that the sequin material could work as a display. Of course the tricky part is figuring out how to actually draw on it reliably. It can’t be done from the back, and since the sequins are plastic, you can’t use a magnet. The only way to do it is with a robotic “finger” and some very slick kinematics.

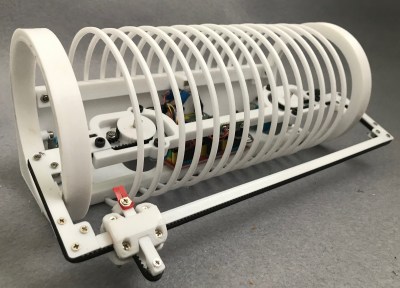
The most obvious feature of the Sequino is the belt drive that goes the length of its cylindrical shape. When the two motors connected to the belt are turning in the same direction, the pointer is moved left or right. But when the motors turn in opposite directions, the tension on the belt forces the pointer to extend and contact the sequins. It’s like an H-bot , but with the shortest ever Y axis. The front bar is moved up and down with rotating rings inside of the device. It will probably make a lot more sense once you watch the video of it in operation after the break.

[Ekaggrat] says this project was developed as part of his quest to build “doodle clocks” that draw out the time continuously. The advantage of using the sequin fabric is that it shouldn’t be damaged by repetitive use, an issue he’s tried to solve via photonic means in the past.

Continue reading “Unique Clock Finally Unites Hackers And Sequins”

Make Physics Fun With A Trebuchet

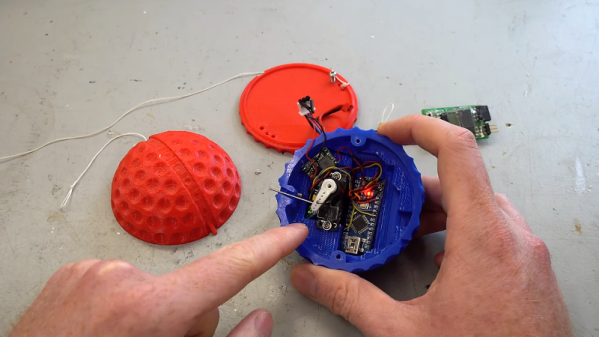
What goes up must come down. And what goes way, way up can come down way, way too fast to survive the sudden stop. That’s why [Tom Stanton] built an altitude recording projectile into an oversized golf ball with parachute-controlled descent. Oh, and there’s a trebuchet too.

That’s a lot to unpack, but suffice it to say, all this stems from [Tom]’s obvious appreciation for physics. Where most of us would be satisfied with tossing a ball into the air and estimating the height to solve the classic kinematic equations from Physics 101, [Tom] decided that more extreme means were needed.

Having a compound trebuchet close at hand, a few simple mods were all it took to launch projectiles more or less straight up. The first payload was to be rocket-shaped, but that proved difficult to launch. So [Tom] 3D-printed an upsized golf ball and packed it with electronics to record the details of its brief ballistic flight. Aside from an altimeter, there’s a small servo controlled by an Arduino and an accelerometer. The servo retracts a pin holding the two halves of the ball together, allowing a parachute to deploy and return the package safely to Earth. The video below shows some pretty exciting launches, the best of which reached over 60 meters high.

The skies in the field behind [Tom]’s house are an exciting place. Between flying supercapacitors, reaction wheel drones, and low-altitude ISS flybys, there’s always something going on up there.

Continue reading “Make Physics Fun With A Trebuchet”

Omni Wheels Move This CNC Plotter

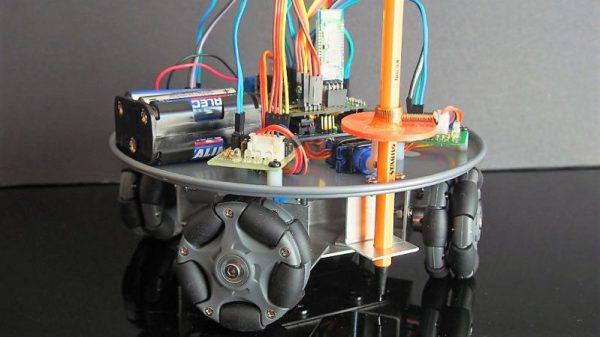
We’ve always had a soft spot for omni wheels and the bots that move around somewhat bumpily on them. Likewise, CNC pen plotters are always a welcome sight in our tip line. But a CNC plotter using omni wheels is new, and the results are surprisingly good.

Built from the bottom of a spring-form baking pan, [lingib]’s plotter is simplicity itself. Four steppers turn the omni wheels while a hobby servo raises and lowers the pen. The controller is an Uno with a Bluetooth module for smartphone control. Translating wheel rotations into X- and Y-axis motions was not exactly trivial, and the video below shows the results. Lines are a bit wobbly, and it’s clear that the plotter isn’t hitting the coordinates very precisely. But given the somewhat compliant nature of the omni wheels, we’re surprised [lingib] got results as good as these, and we applaud the effort.

[lingib] reports the most expensive part of this $100 build was the omni wheels themselves. We suppose laser-cut MDF omni wheels could reduce the price, or even Mecanum wheels from bent metal and wood. We’re not sure either will help with the precision, though.

Continue reading “Omni Wheels Move This CNC Plotter”

Delta Bot Plucks Out Tunes On A Mandolin

Is there no occupation safe from the scourge of robotic replacement? First it was the automobile assemblers, then fast food workers, and now it’s the — mandolin players?

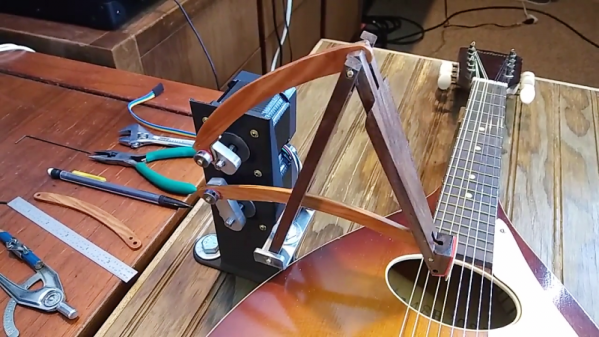
Probably not, unless [Clayton Darwin]’s mandolin playing pluck-bot has anything to say about it. The pick-wielding delta-ish robot can be seen in action in the video below, plucking out the iconic opening measures of that 70s prom-theme favorite, “Colour My World.” The robot consists of two stepper motors connected to a hinged wooden arm by two pushrods. We had to slow the video down to catch the motion, but it looks like [Clayton] has worked out the kinematics so that the pick can be positioned in front of any of the mandolin’s eight strings. A quick move of the lower stepper then flicks the pick across a string and plucks it. [Clayton] goes into some detail about how he built the motion-control part in an earlier video; he also proves that steppers are better musicians than we’ll ever be with a little “Axel F” break.

It’s only a beginning, of course, but the complexity of the kinematics just goes to show how simple playing an instrument isn’t. Unless, of course, you unleash an endless waterfall of marbles on the problem.

Continue reading “Delta Bot Plucks Out Tunes On A Mandolin”

Stepper Motor Mods Improve CNC Flat Coil Winder

Finding just the right off-the-shelf part to complete a project is a satisfying experience – buy it, bolt it on, get on with business. Things don’t always work out so easily, though, which often requires the even more satisfying experience of modifying an existing part to do the job. Modifying a stepper motor by drilling a hole down its shaft probably qualifies for the satisfying mod of the year award.

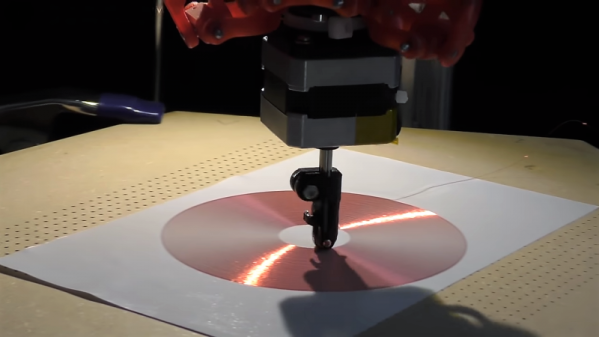
That’s what [Russ] did to make needed improvements to his CNC flat-coil winder, which uses a modified delta-style 3D-printer to roll fine magnet wire out onto adhesive paper to form beautiful coils of various sizes and shapes. [Russ] has been tweaking his design since we featured it and coming up with better and better coils. While experimenting, the passive roller at the business end proved to be a liability. The problem was that the contact point lagged behind the center axis of the delta, leading to problems with the G-code. [Russ] figured that a new tool with the contact point at the dead center would help. The downside would be having to actively swivel the tool in concert with the X- and Y-axis movements. The video below shows his mods, which include disassembling the NEMA-17 stepper and drilling out the shaft to pass the coil wire. [Russ] also spent some time reversing the rotor in the frame and provided a small preload spring to keep the coil roller in contact with the paper.

A real-time coil winding session starts at the 21:18 mark, and we’ve got to admit it’s oddly soothing to watch. We’re not sure exactly what [Russ] intends to do with these coils, and by his own admission, neither is he. But it’s still pretty cool to see, and the stepper motor mods are a neat trick to keep in mind.

Continue reading “Stepper Motor Mods Improve CNC Flat Coil Winder”

Fast 3D Printing With Raspberry Pi — But Not How You Think

Although we tend to think of 3D printers as high-tech toys, most of them are not especially powerful in the brain department. There are some exceptions, but most 3D printers run on either an 8-bit Arduino or some Arduino variant with a lot of I/O. There are a few 32-bit boards, but if you grab a random 3D printer, its brain is going to be an 8-bit AVR running something like Marlin or Repetier. It isn’t uncommon to see a Raspberry Pi connected to a printer, too, but — again, in general — it is a network interface that handles sending G-code to the 8-bit controller that runs the stepper motors. Would it make more sense to do things like parse G-code, map out curves, and set accelerations in the relatively powerful Raspberry Pi and relegate the 8-bit AVR to just commanding motors and heaters? [KevinOConnor] thinks so, and he wrote Klipper to prove it.

Klipper is mostly written in Python and it does most of the functions of traditional 3D printing firmware. It communicates with the onboard microprocessor by providing a schedule of when to do what tasks. The microprocessor then handles the timing and things like motion control for the axes and extruder. Klipper can control multiple microprocessors with no trouble and keeps them in synchronization, so you could have a processor for your extruder and one for each stepper, for example. You can use Klipper with a Cartesian machine, a delta, or a Core XY-style printer.

Continue reading “Fast 3D Printing With Raspberry Pi — But Not How You Think”