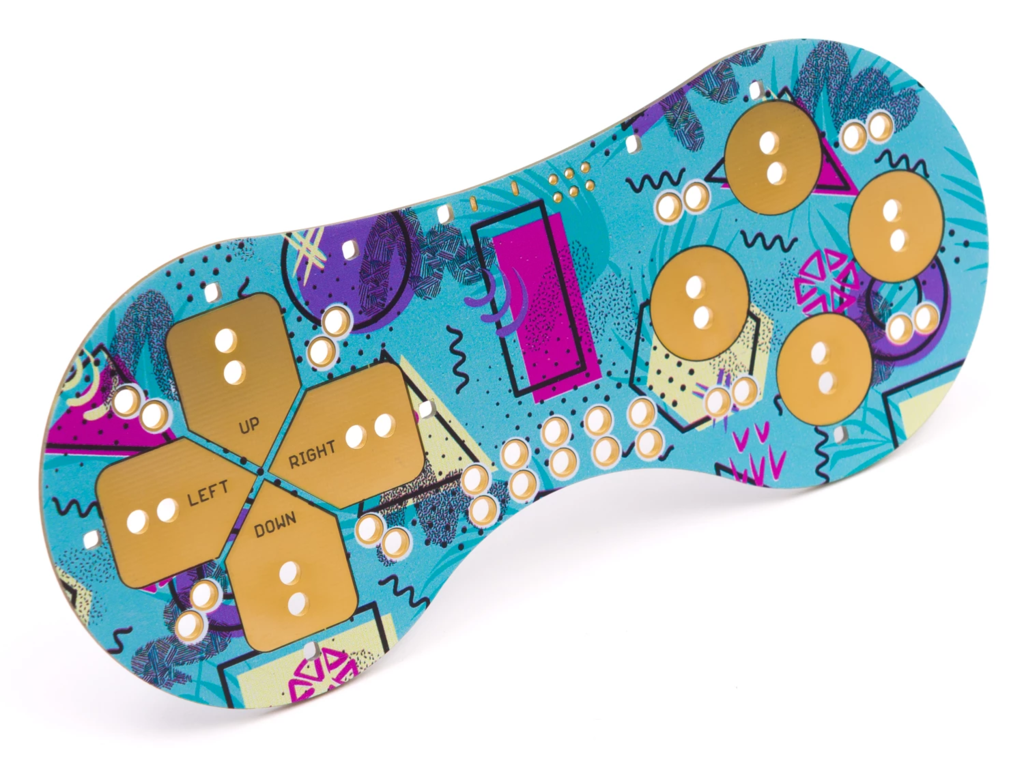
 Ordering a PCB used to be a [Henry Ford]-esque experience: pick any color you like, as long as it’s green. We’ve come a long way in the “express yourself” space with PCBs, with slightly less than all the colors of the rainbow available, and some pretty nice silkscreening options to boot. But wouldn’t it be nice to get full-color graphics on a PCB? Australian company Little Bird thinks so, and they came up with a method to print graphics on a board. The results from what looks like a modified inkjet printer are pretty stunning, if somewhat limited in application. But I bet you could really make a splash with these in our Beautiful Hardware contest.
The 50th anniversary of the Apollo 11 landing has come and gone with at least as much fanfare as it deserves. Part of that celebration was Project Egress, creation of a replica of the Columbia crew hatch from parts made by 44 hackers and makers. Those parts were assembled on Thursday by [Adam Savage] at the National Air and Space Museum in an event that was streamed live. A lot of friends of Hackaday were in on the build and were on hand, like [Fran Blanche], [John Saunders], [Sophy Wong], and [Estefannie]. The Smithsonian says they’ll have a recording of the stream available soon, so watch this space if you’re interested in a replay.
From the “Don’t try this at home” department, organic chemist [Derek Lowe] has compiled a “Things I won’t work with” list. It’s real horror show stuff that regales the uninitiated with all sorts of chemical nightmares. Read up on chlorine trifluoride, an oxidizer of such strength that it’s hypergolic with anything that even approaches being fuel. Wet sand? Yep, bursts into flames on contact. Good reading.
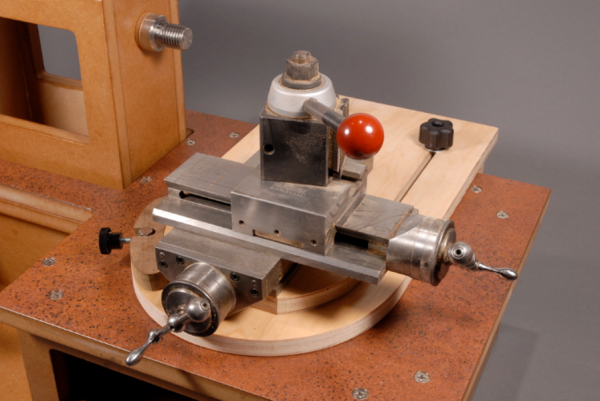
Continuing the safety theme, machinist [Joe Pieczynski] offers this lathe tip designed to keep you in possession of a full set of fingers. He points out that the common practice of using a strip of emery cloth to polish a piece of round stock on either a wood or metal lathe can lead to disaster if the ends of the strip are brought into close proximity, whereupon it can catch and act like a strap wrench. Your fingers don’t stand a chance against such forces, so watch out. [Joe] doesn’t share any gory pictures of what can happen, but they’re out there. Only the brave need to Google “degloving injury.” NSFL – you’ve been warned.
On a happier note, wouldn’t it be nice to be able to print water-clear parts on a standard 3D printer? Sure it would, but the “clear” filaments and resins all seem to result in parts that are, at best, clearish. Industrial designer [Eric Strebel] has developed a method of post-processing clear SLA prints. It’s a little wet sanding followed by a top coat of a super stinky two-part urethane clearcoat. Fussy work, but the results are impressive, and it’s a good technique to file away for someday.