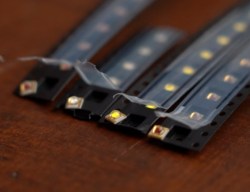
Call us childlike, but we sure do get a kick out of both larger-than-life and miniature things, especially when they work as their “normal-sized” counterparts do. So you can imagine our glee when we saw [JGJMatt]’s 50mm LED lamp, which looks like a giant version of something you might have wired up on your bench at any given moment — a bent-legged LED, wired up and ready to blink.
 [JGJMatt] started by designing a mold in Fusion360 to make the lens, which he then printed in PLA. However, due to the heat generated by curing resin (especially all enclosed like that), he recommends using PETG or ABS instead to avoid any potential warping issues.
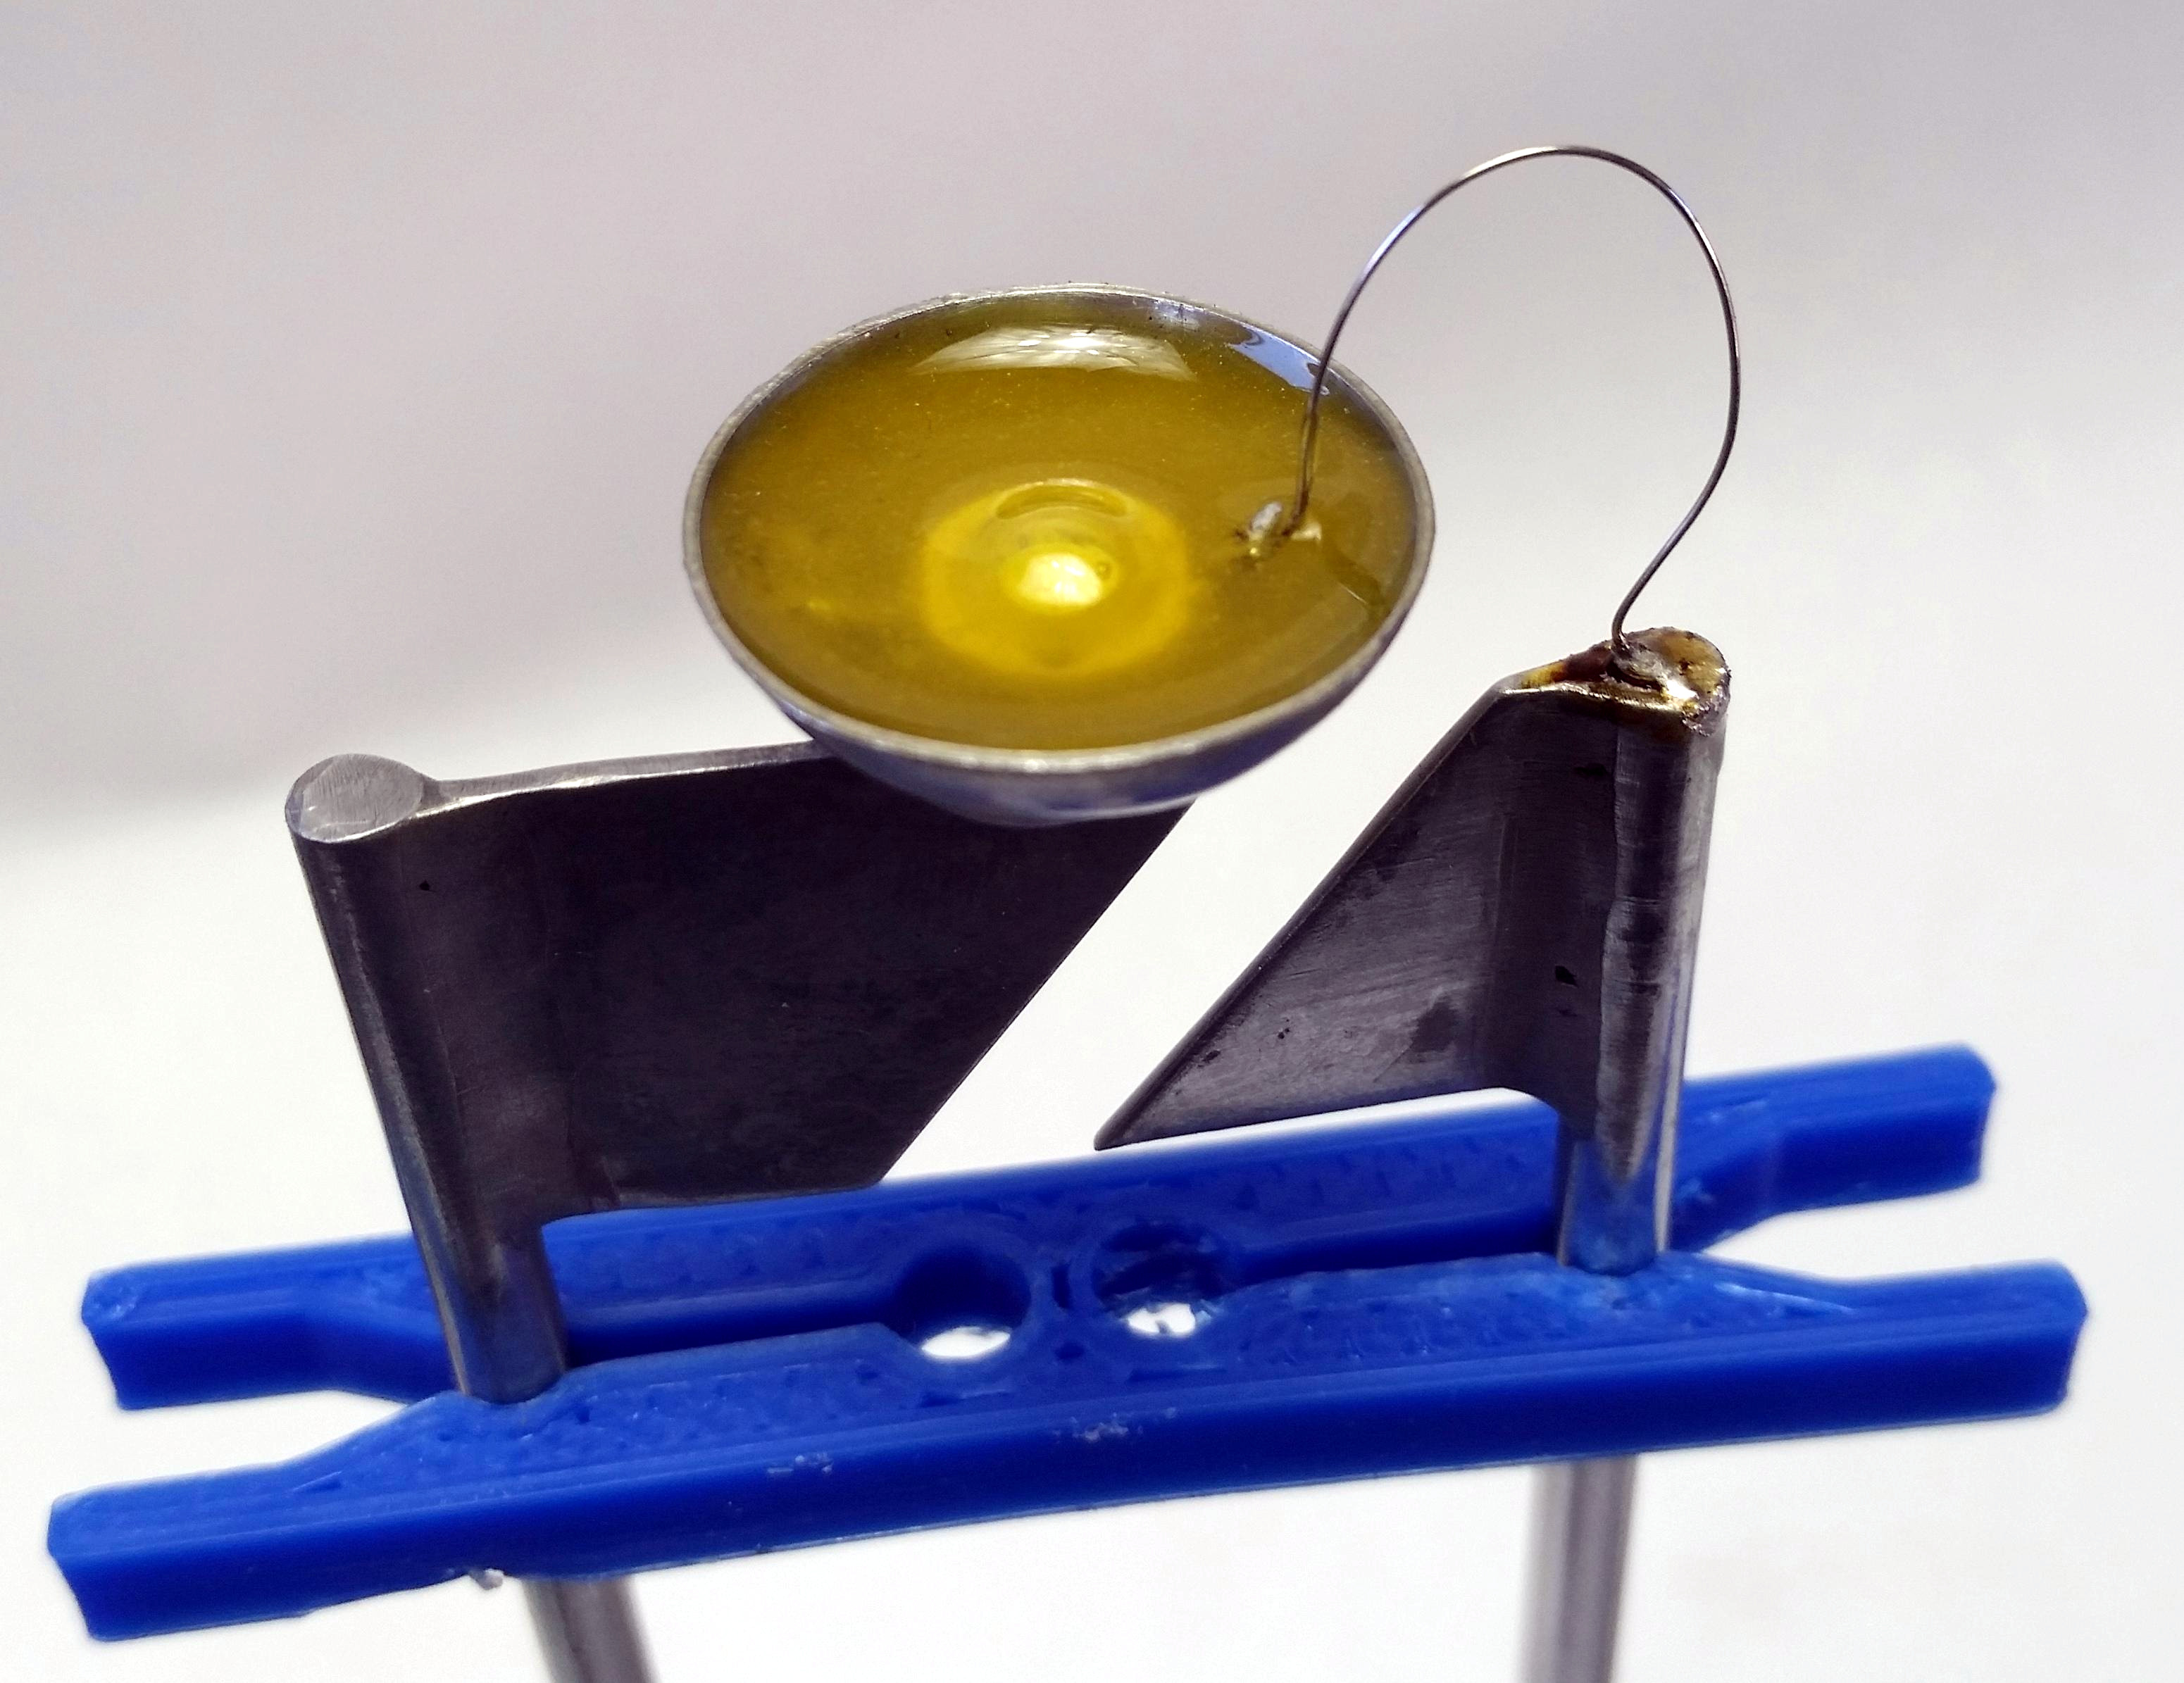
This is where things get a bit dangerous. For the internals, [JGJMatt] went all out, hand forming a reflector cup out of brass pipe, and the anode and cathode plates from flat 1 mm brass stock, plated to a silvery gray finish. The light source itself is a 1 W cool white LED that sits in the reflector cup, safe under a layer of epoxy mixed with a bit of yellow paint that represent the phosphor layer in a standard 5 mm white LED.
Once the innards were ready, it was time to cast the huge lens with them tucked safely inside. After the resin cured, [JGJMatt] sanded away the layer lines and airbrushed it with clear lacquer to clear up the lens and protect it from yellowing down the road. Then it was just a matter of bending the legs to form a stand, and wiring it up. What an awesome way to light up your workbench! Or anywhere, really.
This isn’t the first time we’ve seen a giant, working LED, though it’s probably only the second one since [Mike Szczys] saw some in the flesh at Maker Faire: Rome way back in 2019. Those are for sale on Tindie, BTW, though the shop is on holiday for the foreseeable, so you’ll have to make your own for now.

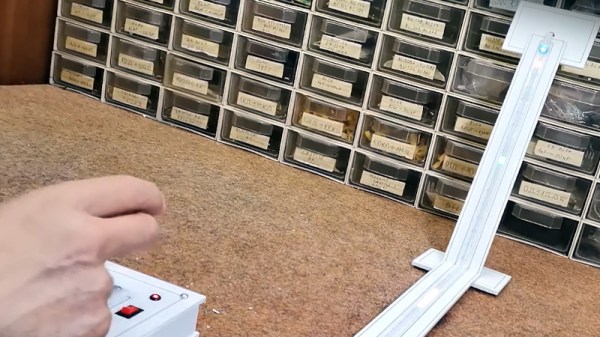
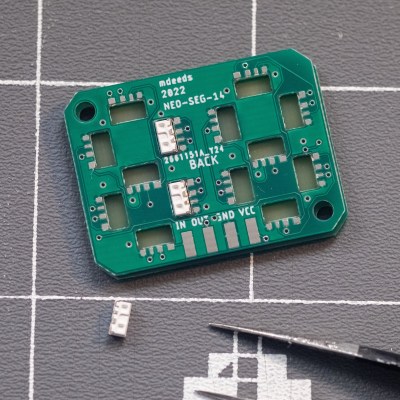 [Matt’s] build consists of a PCB filled with SK6812 side-mount LEDs, laid out in a typical 7-segment pattern. Each PCB features two 7-segment digits. The SK6812 LEDs can be driven in the same way as the famous WS2812B addressable LEDs, though they have the benefit of being more stable in color and brightness over a range of supply voltages.