An Improved Bed And Custom Wasteboard For A CNC Router

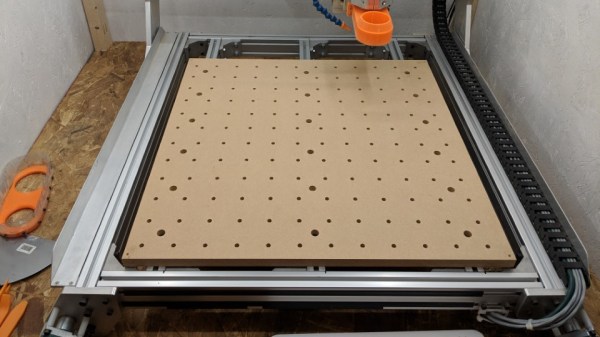
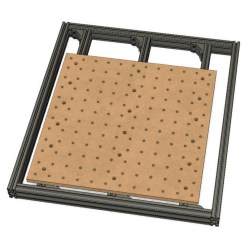
[Adam Haile] has been spending some time improving his CNC router and his latest change is a custom wasteboard with improved bed support. Not only does the MDF wasteboard have plenty of threaded inserts to make for easy clamping solutions, but [Adam] replaced the frame underneath the board with a new set of aluminum extrusions to provide better support. Originally, there was only support for the edges of the wasteboard, which allowed the middle to sag. While researching the machine’s specs, he was able to recognize and order the exact extrusions he needed from Misumi and construct an improved bed to go with the new board. Should you wish to make your own version, [Adam] provides all the part numbers and CAD files required.
Embedded below is a video showing the machine drilling the holes, followed by surfacing the entire board so that it is flat. Since the bolt heads are well below the surface of the board, and the threaded inserts for the holes are on the bottom, there’s no worry of the tool hitting anything it shouldn’t during this process.

Continue reading “An Improved Bed And Custom Wasteboard For A CNC Router”

Downdraft Table Inhales Dust, Not Cash

We always look forward to the builds [MakerMan] sends in, and it’s not just because we dig his choices in royalty free music (though it helps). He always manages to put together his projects with a minimum of fuss, and perhaps more importantly, a minimum of funds. His builds use salvaged components, easily sourced materials, and common tools. Watching him work invariably makes us realize that we tend to overthink our own projects.

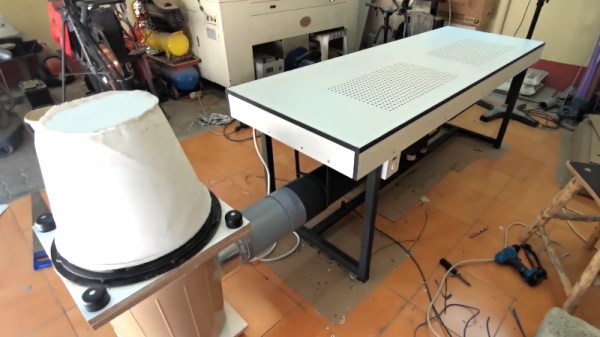
In his latest video, [MakerMan] was tasked with building a downdraft table for a local factory that makes jewelry boxes. By sucking air through a series of holes in the table’s surface, sawdust created while the workers are building the boxes will automatically be removed from the workspace. Even if you aren’t in the jewelry box making business, any task which produces fine particles (such as sanding) could benefit from such a setup. You probably won’t need a downdraft table quite as large as the one he builds, but the principles will be the same if you get inspired to build a somewhat smaller version.

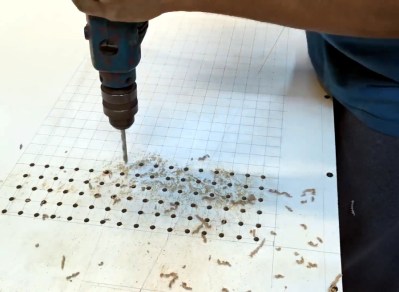
The build starts with sheets of MDF, which get cut, glued, and screwed together to make the basic tabletop shape. To this, [MakerMan] attaches a welded steel frame which will give it the strength MDF itself lacks. With careful measurement, lines are plotted across the top of the MDF sheet and all the holes are drilled with a simple hand drill; no fancy CNC here.

With the table doing its best colander impression, [MakerMan] adds an air box to the bottom which is similarly made of thin MDF sheets. All of the joints are sealed up with caulk, because at this point you want things to be as air tight as possible. A large blower is attached to the bottom, which gets piped to a dust collection system that’s made of a garbage can and…you guessed it, more MDF.

Watching [MakerMan] turn what’s often literal trash into a functional build never gets old. We’ve seen him create everything from a gorgeous origami chandelier to a very impressive diode laser cutter using little more than scrap parts and hand tools, and we can’t wait to see what he comes up with next.

Continue reading “Downdraft Table Inhales Dust, Not Cash”

Become The Next Fabergé With A Rose Engine Lathe

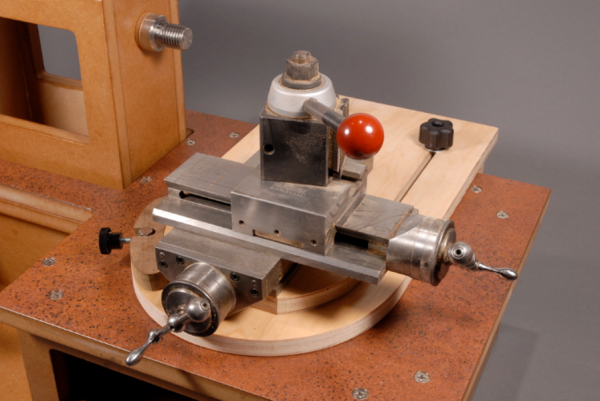
The basics of a skill may take a long time to master, but there is always something else to learn about regardless of the craft. Building a piece of fine furniture out of hardwood or being able to weld together a bicycle from scratch are all impressive feats, but there are fine details that you’ll only learn about once you get to this level of craftsmanship. One such tool that will help with these intricacies is known as the rose engine lathe.

This tool is based on an average lathe, typically used for creating round things out of stock which is not round. A rose engine lathe has a set of cams on it as well which allow the lathe to create intricate patterns in the material it’s working with, such as flower type patterns or intricate spirals. One of the most famous implementations of this method was on the Fabergé eggs. While this might make it sound overly complex, this how-to actually shows you how to build your own rose engine lathe out of a piece of MDF and a large number of miscellaneous pieces of hardware.

We recently featured another build which performs a similar function called engine turning. While similar, this is the method responsible for creating overlapping spirals on a piece of metal. Either way, both projects are sure to spice up your metal or woodworking endeavors.

Thanks to [PWalsh] for the tip!

This Dust Collector Will Blow You Away.

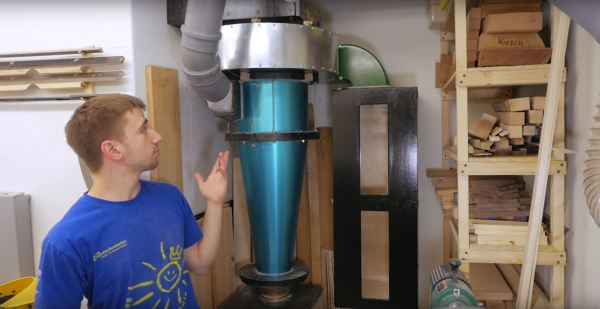
As [Marius Hornberger] was working in his woodshop, a thunderous bang suddenly rocked the space. A brief search revealed the blower for the dust collector had shifted several inches despite being stoutly fastened down. Turns out, the blower had blown itself up when one of the impeller fins came loose. Time to revise and build a bigger, better dust collector!

[Hornberger] is thorough in describing his process, the video series chronicles where he went astray in his original design and how he’s gone about improving on those elements. For instance, the original impeller had six fins which meant fewer points to bear the operating stresses as well as producing an occasionally uncomfortable drone. MDF wasn’t an ideal material choice here either, contributing to the failure of the part.

Continue reading “This Dust Collector Will Blow You Away.”

Easy, Modular Alphanumeric Displays Are Full Of Flappy Goodness

There are plenty of ways to make large alphanumeric displays that are readable at great distances. LED signboards come to mind, as do big flat-screen LCD displays. But such displays feel a little soulless, and nothing captures the atmosphere of a busy train station like an arrivals and departures board composed of hundreds of split-flap displays.

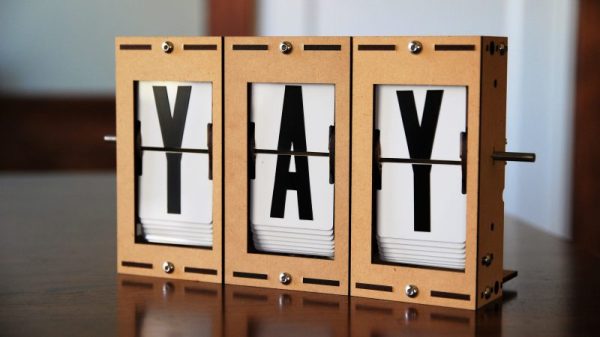
In a bid to make these noisy but intriguing displays practical for the home-gamer, [Scott Bezek] has spent the last couple of years on a simple, modular split-flap display unit, and from the look of the video below, it’s pretty close to ready. The build log details the design process, which started with OpenSCAD and took advantage of the parametric nature of the scripting language to support any number of characters, within reason. Costs are kept low with laser-cut MDF frames and running gear, and cheap steppers provide the motion. Character cards are just PVC ID badges with vinyl letters, and a simple opto-sensor prevents missed steps and incorrect characters. The modules can be chained together into multi-character displays, and the sound is satisfyingly flappy.

[Scott] has put a lot of thought into these displays, and even if it’s not the simplest split-flap display we’ve seen, it’s really worth checking out.

Continue reading “Easy, Modular Alphanumeric Displays Are Full Of Flappy Goodness”

Bartop Arcade Cabinet Build Skips The Kit

An arcade cabinet is one of those things that every gamer wants at home, but few ever get. Getting a real arcade cabinet is usually expensive, and building one yourself is no small feat. There are kits you can get now which help the process along, generally taking the form of pre-cut cabinet parts, but with them comes the quiet shame of kit-building. What if your friends found out you used a kit instead of designing it yourself? The drama is almost too much to think about.

That’s how [Bogdan Berg] felt about it, at least. Not content with just getting a pre-cut cabinet kit from eBay, he decided to design and build his own bartop arcade machine in just one week: fast enough for him to fit the whole thing into his Christmas vacation. We don’t know what Christmas was like for his friends and family this year with him toiling away on this beautiful build the whole time, but we can confidently say his Christmas was awesome.

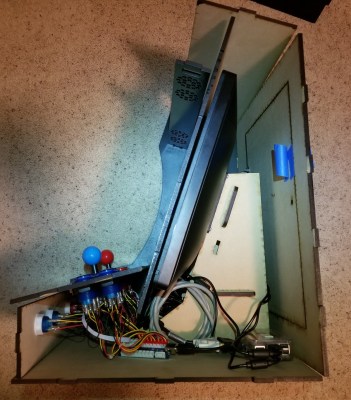
He designed the cabinet in Fusion 360, working around the limitation that the laser cutter he had access to had a work area of 24 inches by 18 inches. Some interesting design choices were made here, including going with a tab and slot construction method. While [Bogdan] admits that this aesthetic isn’t always popular, he liked how sturdy it makes the final product.

He was originally going to use plywood for the cabinet, but owing to the fact that he couldn’t find any pieces that weren’t warped locally, he switched over to MDF. Using MDF did mean he had to seal all the cut pieces with shellac before painting, but in the end he’s happy with the final lacquer paint job; even if it did take more work and materials than he anticipated.

The hardware is pretty much the standard for DIY arcades these days: a 17 inch LCD monitor he had laying around is used for the display, a two player joystick and button kit from Amazon provides the user interface, and emulation is provided by a Raspberry Pi 3 running RetroPie. A recessed door in the rear allows him to get into the machine will still maintaining a finished look on the backside.

While the size of them may vary wildly, DIY arcade cabinets are always a popular project. Whether shamelessly emblazoned with our logo or playing host to glorious LED lighting, it seems like the design of these cabinets provide as much entertainment as the games they play.

Continue reading “Bartop Arcade Cabinet Build Skips The Kit”

Homemade E-Drums Hit All The Right Notes

In our eyes, there isn’t a much higher calling for Arduinos than using them to make musical instruments. [victorh88] has elevated them to rock star status with his homemade electronic drum kit.

The kit uses an Arduino Mega because of the number of inputs [victorh88] included. It’s not quite Neil Peart-level, but it does have a kick drum, a pair of rack toms, a floor tom, a snare, a crash, a ride, and a hi-hat. With the exception of the hi-hat, all the pieces in the kit use a piezo element to detect the hit and play the appropriate sample based on [Evan Kale]’s code, which was built to turn a Rock Band controller into a MIDI drum kit. The hi-hat uses an LDR embedded in a flip-flop to properly mimic the range of an actual acoustic hi-hat. This is a good idea that we have seen before.

[victorh88] made all the drums and pads out of MDF with four layers of pet screen sandwiched in between. In theory, this kit should be able to take anything he can throw at it, including YYZ. The crash and ride cymbals are MDF with a layer of EVA foam on top. This serves two purposes: it absorbs the shock from the sticks and mutes the sound of wood against wood. After that, it was just a matter of attaching everything to a standard e-drum frame using the existing interfaces. Watch [victorh88] beat a tattoo after the break.

If you hate Arduinos but are still reading for some reason, here’s a kit made with a Pi.

Continue reading “Homemade E-Drums Hit All The Right Notes”