DIY HID, OMG!

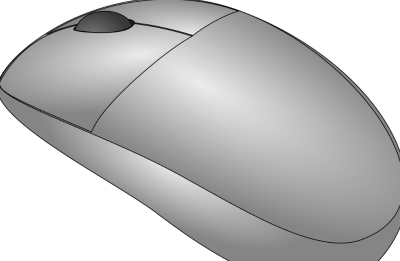
William English, one of the creators of the mouse back in the 60s, passed away last week. And that got me thinking of how amazing it would have been to be in the place that was inventing what would become modern computing interfaces. What a special time! Of course, they probably had no idea.

From here, it looks like the mouse changed everything, but you have to realize that they were working in a world with light-pens, where you could actually draw on the screen. In contrast, the mouse seems positively non-futuristic. They must have known they’d come up with an improvement over the status quo, but did they know they’d created a revolution?

So where has the revolutionary spirit in DIY human interface devices gone? I’d claim it’s still alive and kicking. Indeed our own Kristina Panos has a series called “Inputs of Interest” and we’ve seen a ton of DIY keyboards of late. Then there are many varieties of dial inputs. I used to have a dedicated scroll wheel made out of a hard-drive platter, and when I was reading lots of PDFs on-screen, I have to say it earned its desk-space. Heck, we’ve even seen people make their own mouse.

But what I love about the story of the development of the mouse is that they asked the question “what is the best way to locate a point on a screen” and tried to answer it. Half of their success is probably in simply asking the right question, and the other half in prototyping something half-workable. My gut says that we don’t have inputs figured out 100% on mobile yet. This sounds like a job for Hackaday. What’s the next big human-interface design need? And have you got any crazy ideas to solve it?

Hackaday Remoticon

And this week, we announced the Hackaday Remoticon, our shelter-in-place version of the Supercon. It’s going to take place in November as usual, but online instead of IRL.

The good news? It’s going to be chock full of workshops, all streamed online and recorded for posterity. And for that we need your proposals. If you’d like to teach a group of distributed hackers learning your favorite techniques and tricks, this is your chance!

The bad news is of course that we won’t get to see you all in person. That’s going to make the 2021 Hackaday Supercon seem even more super.

500 Lasers Are Not Necessarily Better Than One, But They Look Great

If playing with but a single laser pointer is fun, then playing with 500 laser pointers must be 500 times the fun, right? So by extension, training 500 laser pointers on a single point must be the pinnacle of pointless mirth. And indeed it is.

When we first spotted this project, we thought for sure it was yet another case of lockdown-induced  boredom producing an over-the-top build. Mind you, we have no problem with that, but in this case, [nanoslavic] relates that this is actually a project from a few years back. It’s really as simple as it looks: 500 laser pointer modules arranged on a plate with a grid of holes in a 25 by 20 array. As he placed the laser modules on the board with a glob of hot glue, he carefully aimed each one to hit a single point about a meter and a half away.  There are also a handful of blue LEDs nestled into the array, because what project is complete without blue LEDs?

The modules are wired in concentric circuits and controlled by a simple bank of toggle switches. Alas, 500 converging 150-mW 5 mW lasers do not a 75-W 2.5 W laser make; when fully powered, the effect at the focal point is reported to be only a bit warm. But it looks incredible, especially through smoke. Throwing mirrors and lenses into the beam results in some interesting patterns, too.

You’ll still need to take safety seriously if you build something like this, of course, but this one is really just for show. If you’re really serious about doing some damage with lasers, check out the long list of inadvisable laser builds that [Styropyro] has accumulated — from a high-powered “lightsaber” to a 200-Watt laser bazooka.

(Terminate your beams carefully, folks. We don’t want anyone going blind.)

Continue reading “500 Lasers Are Not Necessarily Better Than One, But They Look Great”

Wireless Protocol Reverse Engineered To Create Wrist Wearable Mouse

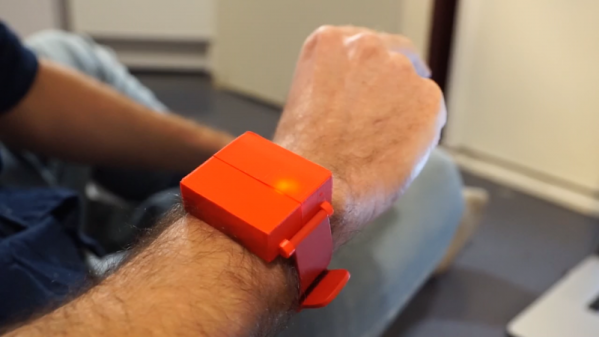
We’ve seen a few near-future sci-fi films recently where computers respond not just to touchscreen gestures but also to broad commands, like swiping a phone to throw its display onto a large flat panel display. It’s a nice metaphor, and if we’re going to see something like it soon, perhaps this wrist-mounted pointing device will be one way to get there.

The video below shows the finished product in action, with the cursor controlled by arm movements. Finger gestures that are very much like handling a real mouse’s buttons are interpreted as clicks. The wearable has a Nano, an MPU6050 IMU, and a nRF24L01 transceiver, all powered by some coin cells and tucked nicely into a 3D-printed case. To be honest, as cool as [Ronan Gaillard]’s wrist mouse is, the real story here is the reverse engineering he and his classmate did to pull this one off.

The road to the finished product was very interesting and more detail is shared in their final presentation (in French and heavy with memes). Our French is sufficient only to decipher “Le dongle Logitech,” but there are enough packet diagrams supporting into get the gist. They sniffed the packets going between a wireless keyboard and its dongle and figured out how to imitate mouse movements using an NRF24 module. Translating wrist and finger movements to cursor position via the 6-axis IMU involved some fairly fancy math, but it all seems to have worked in the end, and it makes for a very impressive project.

Is sniffing wireless packets in your future? Perhaps this guide to Wireshark and the nRF24L01 will prove useful.

Continue reading “Wireless Protocol Reverse Engineered To Create Wrist Wearable Mouse”

Star Track: A Lesson In Positional Astronomy With Lasers

[gocivici] threatened us with a tutorial on positional astronomy when we started reading his tutorial on a Arduino Powered Star Pointer and he delivered. We’d pick him to help us take the One Ring to Mordor; we’d never get lost and his threat-delivery-rate makes him less likely to pull a Boromir.

As we mentioned he starts off with a really succinct and well written tutorial on celestial coordinates that antiquity would have killed to have. If we were writing a bit of code to do our own positional astronomy system, this is the tab we’d have open. Incidentally, that’s exactly what he encourages those who have followed the tutorial to do.

The star pointer itself is a high powered green laser pointer (battery powered), 3D printed parts, and an amalgam of fourteen dollars of Chinese tech cruft. The project uses two Arduino clones to process serial commands and manage two 28byj-48 stepper motors. The 2nd Arduino clone was purely to supplement the digital pins of the first; we paused a bit at that, but then we realized that import arduinos have gotten so cheap they probably are more affordable than an I2C breakout board or stepper driver these days. The body was designed with a mixture of Tinkercad and something we’d not heard of, OpenJsCAD.

Once it’s all assembled and tested the only thing left to do is go outside with your contraption. After making sure that you’ve followed all the local regulations for not pointing lasers at airplanes, point the laser at the north star. After that you can plug in any star coordinate and the laser will swing towards it and track its location in the sky. Pretty cool.

Continue reading “Star Track: A Lesson In Positional Astronomy With Lasers”

Hacklet 42 – Mouse Projects

Ever since [Douglas Engelbart] and his team came up with the computer mouse, hackers, makers, and engineers have been creating ways to change and improve the design. Even the original mouse was something of a hack, built form a block of wood, a button, and two encoder wheels. The wire exited toward the user’s wrist, making the device look like it had a tail. Even after all these years, folks are still working to make the perfect pointing device. This week’s Hacklet highlights some of the best mouse projects on Hackaday.io!

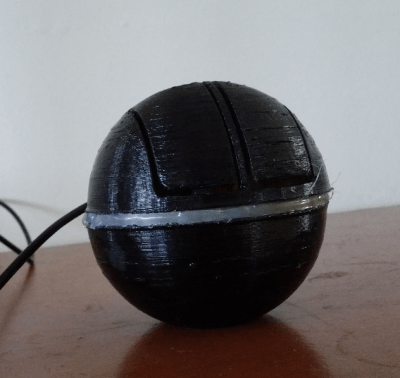
mouseballzWe start with [s_sudhar] and ORB – A 3D gaming mouse. Orb uses accelerometers and gyros to track its location in 3D space. The popular MPU-6050 chip provides all the sensors to create an Inertial Measurement Unit (IMU). The controller is an Arduino Micro, which provides the USB interface to a PC with the help of Arduino’s MouseKeyboard library. Two micro switches handle button duties. The original Orb was built up in a cardboard box. [S_sudhar] created a more advanced version housed in a 3D printed sphere with two buttons. The translucent joint between the two halves of the sphere is just begging for some RGB LEDs. We can already see them flashing red when you’re getting shot in Team Fortress 2!

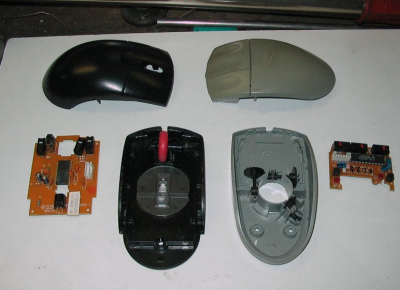
mouse-wheelAnyone who has used X-Windows with a three button mouse knows how maddening the modern clickable center scroll wheel can be. You can’t click the wheel without it rolling, and causing all sorts of mayhem. There are plenty of software solutions and window manager mods to work around this, but [mclien] wanted a real three button mouse with a side scroll wheel. He didn’t want just any mouse though – it had to be a Silicon Graphics International (SGI) 3 button unit. His project 3-buttonmouse with seperate wheel used a dremel, drill press, and glue to transplant the electronics of a 3 button scrolling mouse into the classic SGI plastics. The final wheel placement did work – but it didn’t quite fit [mclien’s] hand. It did fit one of his friends hands perfectly though. So well in fact that the friend borrowed [mclien’s] creation. Neither the mouse nor the friend have been seen since!

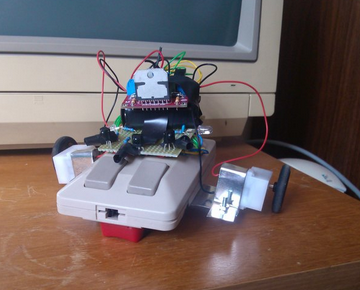
jimmy[Jay-t] decided that mice are for more than pointing, so he built Jimmy the mouse bot. Jimmy is a robot built from an old Commodore Amiga two button mouse. His brain is a Parallax Propeller processor. Two outrigger mounted gear motors help Jimmy drive around. Jimmy has plenty of sensors, including infrared object detectors, switches, and a GPS module from Adafruit. Jimmy may be the world’s first homing mousebot. [Jay-t] does all his interactive testing with Tachyon Forth on the Prop. The great thing about having an 8 core processor is that there is plenty of room for expansion. Even with all these sensors, Jimmy is still only using 3 cores!


clovis

Finally we at [Clovis Fritzen] and the Wireless Batteryless Mouse. This is our favorite type of project – the kind that has just been uploaded. [Clovis] plans to use a movement based system to charge up a supercapacitor – eliminating the need for batteries or wires. He’s also hoping to use an accelerometer to detect the mouse’s position rather than a power-hungry optical system. The details are still sparse, because he’s just started the project! These are exactly the type of projects that get us thinking. How will [Clovis] translate movement to energy? Will it be weights, like a self-winding watch? Maybe pizeo elements in the buttons. Will people mind having to jiggle their mouse to get it working once that capacitor is discharged? One thing we’re sure of, [Clovis] has a proven track record of implementing projects like his weather station. Get in there and help with your own ideas, or simply follow along with us and see how this one turns out.

Not satisfied? Want more mousy goodness? Check out our freshly minted mouse and pointer projects list!

That’s about all the time we have for this week’s Hacklet. As always, see you next week. Same hack time, same hack channel, bringing you the best of Hackaday.io! 

Laser Marquee Projector

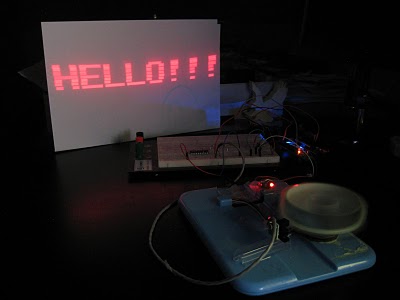
This laser message scroller is built with inexpensive parts. The heart of [Raul’s] system is a spinning pill-box with eight mirrors on it. Each redirects the laser to a different vertical portion of the projection surface. There are eight small arms on the apparatus that each break the beam of an optical sensors as it spins, facilitating the precise synchronization needed to generate the projected image correctly. In the video after the break we can make out what looks like an Arduino controlling the system. This makes sense as it’s easy to connect the laser pointer and sensor, and the USB connection allows for the streaming of messages to the system.

Want to see a more complicated setup? Check out the POV laser projector from a few years back. Continue reading “Laser Marquee Projector”

Auxiliary Scoreboard Reads Status Directly From Memory

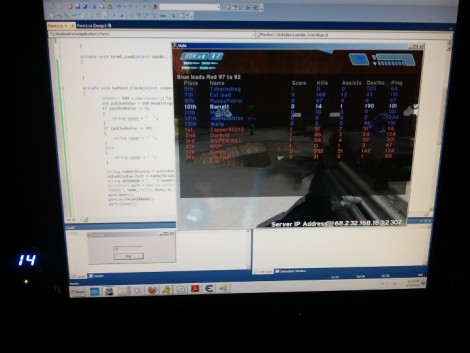
[StaticChanger] built a scoreboard to display his kill statistics from Halo for the PC. Yes, we’ve seen kill counters before, but we like the way that he gathers the data. This project is reading the score directly from an address in memory.

Using a program called Cheat Engine, the memory used by a program can be sniffed. After a few passes, the program will help you find a static memory address for your desired data. Once you have that it’s just a matter of using a pointer to that address in your desired programming language. In this case, a C# program polls the value and instructs an Arduino to display the value on a couple of 7-segment displays. Voila, the number appears next to your screen as you see in the image above.