Blinking LEDs are good. Moving, spinning things are good too. Put them both together and you get a Persistence of Vision (POV) display. Hackers have been building these displays for years. This week’s Hacklet focuses on some of the best LED POV displays on Hackaday.io!
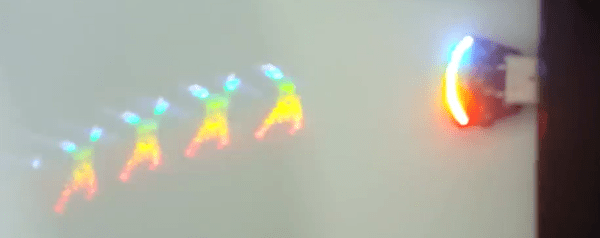
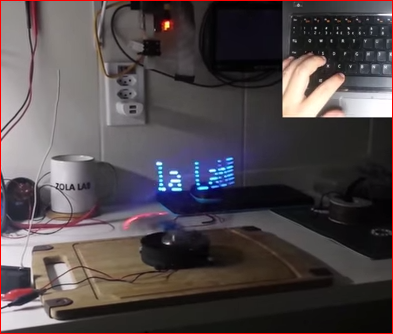 We start with [EduardoZola] and POV as you type, write on the air. [Eduardo] used an Arduino Nano, a pair of 433 MHz radios, some blue LEDs and a motor to create a simple spinning display. A hall effect sensor keeps everything in sync. The entire display is powered by a 500 mAh LiPo battery. The awesome thing about this display is the interactive aspect. The transmitter module connects to a laptop via an on-board USB to serial converter. Typing into any serial terminal sends the text directly to the POV display, where the letters appear to hang in the air.
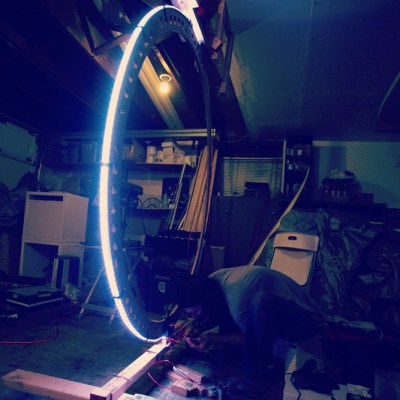 Next up is [boolean] with Silent Orchestra POV aka “Death Ring”. [boolean] didn’t want to just create a POV ring, he wanted a huge 5 foot diameter display for his local Burning Man decompression. Death Ring is an aluminum ring spun by a 3HP motor. A hall effect sensor keeps everything synced up, and keeps Death Ring’s 3 horsepower motor in check. Light is provided by a PixelPusher and WS2812 RGB strips. The system is designed to be interactive, controlled with a Leap Motion controller or a Microsoft Kinect. An MPU-6050 keeps acceleration in check while processing maps video to the LED strip. An Arduino Yun allows the entire system to be controlled via WiFi. [boolean] and his team have taken Death Ring through several revisions. Judging by the quality of their aluminum welding though, they’re on the right track to an awesome end result!
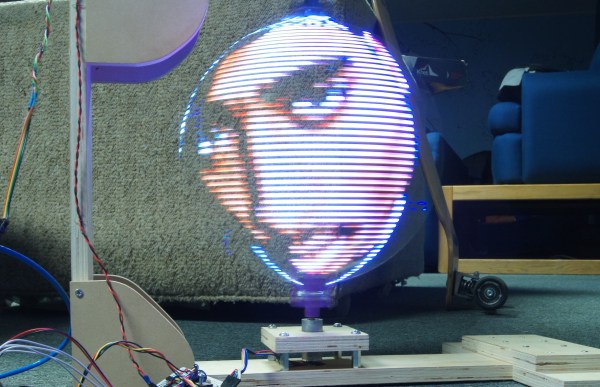
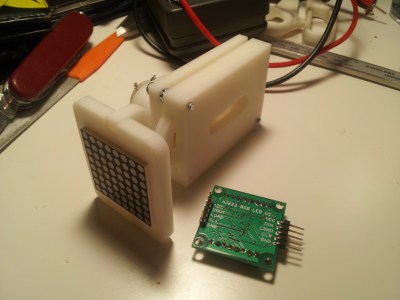 Hackaday.io power user [Davedarko] has been working on a POV display of a different sort. His Locomatrix is an 8×8 LED matrix which moves in and out on the Z axis. [Dave] originally created Locomatrix as his entry in the 2014 Hackaday Prize. We have to admit this is the first time we’ve seen this sort of display, but the idea is sound. In fact, [Bruce Land] posted in the comments to let [Dave] know that he’d seen a similar technique used with a CRT display back in 1964. We’re betting Dave’s 3D printed gears and LED matrix display will be more robust than a CRT tube slamming two and fro at several hundred pulses per minute!
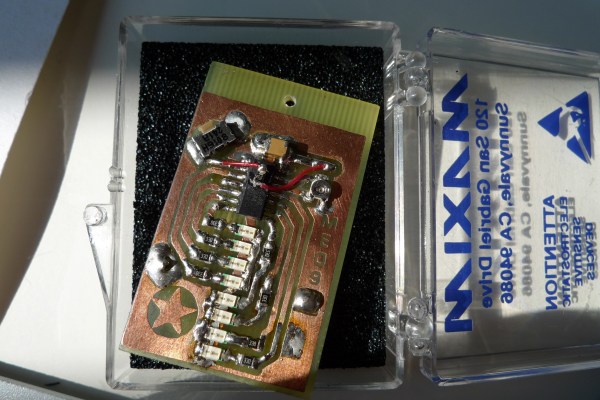
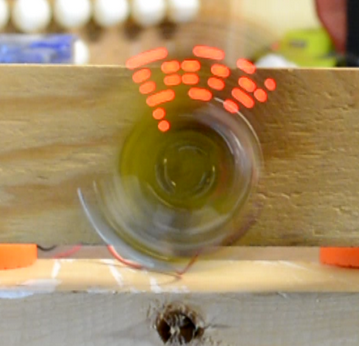 Finally, we have Hackaday’s own [Mike Szczys] with CPOV – a Crappy Persistence of Vision display . CPOV is a proof of concept made from upcycled parts which [Mike] threw together in a couple of hours. He grabbed the motor from an old cassette deck, some plywood, perfboard, and of course LEDs to build his display. The processor is an ATtiny2313 running Adafruit’s MiniPOV 3 firmware. The system display doesn’t have a sync input, so [Mike] uses a novel form of Human-in-the-loop PWM control to keep the motor speed in check. CPOV is proof that Hackaday.io isn’t just for polished projects, but for proof of concepts, fails, and just plain research. Even if your project isn’t perfect, documenting it will help you learn from it. It might even inspire someone else to move forward and continue where you left off!
Want more POV goodness? Check out our new POV display list!
Our LEDs are going dim, so that’s about all the time we have for this Hacklet. As always, see you next week. Same hack time, same hack channel, bringing you the best of Hackaday.io!
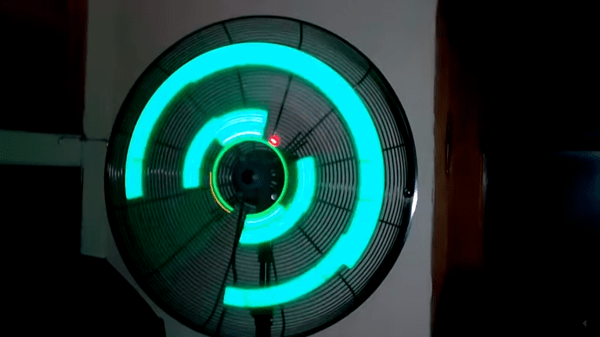

 He used the frame, disk and motor from a drive and added LEDs under the spinning disk as the light source. The disk has 8 small holes drilled equidistant around the disk, and spiraling slightly toward the center. As the holes pass by the LEDS they are flashed by the ATtiny2313 processor to create images. To determine the position of the platters a Hall effect sensor is monitored by the 2313 to detect a magnet on the underside of the disk. There is room to display ten characters at one time. Each cursor position can scroll through the character set by rotating an encoder. For all the precision needed to coordinate the LEDs with the spinning holes the electronics and software code are amazingly simple. That’s a really nice job, [Adam]!
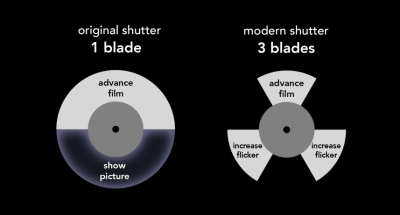 Film is projected at a rate of 24 frames per second, which is sufficient to create the POV illusion. A projector’s shutter inserts itself between the lamp and the lens, blocking the light to prevent projection of the film’s physical movement. But these short periods of darkness, or flicker, present a problem. Originally, shutters were made in the shape of a semi-circle, so they block the light half of the time. Someone figured out that increasing the flicker rate to 60-70 times per second would have the effect of constant brightness. And so the modern shutter has three blades: one blocks projection of the film’s movement, and the other two simply increase flicker.


