Hacking A Coffee Machine

The folks at Q42 write code, lots of it, and this implies the copious consumption of coffee. In more primitive times, an actual human person would measure how many cups were consumed and update a counter on their website once a day. That had to be fixed, obviously, so they hacked their coffee machine so it publishes the amount of coffee being consumed by itself. Their Jura coffee machine makes good coffee, but it wasn’t hacker friendly at all. No API, no documentation, non-standard serial port and encrypted EEPROM contents. It seems the manufacturer tried every trick to keep the hackers away — challenge accepted.

The folks at Q42 found details of the Jura encryption protocol from the internet, and then hooked up a Raspberry-Pi via serial UART to the Jura. Encryption consisted of taking each byte and breaking it up in to 4 bytes, with the data being loaded in bit positions 2 and 5 of each of the 4 bytes, which got OR’ed into 0x5B. To figure out where the counter data was stored by the machine in the EEPROM, they took a data dump of the contents, poured a shot of coffee, took another memory dump, and then compared the two.

Once they had this all figured out, the Raspberry-Pi was no longer required, and was replaced with the more appropriate Particle Photon. The Photon is put on a bread board and stuck with Velcro to the back of the coffee machine, with three wires connected to the serial port on the machine.

If you’d like to dig in to their code, checkout their GitHub repository. Seems the guys at Q42 love playing games too – check out 0h h1 and 0h n0.

Thanks [Max] for letting us know about this.

Old School Gauges Let You Know Which Way The Wind Blows

When your passion is a sport that depends on Mother Nature’s cooperation, you need to keep a close eye on weather conditions. With this in mind, and not one to let work distract him from an opportunity to play, [mechanicalsquid] decided to build a wind-monitoring gauge with an old-school look to let him know when the wind is right for kitesurfing.

old-school-meter-for-windBeing an aficionado of big engineering helped [mechanicalsquid] come up with a style for his gauge – big old dials and meters. We hesitate to apply the “steampunk” label to every project that retasks old technology, but it sure looks like a couple of the gauges he used could have been for steam, so the moniker probably fits here. Weather data for favorite kitesurfing and windsurfing locales is scraped from the web and applied to the gauges to indicates wind speed and direction. [mechanicalsquid] made a valiant effort to drive the voltmeter coil directly from the Raspberry Pi, but it was not to be. Servos proved inaccurate, so steppers do the job of moving the needles on both gauges. Check out the nicely detailed build log for this one, too.

For more weather station fun be sure to check out this meter-based weather station with a slightly more modern look. And for another build in the steampunk style, this vintage meter and Nixie power display is sure to impress.

Cricket Scoreboard Is A Big Win For Novice Hackers

The game of cricket boggles most Americans in the same way our football perplexes the rest of the world. We won’t even pretend to understand what a “wicket” or an “over” is, but apparently it’s important enough to keep track of that so an English cricket club decided to build their own electronic scoreboard for their – pitch? Field? Help us out here.

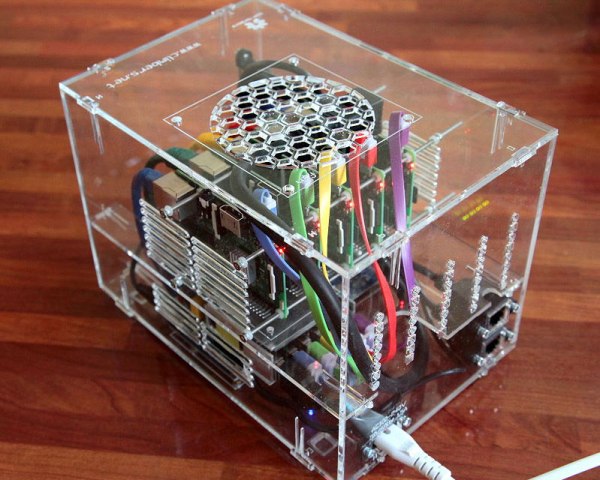
This scoreboard build was undertaken by what team member [Ian] refers to as some “middle-aged blokes from Gloucestershire” with no previous electronics experience. That’s tough enough to deal with, but add to it virtually no budget, a huge physical size for the board, exposure to the elements, and a publicly visible project where failure would be embarrassingly obvious, and this was indeed an intimidating project to even consider. Yet despite the handicaps, they came up with a great rig, with a laser-cut acrylic cover for a professional look. A Raspberry Pi runs the LED segments and allows WiFi connections from a laptop or phone in the stands. They’ve even recently upgraded to solar power for the system.

And we’ll toot our own horn here, since this build was inspired at least in part by a Hackaday post. The builders have a long list of other links that inspired or instructed them, and we think that says something powerful about the hacker community that we’ve all been building – a group with no previous experience manages a major build with the guidance of seasoned hackers. That’s something to feel good about.

Finally, A Power Meter Without Nixies

We’ve had quite a spate of home-brew energy meters on the tip line these days, and that probably reflects a deep inner desire that hackers seem to have to quantify their worlds. Functionally, these meters have all differed, but we’ve noticed a distinct stylistic trend toward the “Nixies and wood” look. Ironically, it is refreshing to see an energy meter with nothing but a spartan web interface for a change.

Clearly, [Tomasz Salwach] had raw data in mind as a design goal, and his Raspberry Pi-based meter delivers. After harvesting current sensing transformers from a bucket of defunct power meter PC boards, [Tomasz] calibrated them with a DIY oscilloscope and wired them and the voltage sensors up to an STM32 Nucleo development board. Data from the MCU goes to the Pi for processing and display as snazzy charts and GUI elements served internally. [Tomasz] was kind enough to include a link to his meter in his tip line post, but asked that we not share it publicly lest HaD readers love the Pi to death. But we can assure you that it works, and it’s kind of fun to peek in on the power usage of a house in Poland in real time.

It’s a nice project that does exactly what it set out to do. But if you missed the recent spate of Nixie-based displays, check out this front hallway meter or this one for a solar-power company CEO’s desk.

How To Use Lidar With The Raspberry Pi

The ability to inexpensively but accurately measure distance between an autonomous vehicle or robot and nearby objects is a challenging problem for hackers. Knowing the distance is key to obstacle avoidance. Running into something with a small robot may be a trivial problem but could be deadly with a big one like an autonomous vehicle.

My interest in distance measurement for obstacle avoidance stems from my entry in the 2013 NASA Sample Return Robot (SRR) Competition. I used a web camera for vision processing and attempted various visual techniques for making measurements, without a lot of success. At the competition, two entrants used scanning lidars which piqued my interest in them.

Continue reading “How To Use Lidar With The Raspberry Pi”

Custom Siri Automation With HomeKit And ESP8266

Knowing where to start when adding a device to your home automation is always a tough thing. Most likely, you are already working on the device end of things (whatever you’re trying to automate) so it would be nice if the user end is already figured out. This is one such case. [Aditya Tannu] is using Siri to control ESP8266 connected devices by leveraging the functionality of Apple’s HomeKit protocols.

HomeKit is a framework from Apple that uses Siri as the voice activation on the user end of the system. Just like Amazon’s voice-control automation, this is ripe for exploration. [Aditya] is building upon the HAP-NodeJS package which implements a HomeKit Accessory Server using anything that will run Node.

Once the server is up and running (in this case, on a raspberry Pi) each connected device simply needs to communicate via MQTT. The Arduino IDE is used to program an ESP8266, and there are plenty of MQTT sketches out there that may be used for this purpose. The most recent example build from [Aditya] is a retrofit for a fiber optic lamp. He added an ESP8266 board and replaced the stock LEDs with WS2812 modules. The current version, demonstrated below, has on/off and color control for the device.

Continue reading “Custom Siri Automation With HomeKit And ESP8266”