ROM dumping is vital for preserving old hardware, and we’ve seen many hacks dedicated to letting someone dump a ROM and send its contents to some hacker stuck with a piece of technology that lost its firmware. However, that requires ROM dumping tools of some kind, and it’s often that the lucky ROM-equipped hacker doesn’t own such tools. Now, you could mail the chip to someone else, but postal services in many countries are known to be UDP-like — lossy and without delivery guarantees. The risk of leaving both hackers without a ROM chip is quite real, so, instead of mailing ROM chips or expensive devices around, [Amen] proposes a cheap and disposable flash dumping tool that you could mail instead.
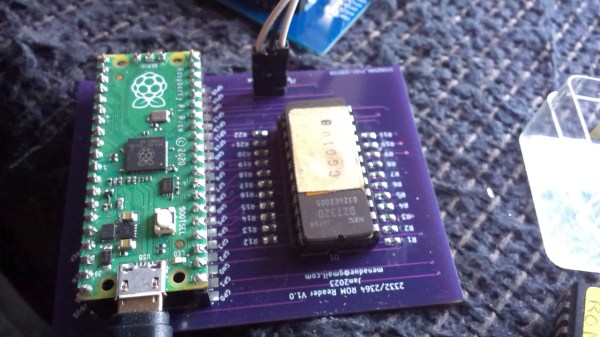
The ROMs in question are 24-pin 2332 and 2364 chips, which run at 5 V and can easily be read with any microcontroller. Thus, his concept is a very simple board, with a Pi Pico and flash chip socket on it, as well as some resistors. Those are used to provide rudimentary GPIO over-voltage protection, since the RP2040 runs its GPIOs at 3.3 V. All the magic is in the software – the tool can both write the chip contents in the RP2040’s internal memory, as well as dump it over USB to the computer. Everything is open-source – if you ever need to dump a rare chip on the other side of the world, modify the design to your liking, order a few copies and then mail them to the hacker involved – losing such a package is way less significant than losing a ROM chip with last-of-its-kind firmware on it.
Old ROM chips are dying out, causing whole generations of hardware, like synths, to fade away – with tools like this one, you can lend a hand in preserving the legacy of many an industry and hobby, and many hackers do. Looking to learn about the basics of parallel flash dumping? This post from 2012 will be a good start, and then check out a more recent venture to learn how things are done with more recent parts.