This Mostly 3D-Printed Discone Antenna Is Ready For Broadband Duty

For hams and other radio enthusiasts, the best part of the hobby is often designing antennas. Part black magic, part hard science, and part engineering, antenna design is an art. And while the expression of that art often ends up boiling down to pieces of wire cut to the correct length, some antennas have a little more going on in the aesthetics department.

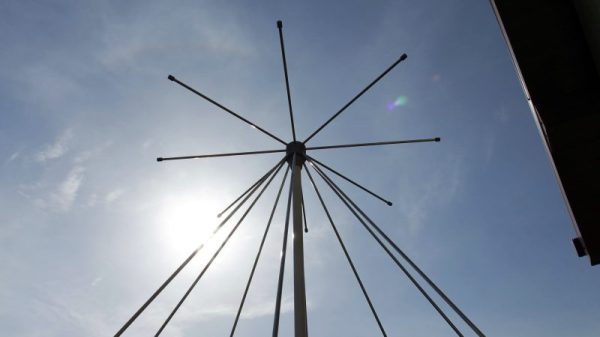
Take the discone antenna, for example. Originally designed as a broadband antenna to sprout from aircraft fuselages, the discone has found a niche with public service radio listeners. But with a disk stuck to the top of a cone, the antennas have been a little hard to homebrew, at least until [ByTechLab] released this mostly 3D-printed discone. A quick look at the finished product, resembling a sweater drying rack more than a disc on top of a cone, reveals that the two shapes can be approximated by individual elements instead of solid surfaces. This is the way most practical discones are built, and [ByTechLab]’s Thingiverse page has the files needed to print the parts needed to properly orient the elements, which are just 6-mm aluminum rods. The printed hub pieces sandwich a copper plate to tie the elements together electrically while providing a feedpoint for the antenna as well as a sturdy place to mount it outdoors. This differs quite a bit from the last 3D-printed discone we featured, which used the solid geometry and was geared more for indoor use.

Interested in other antenna designs? Who can blame you? Check out the theory behind the Yagi-Uda beam antenna, or how to turn junk into a WiFi dish antenna.

[via RTL-SDR.com]

Bargain Bin Barcode Scanner Keeps Track Of Shopping Needs

For most people, a Post-It note or dry-erase board suffices to ensure that household consumables are replenished when they’re used up. But hackers aren’t like most people, so this surplus barcode scanner turned kitchen inventory manager comes as little surprise. After all, if something is worth doing, it’s worth overdoing.

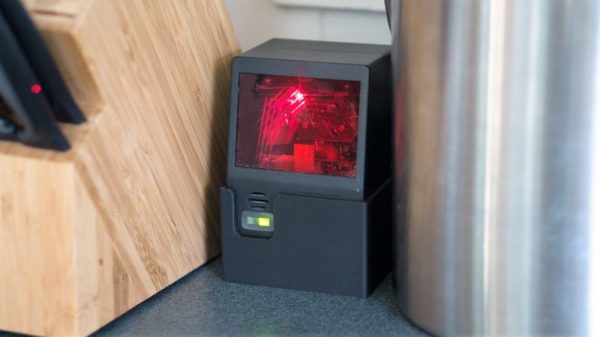
[Brian Carrigan]’s project began with a chance discovery of an old barcode scanner in his local scrap store. Questions as to why we can never find bargains like a $500 scanner for six bucks aside, [Brian] took the scanner home for a bit of reverse engineering. He knew it used RS-232 but it had been unceremoniously ripped from its connectors, so identifying pins took some detective work. With power and data worked out and the scanner talking to a Raspberry Pi, [Brian] set about integrating it into Wunderlist,  a cloud-based list management app. Now when someone eats the last Twinkie, a quick scan of the package looks up the product name via an API call to the UPC database and posts it to Wunderlist. And we’ll bet the red laser beams bouncing around the kitchen make a great nightlight too.

With smartphone barcode reading apps, this might seem a bit like overkill, but we like it just the same. And if barcodes leave you baffled, check out our introduction to these studies in black and white that adorn just about everything.

Debunking Moon Landing Denial With An Arduino And Science

It’s sad that nearly half a century after the achievements of the Apollo program we’re still arguing with a certain subset of people who insist it never happened. Poring through the historical record looking for evidence that proves the missions couldn’t possibly have occurred has become a sad little cottage industry, and debunking the deniers is a distasteful but necessary ongoing effort.

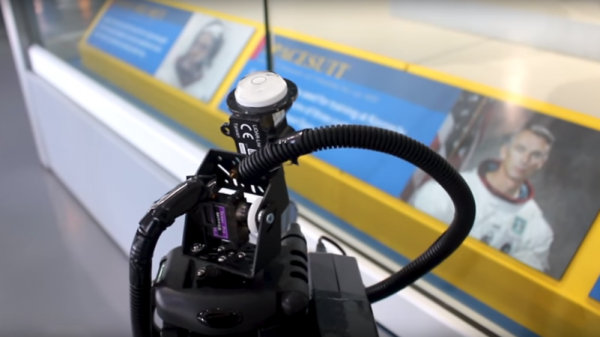
One particularly desperate denier theory holds that fully spacesuited astronauts could never have exited the tiny hatch of the Lunar Excursion Module (LEM). [AstronomyLive] fought back at this tendentious claim in a clever way — with a DIY LIDAR scanner to measure Apollo artifacts in museums. The hardware is straightforward, with a Garmin LIDAR-Lite V3 scanner mounted on a couple of servos to make a quick pan-tilt head. The rig has a decidedly compliant look to it, with the sensor flopping around a bit as the servos move. But for the purpose, it seems perfectly fine.

[AstronomyLive] took the scanner to two separate museum exhibits, one to scan a LEM hatch and one to scan the suit Gene Cernan, the last man to stand on the Moon so far, wore while training for Apollo 17. With the LEM flying from the rafters, the scanner was somewhat stretching its abilities, so the point clouds he captured were a little on the low-res side. But in the end, a virtual Cernan was able to transition through the virtual LEM hatch, as expected.

Sadly, such evidence will only ever be convincing to those who need no convincing; the willfully ignorant will always find ways to justify their position. So let’s just celebrate the achievements of Apollo.

Continue reading “Debunking Moon Landing Denial With An Arduino And Science”

Old Scanner Finds New Life In DIY PCB Fab

Cheap, high-quality PCBs are truly a wonder of our age. That a professionally fabricated board with silkscreen and solder mask can be ordered online and delivered to your door has lowered the bar between a hobbyist project and a polished product. But the wait can be agonizing, and it can throw a wrench into the iterative design process. What to do?

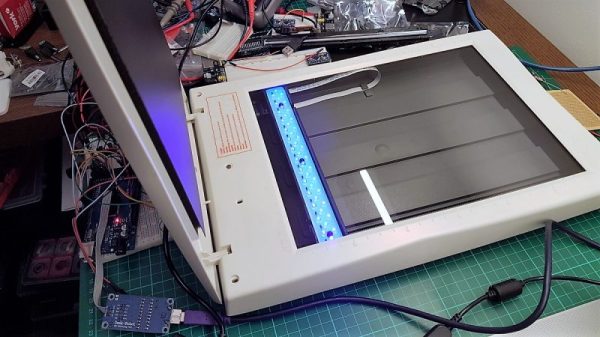
[Andras Kabai] knows the answer to that, and this former flatbed scanner turned into a UV exposer is the centerpiece of his DIY board fab. The old Mustek scanner was a couple of bucks secondhand, and provided not only the perfect form-factor for a board scanner but a trove of valuable parts to reuse. [Andras] replaced the original fluorescent light bar with a long, narrow PCB stuffed with UV LEDs, and added an Arduino Mega to control the original stepper drive. The project looks like it went through a little feature creep, with an elaborate menu system and profiles that include controls for exposure time, the brightness of the LED array via PWM, and the length of board that gets exposed. It’s clearly a work in progress, but early results are encouraging and we’ll be watching to see how [Andras]’ in-house fab shapes up.

This approach to PCB fab is only one of many, of course. You can turn a budget 3D-printer into a PCB machine, or even use an LCD to mask the boards during exposure. The latter intrigues us — an LCD mask and a scanning UV light source could make for a powerful PCB creation tool.

Poor Man’s Laser Scanner Probably Won’t Shoot Your Eye Out, Kid

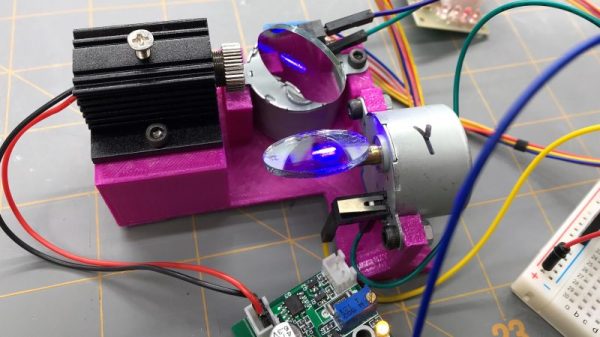
Yes, laser cutters that come off the slow boat from China are more affordable than ever, and with some tweaks and hacks they can turn out some decent results. But if you just want a laser lightshow that’ll draw boxes on your living room ceiling, this simple X-Y laser scanner might be a good platform to build.

Let’s say right up front that there are more than a few safety issues with [ThingEngineer]’s 3D-printed two-axis scanner. He’s well aware of these potential retina-cooking issues and duly notes that a good pair of laser safety goggles is a must and that the cheap anti-lawsuit glasses that laser module manufacturers often include with their products don’t count.

[Editor’s Note: Glasses are really only intended for alignment operations. Pros enclose lasers beyond a certain power to prevent anyone going blind. Know where your beam terminates, kids.]

With that in mind, there’s a lot to be said for this poor man’s scanner build. Yes, it would be faster with real galvos and low-mass mirrors, but time is money, and the steppers and craft store mirror discs do the job, albeit slowly. We like that everything is so simple, even the method for turning a regular mirror into a front-surface mirror.

[ThingEngineer] proves you don’t need galvanometers to have some simple laser fun. And if steppers don’t do it for you, you can try little brushed DC hobby motors or even 3D-printed cams.

Continue reading “Poor Man’s Laser Scanner Probably Won’t Shoot Your Eye Out, Kid”

Spoof A Skimmer For Peace Of Mind

It’s a sad commentary on the state of the world when it becomes a good practice to closely inspect the card reader on every ATM and gas pump for the presence of a skimmer. The trouble is, even physically yanking on the reader may not be enough, as more sophisticated skimmers now reside safely inside the device, sipping on the serial comms output of the reader and caching it for later pickup via Bluetooth. Devilishly clever stuff.

Luckily, there’s an app to detect these devices, and the prudent consumer might take solace when a quick scan of the area reveals no skimmers in operation. But is that enough? After all, how do you know the smartphone app is working? This skimmer scammer scanner — or is that a skimmer scanner scammer? — should help you prove you’re being as safe as possible.

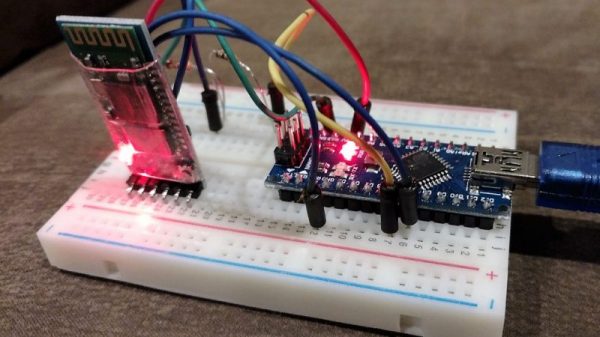
The basic problem that [Ben Kolin] is trying to solve here is: how do you prove a negative? In other words, one could easily write an app with a hard-coded “This Area Certified Zebra-Free” message and market it as a “Zebra Detector,” and 99.999% of the time, it’ll give you the right results. [Ben]’s build provides the zebra, as it were, by posing as an active skimmer to convince the scanner app that a malicious Bluetooth site is nearby. It’s a quick and dirty build with a Nano and a Bluetooth module and a half-dozen lines of code. But it does the trick.

Need a primer on the nefarious world of skimming? Here’s an overview of how easy skimming has become, and a teardown of a skimmer captured in the wild.

Interference Scanner With Clear Instructions

Meticulous. Thorough. Exacting. These are all words we’d use to describe this video by [BrendaEM] about her Homemade 3D Optical Interference Scanner which can be seen after the break. The scanner uses 3D-printed parts and repurposed materials you might find lying around in your spare parts bin. An old optical drive tray acts to move the laser-wielding sled while a stripped-out webcam is an optical sensor. Links to relevant files such as 3D models and Arduino sketches will be found in the video’s author section.

The principle of operation is demonstrated with a water analog in the video at 2:00 with waves in a plastic container. By creating two small apertures between a light source and a sensor, it’s possible to measure the light waves which make it through. [BrendaEM] uses some powerful visualization software to convert her samples into 3D models which look really cool and simultaneously demonstrate the wave nature of light.

On the left side of her device are the control electronics which don’t need any special coatings since light won’t pass over this area. For the right side, where coherent light is measured, to borrow a Rolling Stones lyric: no colors anymore, I want them to turn black. Even the brass strips with apertures are chemically darkened.

Most of the laser hacks here use lasers rather than measure them, like this Laser Clock and a Laser Projector.

Continue reading “Interference Scanner With Clear Instructions”