Tetris

Arduino Tetris On A Multiplexed LED Matrix

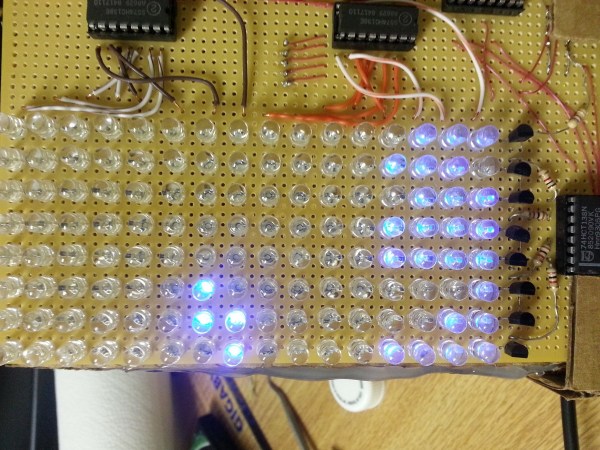
[Alex] needed a project for his microcomputer circuits class. He wanted something that would challenge him on both the electronics side of things, as well as the programming side. He ended up designing an 8 by 16 grid of LED’s that was turned into a game of Tetris.

He arranged all 128 LED’s into the grid on a piece of perfboard. All of the anodes were bent over and connected together into rows of 8 LED’s. The cathodes were bent perpendicularly and forms columns of 16 LED’s. This way, if power is applied to one row and a single column is grounded, one LED will light up at the intersection. This method only works reliably to light up a single LED at a time. With that in mind, [Alex] needed to have a very high “refresh rate” for his display. He only ever lights up one LED at a time, but he scans through the 128 LED’s so fast that persistence of vision prevents you from noticing. To the human eye, it looks like multiple LED’s are lit up simultaneously.

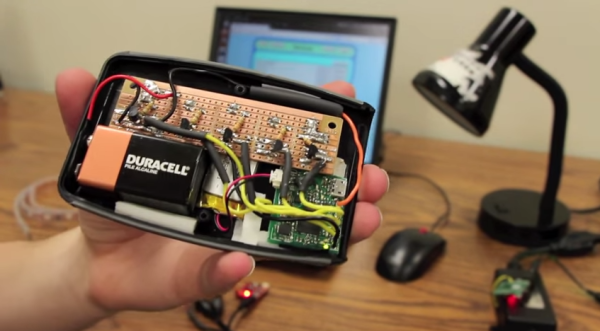
[Alex] planned to use an Arduino to control this display, but it doesn’t have enough outputs on its own to control all of those lights. He ended up using multiple 74138 decoder/multiplexer IC’s to control the LED’s. Since the columns have inverted outputs, he couldn’t just hook them straight up to the LED’s. Instead he had to run the signals through a set of PNP transistors to flip the logic. This setup allowed [Alex] to control all 128 LED’s with just seven bits, but it was too slow for him.

His solution was to control the multiplexers with counter IC’s. The Arduino can just increment the counter up to the appropriate LED. The Arduino then controls the state of the LED using the active high enable line from the column multiplexer chip.

[Alex] wanted more than just a static image to show off on his new display, so he programmed in a version of Tetris. The controller is just a piece of perfboard with four push buttons. He had to work out all of the programming to ensure the game ran smoothly while properly updating the screen and simultaneously reading the controller for new input. All of this ran on the Arduino.

Can’t get enough Tetris hacks? Try these on for size.

Boxing Trainer

Boxing Trainer Uses DIY Force Sensors

A team of Cornell students have designed and built their own electronic boxing trainer system. The product of their work is a game similar to Whack-A-Mole. There are five square pads organized roughly into the shape of a human torso and head. Each pad will light up based on a pre-programmed pattern. When the pad lights up, it’s the player’s job to punch it! The game keeps track of the player’s accuracy as well as their reaction time.

The team was trying to keep their budget under $100, which meant that off the shelf components would be too costly. To remedy this, they designed their own force sensors. The sensors are basically a sandwich of a few different materials. In the center is a 10″ by 10″ square of ESD foam. Pressed against it is a 1/2″ thick sheet of insulating foam rubber. This foam rubber sheet has 1/4″ slits cut into it, resulting in something that looks like jail bars. Sandwiching these two pieces of foam is fine aluminum window screen. Copper wire is fixed the screen using conductive glue. Finally, the whole thing is sandwiched between flattened pieces of corrugated cardboard to protect the screen.

The sensors are mounted flat against a wall. When a user punches a sensor, it compresses. This compression causes the resistance between the two pieces of aluminum screen to change. The resistance can be measured to detect a hit. The students found that if the sensor is hit harder, more surface area becomes compressed. This results in a greater change in resistance and can then be measured as a more powerful hit. Unfortunately it would need to be calibrated depending on what is hitting the sensor, since the size of the hitter can throw off calibration.

Each sensor pad is surrounded by a strip of LEDs. The LEDs light up to indicate which pad the user is supposed to hit. Everything is controlled by an ATMEGA 1284p microcontroller. This is the latest in a string of student projects to come out of Cornell. Make sure to watch the demonstration video below. Continue reading “Boxing Trainer Uses DIY Force Sensors”

Home Automation

Home Automation With A Custom Wireless Sensor Network

We’re no strangers to home automation projects around here, but it’s not often that you see one described in this much detail. [Paul] designed a custom home automation system with four teammates for an undergraduate thesis project.

The system is broken into two main components; the server and the peripherals. The team designed their peripherals from early prototypes of an upcoming ArduIMU v4 measurement unit. They removed all of the default sensors to keep costs down and reduce assembly time. The units can them be hooked up to various peripherals such as temperature sensors, mains relays, RGB color strips, etc.

The central management of the system is performed using a web-based user interface. The web server runs on Java, and interacts with the peripherals wirelessly. Basic messages can be sent back and forth to either read the state of the peripherals or to change the state. As far as the user is concerned, these messages appear as simple triggers and actions. This makes it very simple to program the peripherals using if, then, else logic.

The main project page is a very brief summary of what appears to be a very well documented project. The team has made available their 182 page final report (pdf), which goes into the nitty-gritty details of the project. Also, be sure to watch the demonstration video below. Continue reading “Home Automation With A Custom Wireless Sensor Network”

Print Tasty Treats With MIT’s Ice Cream Printer

Ice Cream Printer

Three MIT students decided that 3D printers just aren’t interesting enough on their own any more. They wanted to design a new type of printer that would really get young kids engaged. What’s more engaging to children than sugary treats? The team got together to develop a new 3d printer that prints ice cream.

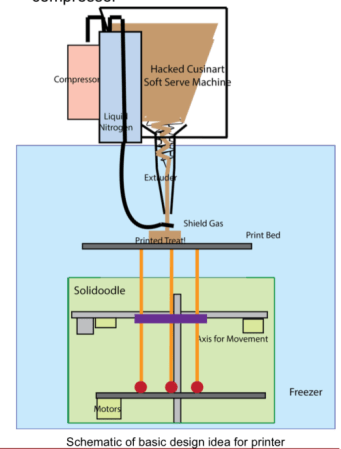
The machine is built around a Solidoodle. The Solidoodle is a manufacturer of “accessible” 3d printers. The printer is enclosed inside of a small freezer to keep things cold during the printing process. On top of the machine is a hacked Cuisinart ice cream maker. The machine also contains a canister of liquid nitrogen. The nitrogen is used to blast the cream as it leaves the print head, keeping it frozen for the 15 minute duration of the print.

It sounds like the team ran into trouble with the ice cream melting, even with the liquid nitrogen added. For a single semester project, this isn’t a bad start. Be sure to watch the clip of the machine running below.

Continue reading “Print Tasty Treats With MIT’s Ice Cream Printer”

Talkbot: An Arduino-driven Robot For Beginners

talkbotguts

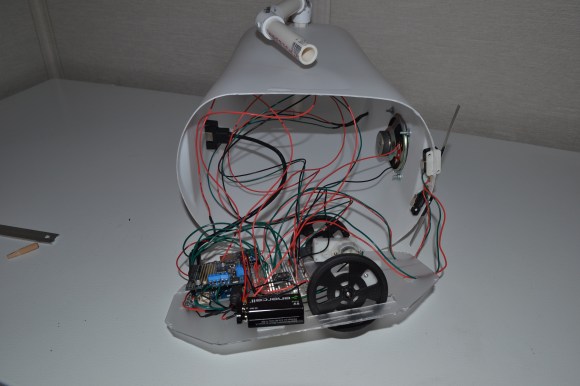
It isn’t exactly WALL-E, but [Bithead’s] affordable introduction to robots — Talkbot — is made out of a trash can. This little guy runs off an Arduino and comes packed with features, including a voice chip, a motor shield, and a pair of bump sensors. Talkbot will cruise around until a bump sensor slams into an obstacle. One of his prerecorded messages will then play through the speaker while he backs up, turns, and tries to find a clearer path.

According to [Bithead’s] build log, tracking down the right bargain voice chip was a bit of a hassle; he skipped over the text-to-speech options only to be stalled by vendor issues. He finally settled on a clone of Sparkfun’s WTV020SD chip sourced from eBay, which allows you to access pre-recorded WAV files stored on a Micro-SD card. The robot’s body comes straight off the hardware store shelf, with PVC pipe for arms and a polystyrene base to hold all the parts.  At the bargain price of $110, [Bithead’s] students will have a true hacker experience cobbling the Talkbot together rather than using a prefab kit.

Be sure to see Talkbot  in a video below, performing either his green-eyed “friendly mode” or red-eyed “grumpy mode,” which dictates how pleasantly he responds to obstacles. Need something more advanced? Check out the tentacle robot, just in time for Halloween.

Continue reading “Talkbot: An Arduino-driven Robot For Beginners”

Sparkfun Electronics Launches An Educational Site

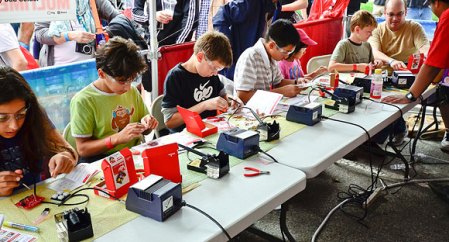
Sparkfun Electronics has launched an educational web site with a full curriculum of classes being held at Sparkfun Headquarters. If you don’t live nearby, no problem. You can download the entire curriculum as well. It appears that they will have a tutorial section for those who prefer a per-project approach, but that area is still “coming soon”. We love to see people educating others. Good job Sparkfun, looking forward to seeing more content on there.