Fitness Tracker Hacked Into Optical Density Meter

What do fitness trackers have to do with bacterial cultures in the lab? Absolutely nothing, unless and until someone turns a fitness band into a general-purpose optical densitometer for the lab.

This is one of those stories that shows that you never know from where inspiration is going to come. [Chinna Devarapu] learned that as a result of playing around with cheap fitness bands, specifically an ID107HR. A community has built up around hacking these bands; we featured a similar band that was turned into an EEG. With some help, [Chinna] was able to reflash the microcontroller and program it in the Arduino IDE, and began looking for a mission for the sensor-laden platform.

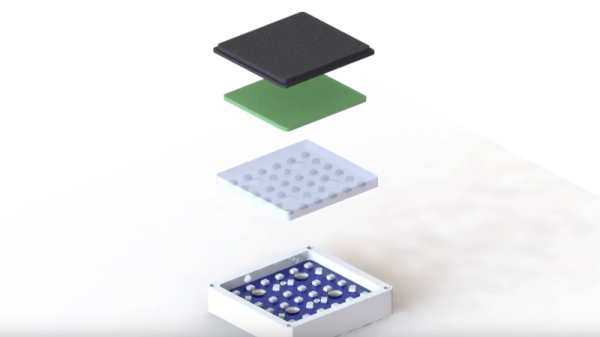
He settled on building a continuous optical densitometer for his biology colleagues. Bacterial cultures become increasingly turbid as the grow, and measuring the optical density (OD) of a culture is a common way to monitor its growth phase. This is usually done by sucking up a bit of the culture to measure, but [Chinna] and his team were able to use the hacked fitness band’s heartrate sensor to measure the OD on the fly. The tracker fits in a 3D-printed holder where an LED can shine through the growing culture; the sensor’s photodiode measures the amount of light getting through and the raw data is available via the tracker’s Bluetooth. The whole thing can be built for less than $20, and the plans have been completely open-sourced.

We really like the idea of turning these fitness bands into something completely different. With the capabilities these things pack into such a cheap and compact package, they should start turning up in more and more projects.

Cheap Sensors And An SDR Monitor Conditions In This Filament Drying Farm

We don’t know where [Scott M. Baker] calls home, but it must be a pretty humid place indeed. After all, he has invested quite a bit in fancy vacuum storage containers to keep his 3D-printer filament dry, with the result being this sensor-laden filament drying farm.

[Scott] wasn’t content to just use these PrintDry containers without knowing what’s going on inside. After a little cleaning and lube to get all the containers working, he set about building the sensors. He settled on a wireless system, with each container getting a BME280 temperature/humidity/pressure sensor and an SYN115 315-MHz ISM band transmitter module. These go with an ATtiny85 into a compact 3D-printed case holding a little silica desiccant. The transmitters are programmed to comply with ISM-band regulations – no need to run afoul of those rules – while the receiver is just an SDR dongle and a Raspberry Pi running rtl_433. The long-ish video below details design and construction.

The idea behind these vacuum containers would seem to be to pull out humid air and prevent it from coming back in. But as [Scott] quickly learned from his telemetry, following the instructions results in the equivalent atmospheric pressure of only about 2700′ (823 meters) elevation – not exactly a hard vacuum. But as [Scott] points out, it’s enough to get a nice, tight seal, and his numbers show a lowered and constant relative humidity over time.

Continue reading “Cheap Sensors And An SDR Monitor Conditions In This Filament Drying Farm”

Detecting Cars With An ESP8266 Magnetometer

Having a motorized gate on your driveway is great, but only if there’s an easy way to trigger it. [Andrew] says the gate at his parent’s place could only be controlled by manually pushing a button on the panel or with a dinky remote that didn’t have nearly the range they wanted. So he decided to build his own magnetometer allowing the gate to automatically open when a car was trying to leave.

Naturally, there are commercial offerings that would solve this problem. But with a sticker price of more than $150 USD, [Andrew] was more than happy to spend a bit of time tinkering to get the job done for less than 1/10th the cost with an ESP8266 and a QMC5883X series magneto-resistive sensor. Of course, this is one of those projects that seems simple enough in your head, but ends up taking a bit of finesse to pull off in the real-world.

For one, [Andrew] had to figure out how to prevent false positives. Pretty much any object brought close enough to the sensor, including his hand, would cause it to react. He ended up coming up with a way to use a rolling average to prevent the gate from firing off just because a squirrel ran past. The built-in safeties are designed to ensure that the gate only opens when an actual car is sitting in the appropriate spot for long enough.

Speaking of, we love how [Andrew] deployed the QMC5883X sensor for this project. The small sensor board and a few moisture-absorbing packets were placed in a Sonoff IP66 waterproof enclosure, and buried under the rocks of the driveway. A standard CAT5 cable is used to tether it to the ESP8266, relay, and assorted other goodies that now live in the gate’s control box. In the future he says the cable will likely have to go into a conduit, but for now the system is working more or less how he expected.

If your estate isn’t quite palatial enough to have a motorized gate out front, we’ve seen plenty of projects that add some much-needed intelligence to the humble garage door opener which might be more your speed.

Simulate Climate With An Arduino

Greenhouses create an artificial climate specifically suited to the plants you want to grow. It’s done by monitoring conditions like temperature and humidity, and making changes using things like vents, fans, irrigation, and lighting fixtures to boost temperature. But how do you know when it’s time to up the humidity, or vent some of the heat building up inside? The easy way is to use the Arduino-powered Norman climate simulator from [934Virginia] which leverages data from different locations or times of year based on NOAA weather data to mimic a particular growing environment.

Norman relies on a simple input of data about the target location, working from coordinates and specified date ranges to return minimum/maximum values for temperature and humidity weather conditions. It makes extensive use of the Dusk2Dawn library, and models other atmospheric conditions using mathematical modeling methods in order to make relatively accurate estimates of the target climate. There are some simulations on the project’s Plotly page which show what this data looks like.

This data is used by [934Virginia’s] Arduino library to compare the difference between your target climate and actual sensor readings in your greenhouse. From there you can make manual changes to the environment, or if you’re luck and already have an Arduino-based greenhouse automation system the climate adjustments can be done automatically. The project is named after Norman Borlaug, a famous soil scientist and someone worth reading about.

Editor’s Note: This article has been rewritten from the original to correct factual errors. The original article incorrectly focused on replicating a climate without the use of sensors. This project does require sensors to compare actual greenhouse conditions to historic climate conditions calculated by the library. We apologize to [934Virginia] for this and thank them for writing in to point out the errors.

Images courtesy of Wikimedia Commons.

Torturing An Instrumented Dive Watch, For Science

The Internet is a wild and wooly place where people can spout off about anything with impunity. If you sound like you know what you’re talking about and throw around a few bits of the appropriate jargon, chances are good that somebody out there will believe whatever you’re selling.

Case in point: those that purport that watches rated for 300-meter dives will leak if you wiggle them around too much in the shower. Seems preposterous, but rather than just dismiss the claim, [Kristopher Marciniak] chose to disprove it with a tiny wireless pressure sensor stuffed into a dive watch case. The idea occurred to him when his gaze fell across an ESP-01 module next to a watch on his bench. Figuring the two needed to get together, he ordered a BMP280 pressure sensor board, tiny enough itself to fit anywhere. Teamed up with a small LiPo pack, everything was stuffed into an Invicta dive watch case. A little code was added to log the temperature and pressure and transmit the results over WiFi, and [Kristopher] was off to torture test his setup.

The first interesting result is how exquisitely sensitive the sensor is, and how much a small change in temperature can affect the pressure inside the case. The watch took a simulated dive to 70 meters in a pressure vessel, which only increased the internal pressure marginally, and took a skin-flaying shower with a 2300-PSI (16 MPa) pressure washer, also with minimal impact. The video below shows the results, but the take-home message is that a dive watch that leaks in the shower isn’t much of a dive watch.

Hats off to [Kristopher] for doing the work here. We always love citizen science efforts such as this, whether it’s hardware-free radio astronomy or sampling whale snot with a drone.

Continue reading “Torturing An Instrumented Dive Watch, For Science”

Exploring Basement Humidity With A Raspberry Pi

Sometimes a hack isn’t about building something cool. Sometimes it’s more tactical, where the right stuff is cobbled together to gather the information needed to make decisions, or just to document some interesting phenomenon.

Take this impromptu but thorough exploration of basement humidity undertaken by [Matthias Wandel]. Like most people with finished basements in their homes, [Matthias] finds the humidity objectionable enough to warrant removal. But he’s not one to just throw a dehumidifier down there and forget about it. Seeking data on how well the appliance works, [Matthias] wired a DHT22 temperature/humidity sensor to a spare Raspberry Pi to monitor room conditions, and plugged the dehumidifier into a Kill-A-Watt with a Pi camera trained on the display to capture data on electrical usage.

His results were interesting. The appliance does drop the room’s humidity while raising its temperature, a not unexpected result given the way dehumidifiers work. But there was a curious cyclical spike in humidity, corresponding to the appliance’s regular defrost cycle driving moisture back into the room. And when the dehumidifier was turned off, room humidity gradually increased, suggesting an unknown source of water. The likely culprit: moisture seeping up through the concrete slab, or at least it appeared so after a few more experiments. [Matthias] also compared three different dehumidifiers to find the best one. The video below has all the details.

We always appreciate [Matthias]’ meticulous approach to problems like these, and his field expedient instrumentation. He seems to like his creature comforts, too – remember the target-tracking space heater from a few months back?

Continue reading “Exploring Basement Humidity With A Raspberry Pi”

Perovskites: Not Just For Solar Cells Anymore

If you’ve been around long enough, you’ll know there’s a long history of advances in materials science that get blown far out of proportion by both the technical and the popular media. Most of the recent ones seem to center on the chemistry of carbon, particularly graphene and nanotubes. Head back a little in time and superconductors were all the rage, and before that it was advanced ceramics, semiconductors, and synthetic diamonds. There’s always some new miracle material to be breathlessly and endlessly reported on by the media, with hopeful tales of how one or the other will be our salvation from <insert catastrophe du jour here>.

While there’s no denying that each of these materials has led to huge advancements in science, industry, and the quality of life for billions, the development cycle from lab to commercialization is generally a tad slower than the press would have one believe. And so when a new material starts to gain traction in the headlines, as perovskites have recently, we feel like it’s a good opportunity to take a close look, to try to smooth out the ups and downs of the hype curve and manage expectations.

Continue reading “Perovskites: Not Just For Solar Cells Anymore”